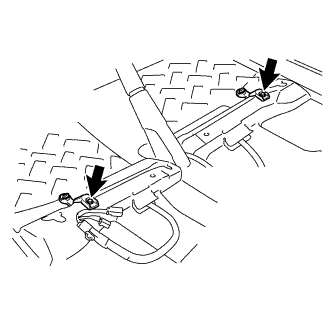
REMOVAL
Removal / installation · Vehicles built from Aug 2012
Versions by build date: Nov 2010 – Jul 2012 from Aug 2012
| 1.
REMOVE FRONT SEAT ASSEMBLY |
 |
(Click here)
| 2.
REMOVE REAR SEAT ASSEMBLY RH |
|
(Click here)
| 3.
REMOVE REAR SEAT ASSEMBLY LH |
|
(Click here)
| 4.
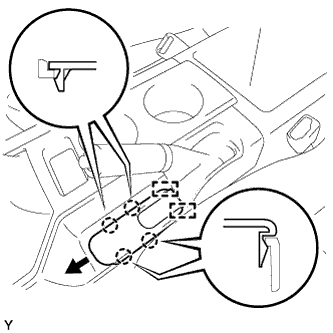
REMOVE PARKING BRAKE HOLE COVER SUB-ASSEMBLY
|
|
- Disengage the 4 claws.
Slide the parking brake hole cover toward the front of the vehicle, disengage the 2 guides and remove the parking brake hole cover.
| 5.
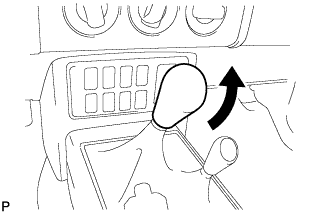
REMOVE SHIFT LEVER KNOB SUB-ASSEMBLY (for Manual Transmission)
|
|
- Remove the shift lever knob.
| 6.
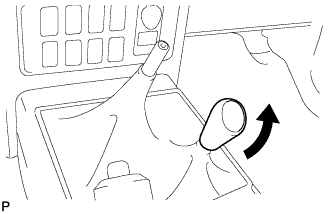
REMOVE SHIFT LEVER KNOB SUB-ASSEMBLY (for 4WD)
|
|
- Remove the shift lever knob.
| 7.
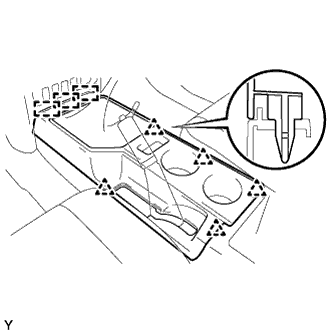
REMOVE CONSOLE UPPER REAR PANEL SUB-ASSEMBLY
|
|
- Shift the shift lever into the N position.
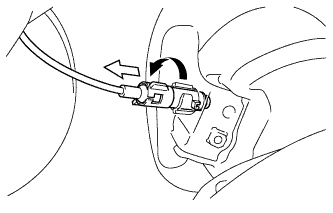
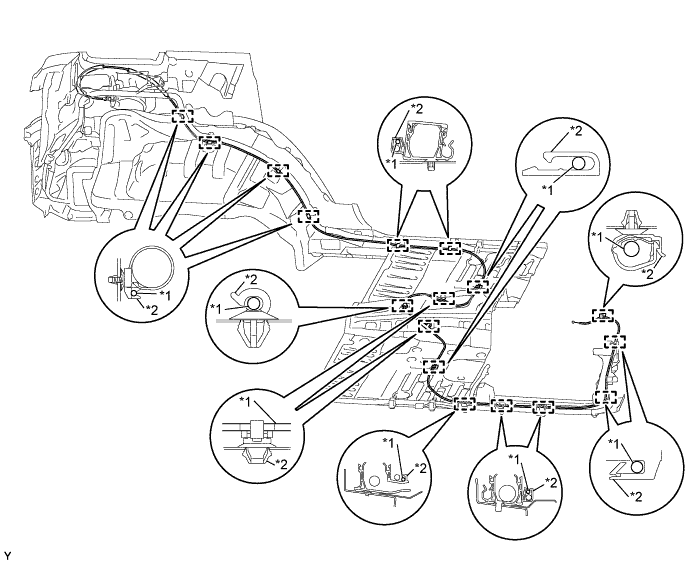
Disengage the 5 clips and 3 guides and remove the console upper rear panel.
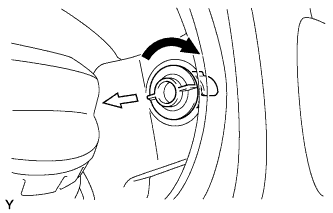
| 8.
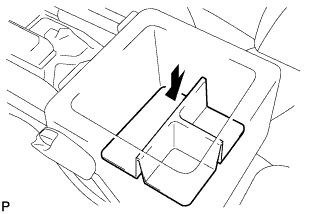
REMOVE BOX BOTTOM MAT
|
|
- Remove the box bottom mat.
| 9.
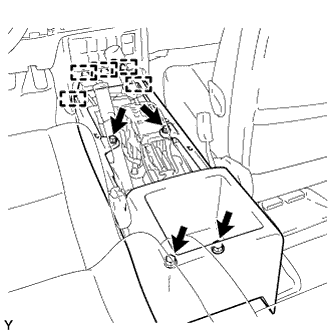
REMOVE FRONT CONSOLE BOX
|
|
- Remove the 4 <H> bolts.
Disengage the 5 guides and remove the console box.
| 10.
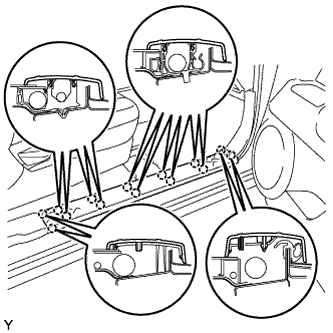
REMOVE FRONT DOOR SCUFF PLATE RH
|
|
- Disengage the 14 claws and remove the front door scuff plate.
| 11.
REMOVE FRONT DOOR SCUFF PLATE LH
|
|
- HINT:
- Use the same procedure as for the RH side.
| 12.
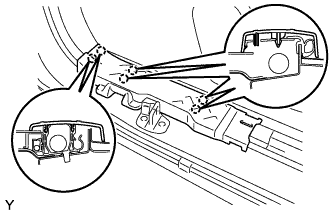
REMOVE REAR DOOR SCUFF PLATE RH
|
|
- Disengage the 6 claws and remove the access door scuff plate.
| 13.
REMOVE REAR DOOR SCUFF PLATE LH
|
|
- HINT:
- Use the same procedure as for the RH side.
| 14.
REMOVE COWL SIDE TRIM BOARD RH
|
|
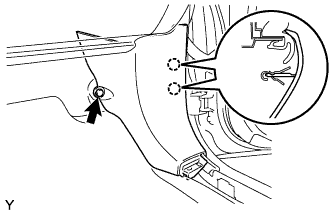
- Remove the clip.
Disengage the 2 claws and remove the cowl side trim board.
| 15.
REMOVE COWL SIDE TRIM BOARD LH
|
|
- HINT:
- Use the same procedure as for the RH side.
| 16.
SEPARATE FRONT DOOR OPENING TRIM WEATHERSTRIP RH
|
|
Separate the front door opening trim weatherstrip RH.
| 17.
SEPARATE FRONT DOOR OPENING TRIM WEATHERSTRIP LH
|
|
Separate the front door opening trim weatherstrip LH.
| 18.
REMOVE NO. 1 INSTRUMENT PANEL REGISTER ASSEMBLY
|
|
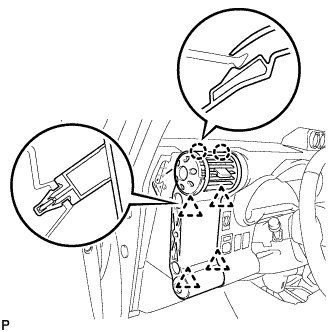
- Disengage the 4 clips and 2 claws and remove the instrument panel register.
- NOTICE:
- To avoid breakage of the register, remove the instrument panel register with the shut damper of the register open.
- Pull the instrument panel register up diagonally to remove it.
| 19.
SEPARATE HOOD LOCK CONTROL LEVER SUB-ASSEMBLY
|
|
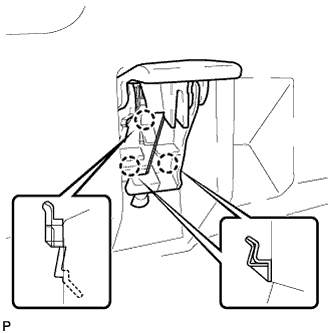
- Disengage the 3 claws and separate the hood lock control lever.
| 20.
REMOVE FUEL LID LOCK OPEN LEVER SUB-ASSEMBLY |
|
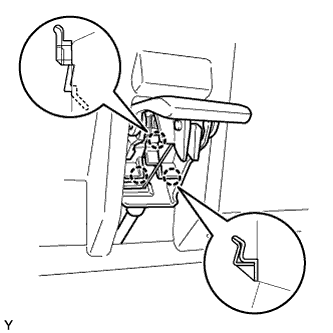
- Disengage the 3 claws and separate the fuel lid lock open lever.
Disconnect the fuel lid lock control cable from fuel lid lock open lever.
| 21.
REMOVE INSTRUMENT PANEL FINISH PLATE
|
|
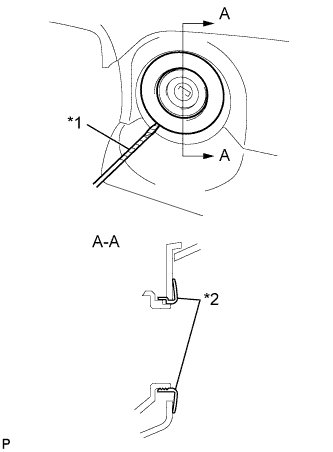
- Using a screwdriver with its tip wrapped in protective tape, remove the instrument panel finish plate.
Text in Illustration
*1
|
Protective Tape
|
*2
|
Instrument Panel Finish Plate
|
| 22.
REMOVE LOWER INSTRUMENT PANEL FINISH PANEL
|
|
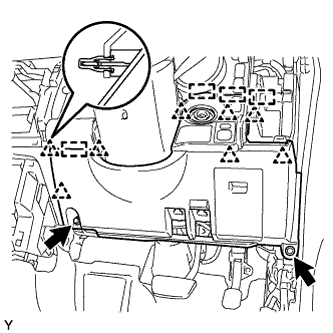
- Remove the 2 <E> bolts.
Disengage the 8 clips and 4 guides.
Disconnect the connectors and remove the lower instrument panel finish panel.
| 23.
REMOVE CONSOLE UPPER PANEL NO. 1 GARNISH
|
|
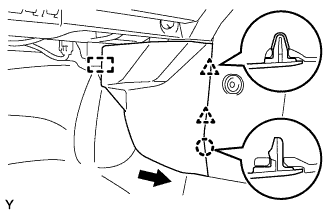
- Disengage claw and the 2 clips.
Slide the console upper panel garnish toward the rear of the vehicle, disengage the guide and remove the console upper panel garnish.
| 24.
REMOVE INSTRUMENT LOWER COVER SUB-ASSEMBLY
|
|
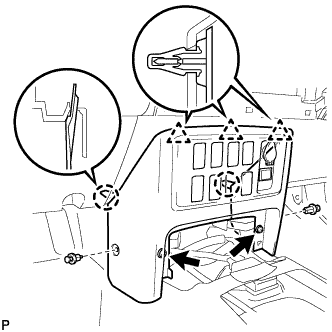
- Remove the 2 clips and 2 <E> bolts.
Disengage the 3 clips and 2 claws and remove the instrument lower cover.
| 25.
REMOVE REAR FLOOR BOARD
|
|
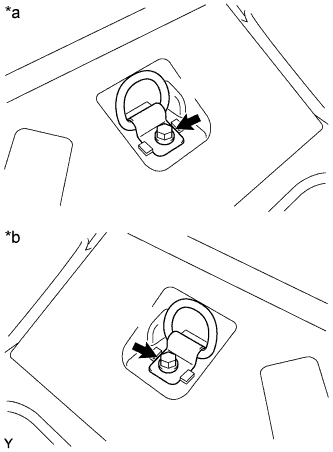
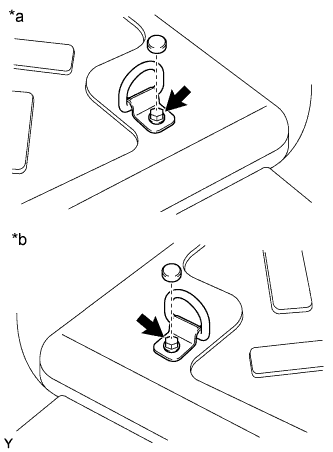
- Remove the bolt and the luggage hold belt striker.
Text in Illustration
*a
|
for RH Side
|
*b
|
for LH Side
|
- HINT:
- Use the same procedure for both sides.
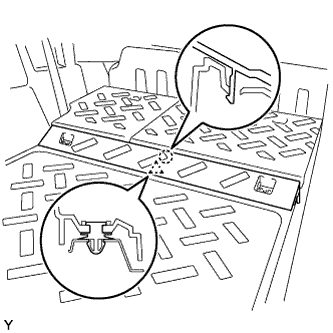
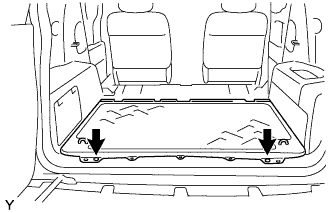
- Disengage the clip and the claw and remove the rear floor board.
| 26.
REMOVE REAR FLOOR MAT SUPPORT PLATE
|
|
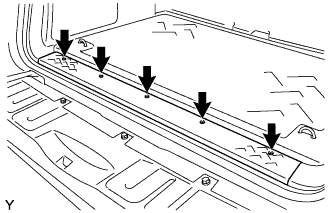
- Remove the 5 screws.
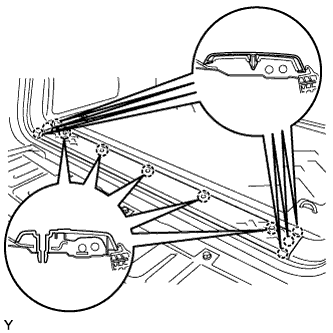
- Disengage the 11 claws and remove the rear floor mat support plate.
| 27.
REMOVE LUGGAGE HOLD BELT STRIKER ASSEMBLY
|
|
- HINT:
- Use the same procedure for both sides.
- Remove the cap.
Text in Illustration
*a
|
for RH Side
|
*b
|
for LH Side
|
Remove the bolt and the luggage hold belt striker.
| 28.
REMOVE REAR FLOOR MAT ASSEMBLY
|
|
- Using a clip remover, remove the 2 clips and the rear floor mat.
| 29.
REMOVE PACKAGE HOLDER NET HOOK
|
|
- HINT:
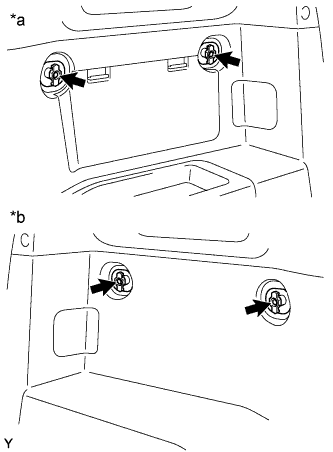
- Use the same procedure to remove all the package holder net hooks.
Text in Illustration
*a
|
for RH Side without Woofer
|
*b
|
for LH Side
|
Remove the screw and the package holder net hook.
| 30.
REMOVE LAP BELT OUTER ANCHOR COVER
|
|
- HINT:
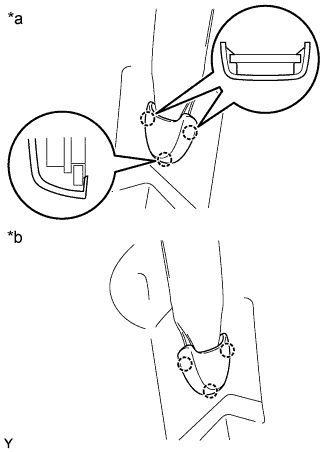
- Use the same procedure for both sides.
Text in Illustration
*a
|
for RH Side
|
*b
|
for LH Side
|
Disengage the 3 claws and remove the lap belt outer anchor cover.
| 31.
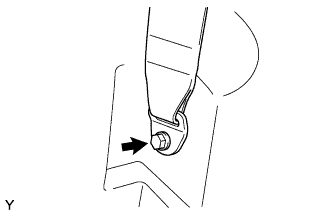
REMOVE REAR SEAT OUTER BELT ASSEMBLY LH
|
|
- Remove the bolt and the anchor plate.
| 32.
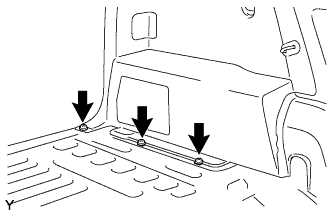
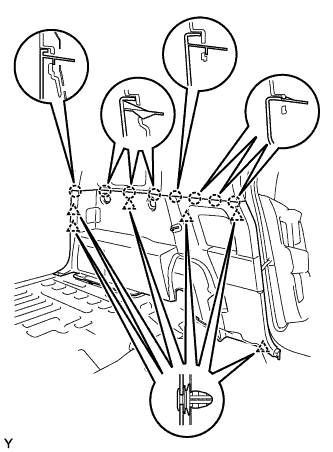
REMOVE DECK TRIM SIDE PANEL ASSEMBLY LH
|
|
- Remove the 3 screws.
- Disengage the 6 clips and the 8 claws and remove the deck trim side panel.
| 33.
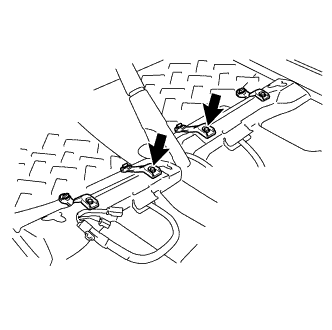
REMOVE NO. 2 FLOOR CARPET HOOK |
|
- Remove the 2 screws and 2 floor carpet hooks.
| 34.
REMOVE NO. 3 FLOOR CARPET HOOK |
|
- Remove the 2 screws and 2 floor carpet hooks.
| 35.
REMOVE FRONT FLOOR MAT |
|
Remove the 2 clips.
Disengage the 14 clamps and remove the front floor mat.
| 36.
REMOVE FUEL LID LOCK CONTROL CABLE SUB-ASSEMBLY |
|
- Separate the fuel lid lock control cable by rotating it from the fuel filler opening lid lock retainer as shown in the illustration.
Text in Illustration
 
|
Turn
|

|
Pull Out
|
Disengage the clamps and remove the fuel lid lock control cable.
Text in Illustration
*1
|
Fuel Lid Lock Control Cable
|
*2
|
Clamp
|
| 37.
REMOVE FUEL FILLER OPENING LID LOCK RETAINER |
|
- Remove the fuel filler opening lid lock retainer by rotating it as shown in the illustration.
Text in Illustration
|
Turn
|
|
Pull Out
|