INSTALLATION
Removal / installation · Vehicles built from Aug 2012
Versions by build date: Jul 2007 – Oct 2010 Nov 2010 – Jul 2012 from Aug 2012
| 1.
INSTALL NO. 2 TRACTION CONTROL SWITCH (A-TRAC SWITCH) |
 |
Attach the 2 claws to install the No. 2 traction control switch (A-TRAC switch).
| 2.
INSTALL INSTRUMENT LOWER COVER SUB-ASSEMBLY
|
|
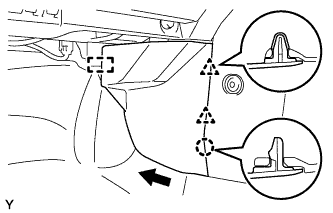
Engage the 3 clips and 2 claws and install the instrument lower cover.
Install the 2 <E> bolts and 2 clips.
| 3.
INSTALL CONSOLE UPPER PANEL NO. 1 GARNISH (for RHD)
|
|
- Slide the console upper panel garnish toward the front of the vehicle and engage guide.
Engage the claw and 2 clips and install the console upper panel garnish.
| 4.
INSTALL FRONT CONSOLE BOX
|
|
Engage the 5 guides and install the front console box.
Install the 4 <H> bolts.
| 5.
INSTALL BOX BOTTOM MAT
|
|
Install the box bottom mat.
| 6.
INSTALL CONSOLE UPPER REAR PANEL SUB-ASSEMBLY
|
|
Engage the 3 guides and 5 clips and install the console upper rear panel.
| 7.
INSTALL SHIFT LEVER KNOB SUB-ASSEMBLY (for 4WD)
|
|
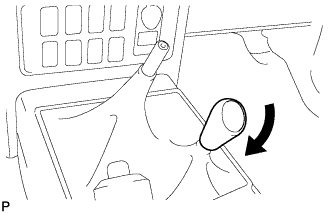
- Install the shift lever knob.
| 8.
INSTALL SHIFT LEVER KNOB SUB-ASSEMBLY (for Manual Transmission)
|
|
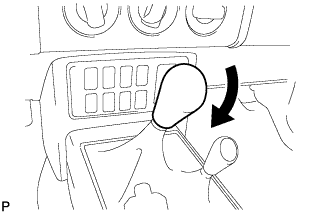
- Install the shift lever knob.
| 9.
INSTALL PARKING BRAKE HOLE COVER SUB-ASSEMBLY
|
|
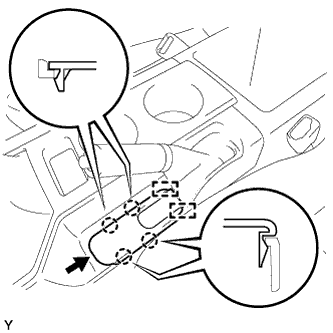
- Slide the parking brake hole cover toward the rear of the vehicle and engage the 2 guides.
Engage the 4 claws and install the parking brake hole cover.