Home › ENGINE › 1GR-FE FUEL › FUEL SUB TANKREMOVAL
Removal / installation · Vehicles built from Aug 2014
Versions by build date: Nov 2012 – Jul 2014 from Aug 2014
1.
DISCHARGE FUEL SYSTEM PRESSURE
(Click here )
2.
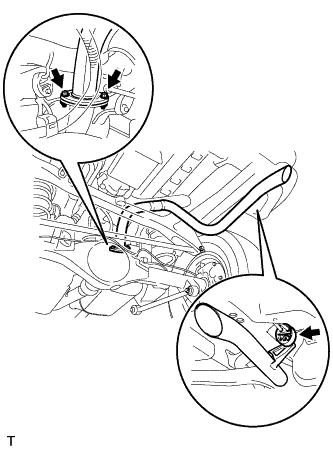
REMOVE TAIL EXHAUST PIPE ASSEMBLY
Remove the 2 bolts and separate the exhaust pipe support, then remove the tail exhaust pipe.
3.
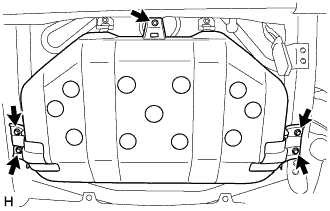
REMOVE NO. 1 FUEL TANK PROTECTOR SUB-ASSEMBLY
Remove the 5 bolts and the No. 1 fuel tank protector sub-assembly from the vehicle.
4.
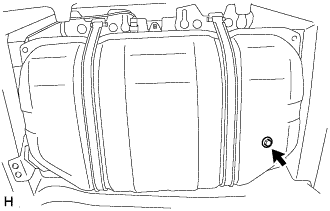
DRAIN FUEL
Remove the fuel tank drain plug and gasket from the fuel sub tank sub-assembly. Drain the fuel.
Install a new gasket and the fuel tank drain plug to the fuel sub tank sub-assembly.
Torque:
6.5 N*m{
66 kgf*cm
, 58 in.*lbf
}
5.
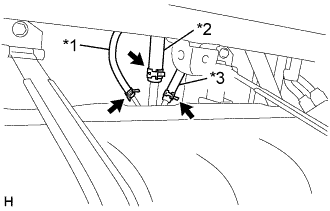
DISCONNECT FUEL HOSE
Disconnect the fuel evaporation hose, fuel breather hose and fuel hose from the fuel sub tank sub-assembly.
Text in Illustration
*1
Fuel Evaporation Hose
*2
Fuel Breather Hose
*3
Fuel Hose
6.
DISCONNECT FUEL TANK BREATHER HOSE
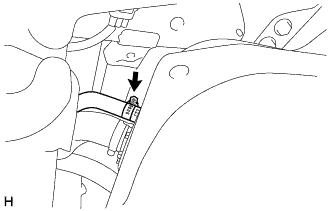
Loosen the hose clamp and disconnect the fuel breather hose from the lower fuel tank filler pipe sub-assembly.
7.
DISCONNECT FUEL TANK TO FILLER PIPE HOSE
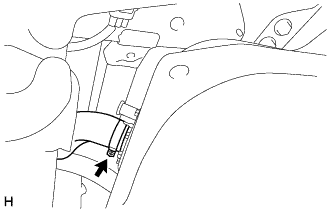
Loosen the hose clamp and disconnect the fuel tank to filler pipe hose from the lower fuel tank filler pipe sub-assembly.
8.
REMOVE FUEL SUB TANK SUB-ASSEMBLY
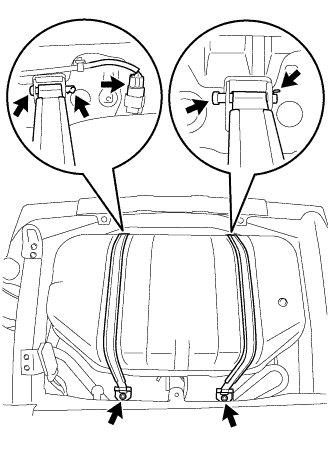
Disconnect the No. 2 frame wire connector. Set a transmission jack underneath the fuel sub tank sub-assembly.
Remove the 2 bolts, 2 clips, 2 pins and the 2 fuel tank bands from the vehicle.
Remove the fuel sub tank sub-assembly from the vehicle.
9.
REMOVE FUEL TANK VENT TUBE SUB-ASSEMBLY
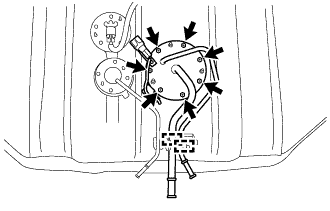
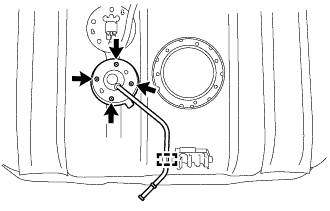
Remove the 7 screws from the fuel tank vent tube sub-assembly. Disengage the 2 clamps and remove the fuel tank vent tube sub-assembly from the fuel sub tank sub-assembly.
Remove the gasket from the fuel tank vent tube sub-assembly.
10.
REMOVE NO. 1 FUEL EVAPORATION TUBE SUB-ASSEMBLY
Remove the 4 screws from the No. 1 fuel evaporation tube sub-assembly. Disengage the clamp and remove the No. 1 fuel evaporation tube sub-assembly from the fuel sub tank sub-assembly.
Remove the gasket from the No. 1 fuel evaporation tube sub-assembly.
11.
REMOVE FUEL CUT OFF VALVE ASSEMBLY
Remove the fuel cut off valve from the fuel sub tank sub-assembly.
12.
REMOVE FUEL SUB-TANK FUEL SENDER GAUGE ASSEMBLY
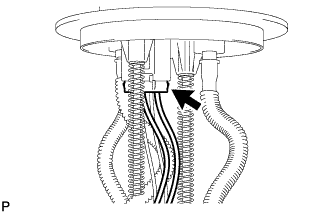
Disconnect the fuel sender gauge assembly connector.
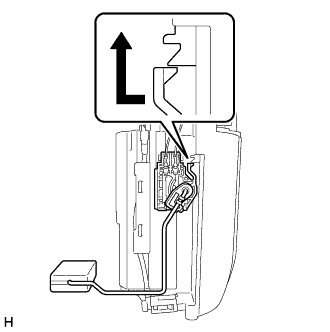
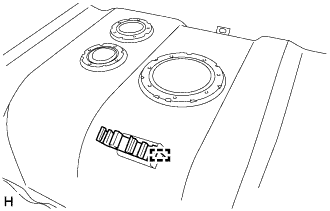
As shown in the illustration, disengage the lock of the claw, slide the claw upwards, and remove the fuel sender gauge assembly from the No. 1 fuel sub tank.
13.
REMOVE LOWER FUEL TANK FILLER PIPE SUB-ASSEMBLY
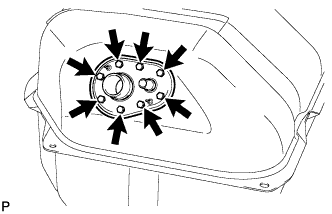
Remove the 8 screws and the lower fuel tank filler pipe sub-assembly from the fuel sub tank sub-assembly. Remove the gasket from the lower fuel tank filler pipe sub-assembly.
14.
REMOVE FUEL TUBE GROMMET
Disengage the clamp and remove the fuel tube grommet from the fuel sub tank sub-assembly.
15.
REMOVE NO. 1 FUEL TANK CUSHION
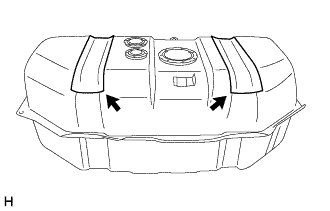
Remove the 2 No. 1 fuel tank cushions from the fuel sub tank sub-assembly.