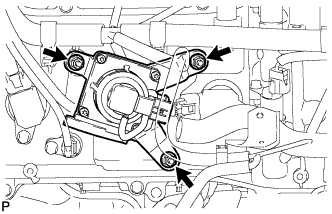
REMOVAL
Removal / installation · Vehicles built from Aug 2014
| 1. REMOVE V-BANK COVER |

Raise the front of the V-bank cover to disengage the 2 cushions of the V-bank cover from the 2 pins.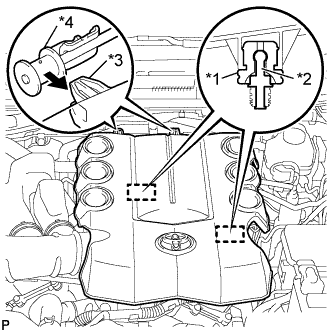

Text in Illustration *1
Cushion
*2
Pin
*3
Hook
*4
No. 1 V-bank Cover Bracket
Disengage the 2 hooks to remove the V-bank cover from the No. 1 V-bank cover bracket.
| 2. REMOVE AIR CLEANER CAP SUB-ASSEMBLY WITH NO. 1 AIR CLEANER HOSE |
Disconnect the MAF meter connector.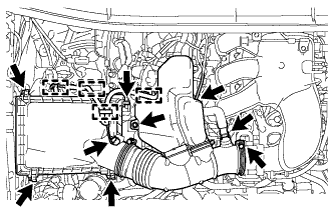
Disengage the 4 wire harness clamps.
Disconnect the ventilation hose and vacuum hose.
Remove the bolt.
Loosen the No. 1 air cleaner hose clamp.
Release the 4 hinges.
Remove the air cleaner cap and hose.
| 3. REMOVE AIR CLEANER CASE SUB-ASSEMBLY |
Remove the air cleaner filter element from the air cleaner case sub-assembly.
Disengage the clamp to disconnect the wire harness from the air cleaner case sub-assembly.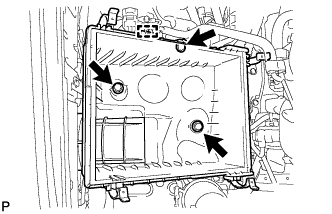
Remove the 3 bolts and air cleaner case sub-assembly from the vehicle.
| 4. REMOVE AIR TUBE |
Remove the 2 bolts, 2 nuts and air tube from the No. 1 emission control valve set and exhaust manifold sub-assembly RH.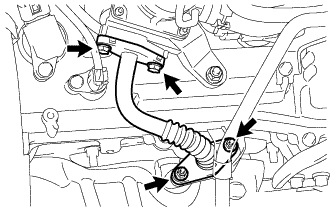
Remove the 2 gaskets from the air tube.
- NOTICE:
- Be careful not to damage the installation surface of the gaskets.
| 5. REMOVE NO. 1 EMISSION CONTROL VALVE SET |
Disconnect the No. 1 emission control valve set connector.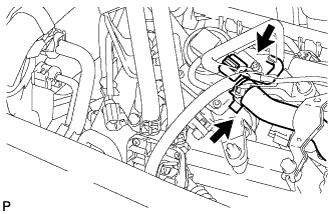
Slide the hose clip and disconnect the air tube assembly from the No. 1 emission control valve set.
Remove the 3 nuts and No. 1 emission control valve set from the cylinder head cover sub-assembly.