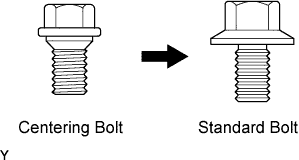
 |
REAR DOOR > ADJUSTMENT |
|
| 1. INSPECT REAR DOOR |
Check that the clearance measurements are within the standard ranges.
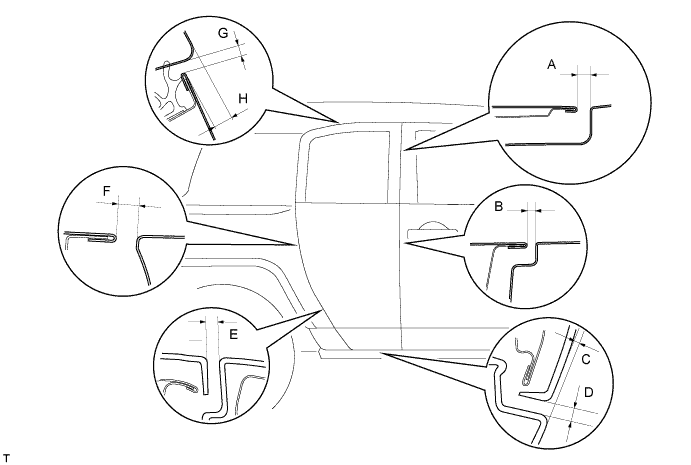
| Area | Measurement | Area | Measurement |
| A | 4.6 to 7.6 mm (0.181 to 0.299 in.) | E | 4.6 to 7.6 mm (0.181 to 0.299 in.) |
| B | 3.5 to 6.5 mm (0.138 to 0.256 in.) | F | 4.5 to 7.5 mm (0.177 to 0.295 in.) |
| C | 1.1 to 4.1 mm (0.043 to 0.161 in.) | G | 4.1 to 7.1 mm (0.161 to 0.280 in.) |
| D | 4.3 to 7.3 mm (0.169 to 0.287 in.) | H | 9 to 12 mm (0.354 to 0.472 in.) |
| 2. ADJUST REAR DOOR |
Disconnect the cable from the negative battery terminal.
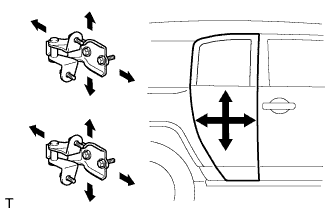 |
Loosen the body side hinge bolts and adjust the door position.
Tighten the body side hinge bolts after the adjustment.
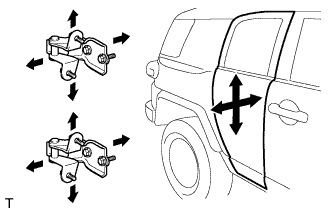 |
Loosen the door side hinge bolts and adjust the door position.
Tighten the door side hinge bolts after the adjustment.
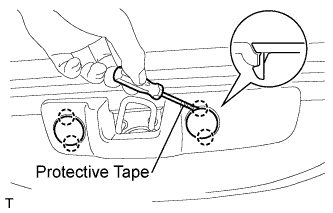 |
Using a screwdriver with its tip wrapped in protective tape, disengage the 2 claws and remove the 2 roof side inner garnish covers.
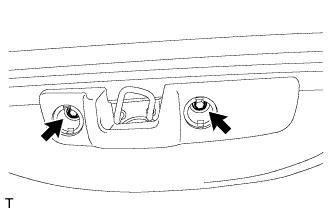 |
Remove the 2 bolts.
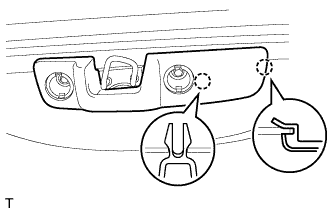 |
Disengage the 2 claws and remove the No. 1 roof side rail garnish.
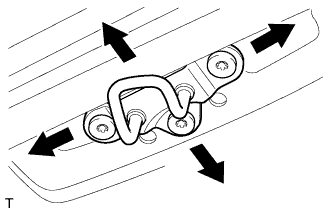 |
Adjust the striker position by slightly loosening the striker mounting screws with "Torx" socket wrench T40 and hitting the striker with a plastic hammer (upper side).
Using "Torx" socket wrench T40, tighten the striker mounting screws after the adjustment.
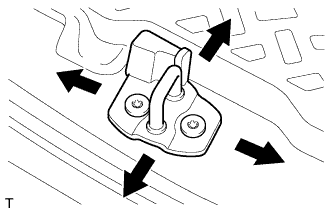 |
Adjust the striker position by slightly loosening the striker mounting screws with "Torx" socket wrench T40 and hitting the striker with a plastic hammer (lower side).
Using "Torx" socket wrench T40, tighten the striker mounting screws after the adjustment.
|
Engage the 2 claws and install the No. 1 roof side rail garnish.
|
Install the 2 bolts.
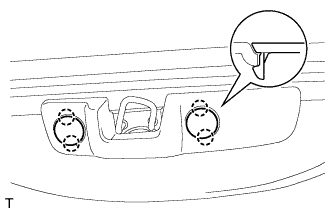 |
Engage the 2 claws and install the roof side inner garnish cover.
Connect the cable to the negative battery terminal.
Inspect the SRS warning light (Click here).