Home › RESTRAINTS › SUPPLEMENTAL RESTRAINT SYSTEM › CENTER AIRBAG SENSOR ASSEMBLY

CENTER AIRBAG SENSOR ASSEMBLY > INSTALLATION

for Preparation Click here


1. PRECAUTION

CAUTION:
Read "PRECAUTION" thoroughly before servicing (Click here).


2. INSTALL CENTER AIRBAG SENSOR ASSEMBLY
  1. Check that the ignition switch is turned to OFF.

  1. Check that the negative (-) battery terminal is disconnected.

    NOTICE:
    After disconnecting the negative battery terminal, wait for at least 90 seconds before starting the operation.


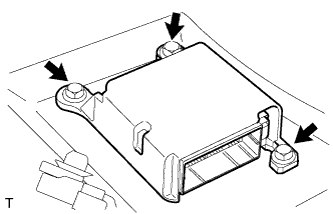
    C128260
  1. Temporarily install the center airbag sensor assembly with the 3 bolts.

    NOTICE:
    1. If the center airbag sensor assembly has been dropped, or there are any cracks, dents or other defects in the case, bracket or connector, replace it with a new one.
    2. When installing the center airbag sensor assembly, make sure that the SRS wiring does not interfere with any other parts and that it is not pinched between other parts.
  1. Tighten the 3 bolts to the specified torque.

    Torque:
    17.5 N*m{ 179 kgf*cm , 13 ft.*lbf }

  1. Check that there is no looseness in the installation parts of the center airbag sensor assembly.


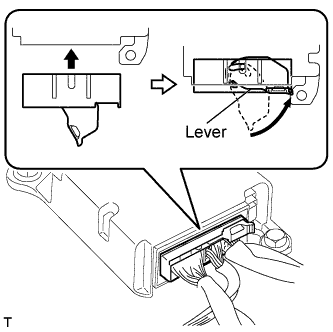
    C128259E01
  1. Connect the holder (with connectors) to the center airbag sensor assembly.

  1. Check that the water-proof sheet is properly set.


3. INSTALL INSTRUMENT LOWER COVER SUB-ASSEMBLY


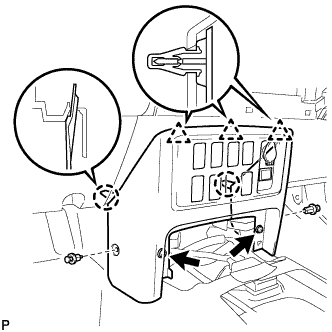
    B133852
  1. Engage the 3 clips and 2 claws and install the instrument lower cover.

  1. Install the 2 <F> bolts and 2 clips.


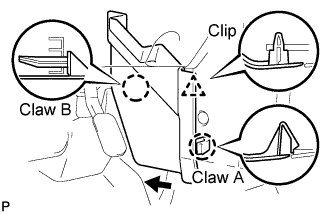
4. INSTALL CONSOLE UPPER PANEL NO.1 GARNISH


B133902E01
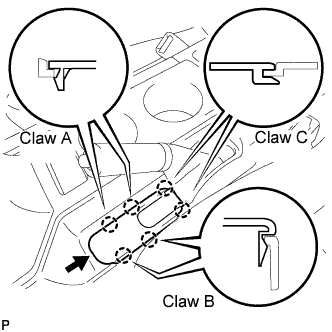
  1. Slide the console upper panel garnish toward the front of the vehicle and engage claw B.

  1. Engage the claw and clip and install the console upper panel garnish.


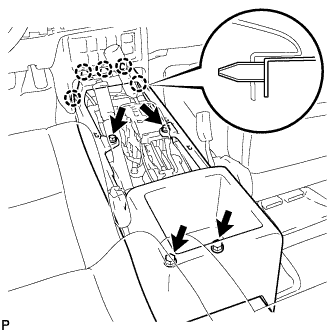
5. INSTALL FRONT CONSOLE BOX


    B133851
  1. Engage the 5 claws and install the front console box.

  1. Install the 4 <D> screws.


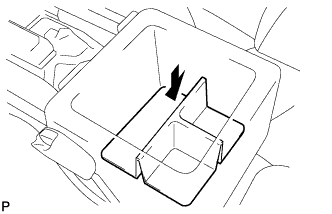
6. INSTALL BOX BOTTOM MAT


    B133899
  1. Install the box bottom mat.


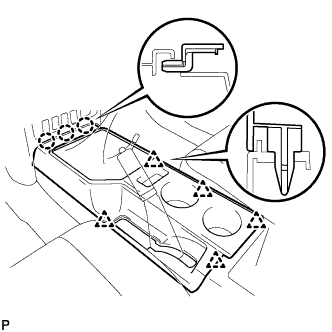
7. INSTALL CONSOLE UPPER REAR PANEL SUB-ASSEMBLY


    B133897
  1. Engage the 3 claws and 5 clips and install the console upper rear panel.


8. INSTALL PARKING BRAKE HOLE COVER SUB-ASSEMBLY


B133901E01
  1. Slide the parking brake hole cover toward the rear of the vehicle and engage the 2 C claws.

  1. Engage the 4 claws and install the parking brake hole cover.


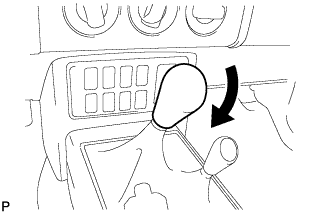
9. INSTALL SHIFT LEVER KNOB SUB-ASSEMBLY (for Manual Transaxle)


    B133894
  1. Install the shift lever knob.


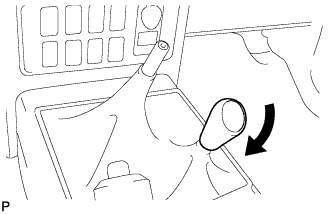
10. INSTALL SHIFT LEVER KNOB SUB-ASSEMBLY (for 4WD)


    B133896
  1. Install the shift lever knob.


11. INSTALL INTEGRATION CONTROL AND PANEL ASSEMBLY


B133888
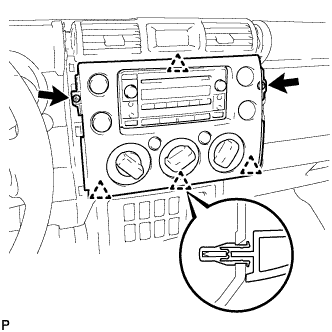
  1. Connect the 3 connectors.

  1. Engage the 4 clips and install the integration control panel assembly.

  1. Install the 2 <H> screws.


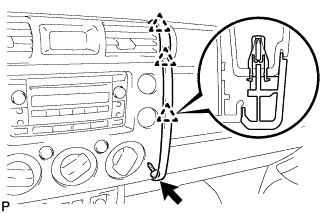
12. INSTALL INSTRUMENT PANEL GARNISH RH


    B133887
  1. Engage the 3 clips and install the instrument panel garnish.

  1. Install screw <H>.


13. INSTALL INSTRUMENT PANEL GARNISH LH

HINT:
Use the same procedure as for the RH side.


14. CONNECT CABLE TO NEGATIVE BATTERY TERMINAL

Torque:
3.9 N*m{ 40 kgf*cm , 35 in.*lbf }


15. PERFORM INITIALIZATION
  1. Perform initialization (Click here).

    HINT:
    Some systems need initialization after reconnecting the cable to the negative battery terminal.


16. INSPECT SRS WARNING LIGHT
  1. Inspect the SRS warning light (Click here).