 |
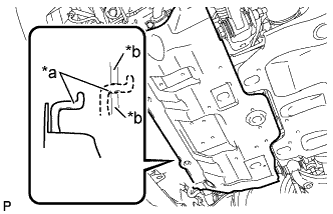
Unhook the No. 1 engine under cover sub-assembly from the frame as shown in the illustration.
| *a | Hook |
| *b | Frame |
WATER PUMP > REMOVAL |
| 1. REMOVE NO. 1 ENGINE UNDER COVER SUB-ASSEMBLY |
Remove the 4 bolts from the No. 1 engine under cover sub-assembly.
|
Unhook the No. 1 engine under cover sub-assembly from the frame as shown in the illustration.
| *a | Hook |
| *b | Frame |
| 2. DRAIN ENGINE COOLANT |
Remove the service hole cover from the engine under cover.
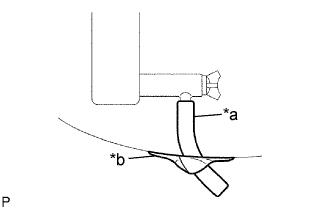 |
Install a vinyl hose to the radiator drain cock on the radiator assembly side.
| *a | Vinyl Hose |
| *b | Tape |
Fix the vinyl hose with tape.
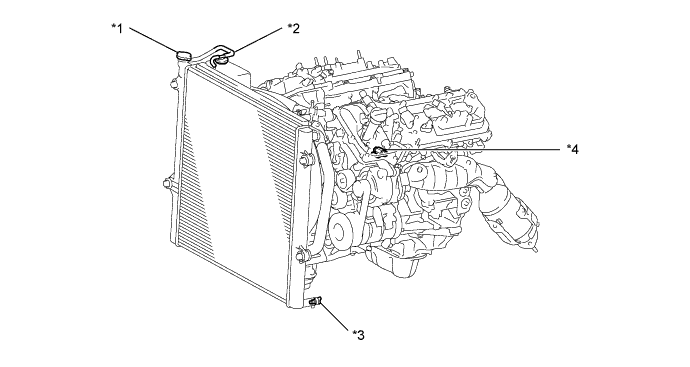
| *1 | Radiator Cap Sub-assembly | *2 | Radiator Reserve Tank Cap Sub-assembly |
| *3 | Radiator Drain Cock Plug | *4 | Cylinder Block Drain Cock Plug |
Loosen the radiator drain cock plug.
Remove the radiator cap sub-assembly and drain the engine coolant.
Loosen the cylinder block drain cock plug and drain the engine coolant from the engine.
| 3. REMOVE V-BANK COVER |
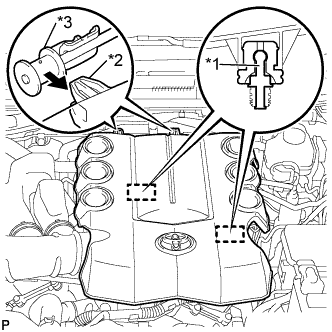 |
Raise the front of the V-bank cover to disengage the 2 pins.
| *1 | Pin |
| *2 | Hook |
| *3 | No. 1 V-bank Cover Bracket |
Disengage the 2 hooks and remove the V-bank cover from the No. 1 V-bank cover bracket.
| 4. REMOVE UPPER RADIATOR SUPPORT SEAL |
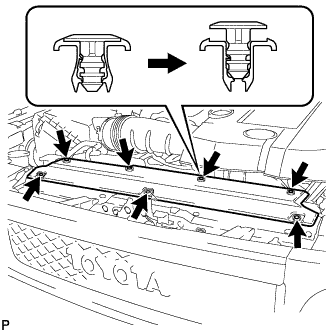 |
Disengage the 7 clips and remove the upper radiator support seal from the fan shroud.
| 5. REMOVE FAN SHROUD |
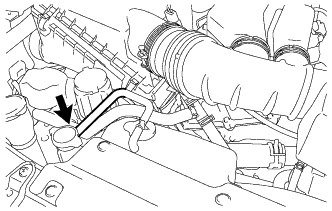 |
Disconnect the radiator reserve tank hose from the radiator assembly.
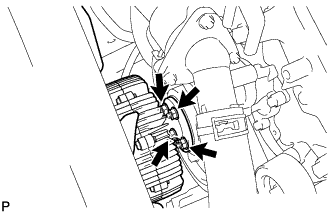 |
Loosen the 4 nuts holding the fan and fluid coupling assembly.
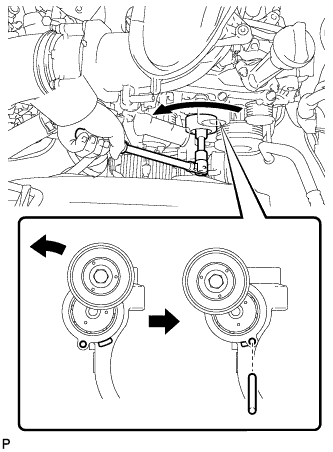 |
While turning the V-ribbed belt tensioner assembly counterclockwise, align the service hole for the V-ribbed belt tensioner assembly and the V-ribbed belt tensioner assembly fixing position, and then insert a bar of φ 6 mm (0.236 in.) into the service hole to fix the V-ribbed belt tensioner assembly in place.
Remove the fan and generator V belt.
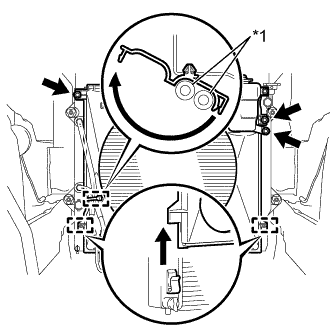 |
Disengage the clamp and disconnect the 2 oil cooler hoses from the hose clamp.
| *1 | Oil Cooler Hose |
Remove the bolt and separate the radiator reserve tank assembly from the radiator assembly.
Remove the 2 bolts and separate the fan shroud from the radiator assembly.
Disengage the 2 guides of the fan shroud from the radiator assembly as shown in the illustration.
Remove the 4 nuts of the fan and fluid coupling assembly, and then remove the fan shroud together with the fan and fluid coupling assembly.
Remove the fan pulley from the engine water pump assembly.
| 6. DISCONNECT NO. 1 RADIATOR HOSE |
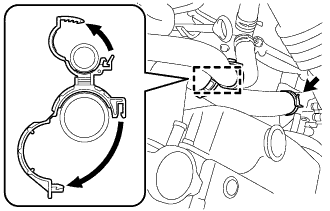 |
Remove the hose clamp from the No. 1 radiator hose and the No. 1 air injection system hose.
Loosen the hose clip and disconnect the No. 1 radiator hose from the water inlet housing.
| 7. DISCONNECT NO. 2 RADIATOR HOSE |
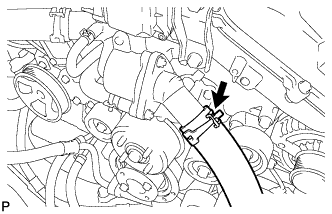 |
Loosen the hose clip and disconnect the No. 2 radiator hose from the water inlet with thermostat.
| 8. REMOVE WATER INLET HOUSING |
Disconnect the throttle body connector.
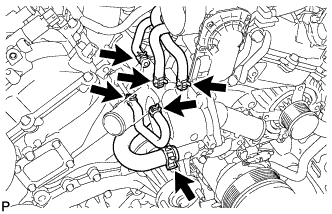 |
Disconnect the 5 water by-pass hoses.
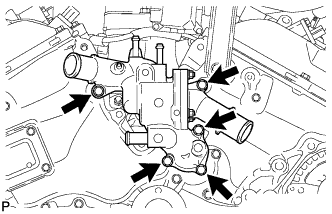 |
Remove the 5 bolts and water inlet.
Remove the gasket from the water outlet pipe.
Remove the gasket from the water pump.
| 9. REMOVE NO. 2 IDLER PULLEY SUB-ASSEMBLY |
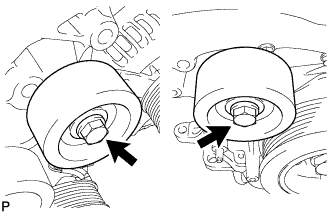 |
for Cover Separate Type:
Remove the 2 bolts, 2 idler pulley cover plates, 2 No. 2 idler pulleys, and 2 No. 2 idler pulley cover plates.
for Cover Integrated Type:
Remove the 2 bolts and 2 No. 2 idler pulleys.
| 10. REMOVE FRONT FENDER APRON SEAL RH |
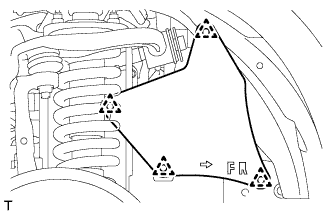 |
Remove the 4 clips and front fender apron seal RH from the front fender apron sub-assembly RH.
| 11. SEPARATE VANE PUMP ASSEMBLY |
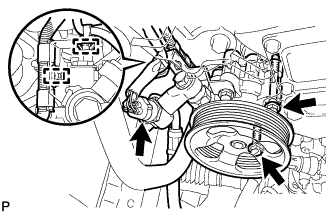 |
Disconnect the 2 clamps and vane pump connector.
Remove the 2 bolts and separate the vane pump.
| 12. REMOVE GENERATOR ASSEMBLY |
Remove the generator assembly (Click here).
| 13. SEPARATE COOLER COMPRESSOR ASSEMBLY |
| 14. REMOVE V-RIBBED BELT TENSIONER ASSEMBLY |
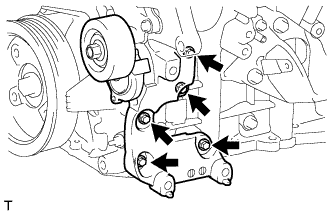 |
Remove the 5 bolts and V-ribbed belt tensioner assembly from the cylinder block sub-assembly and timing chain cover sub-assembly.
| 15. REMOVE ENGINE WATER PUMP ASSEMBLY |
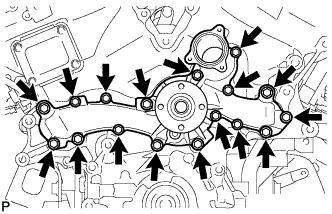 |
Remove the 17 bolts, engine water pump and gasket.