 |
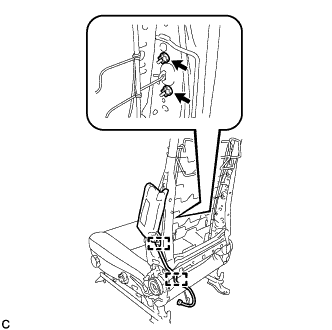
Install the front seat side airbag assembly with 2 new nuts.
- Torque:
- 5.5 N*m{ 56 kgf*cm , 49 in.*lbf }
FRONT SEAT SIDE AIRBAG ASSEMBLY > INSTALLATION |
| 1. INSTALL FRONT SEAT SIDE AIRBAG ASSEMBLY |
|
Install the front seat side airbag assembly with 2 new nuts.
Engage the 2 clamps.
| 2. INSTALL FRONT SEATBACK ASSEMBLY |
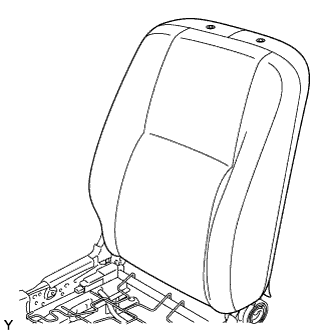 |
Install the front seatback.
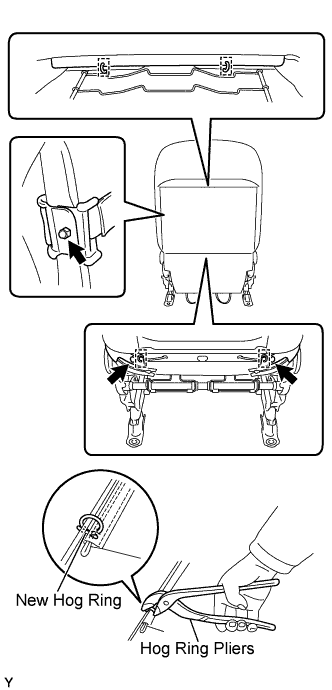 |
Fully cover the airbag with the 2 front seatback cover brackets and tighten the nut.
Using hog ring pliers, install 4 new hog rings.
Install the 2 clips.
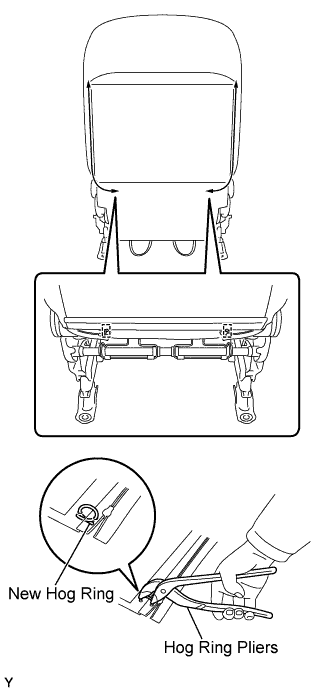 |
Fasten the 2 zippers.
Using hog ring pliers, install 2 new hog rings.
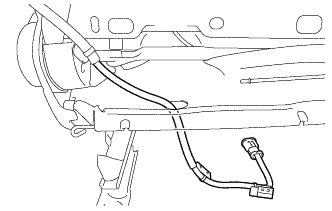 |
Insert the front seat side airbag wire harness into the front seatback cover.
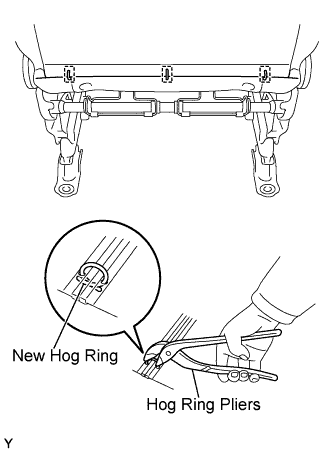 |
Using hog ring pliers, install 3 new hog rings.
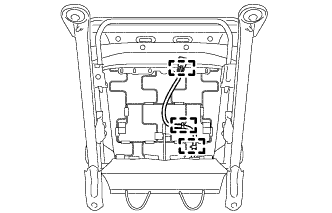 |
Engage the 3 clamps to connect the front seat side airbag wire harness.
| 3. INSTALL FRONT SEAT HEADREST SUPPORT |
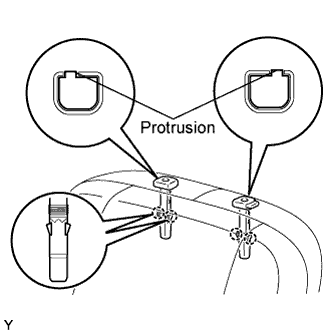 |
Align the protruding portion of the front seat headrest support with the installation groove of the front seatback frame.
Engage the 2 claws and install the front seat headrest support.
| 4. INSTALL FRONT SEAT ARMREST ASSEMBLY (for Driver Side) |
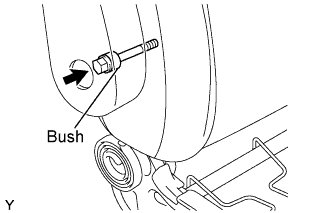 |
Install the bush onto the front seat armrest.
Install the front seat armrest with the bolt.
| 5. INSTALL FRONT SEAT ARMREST CAP (for Driver Side) |
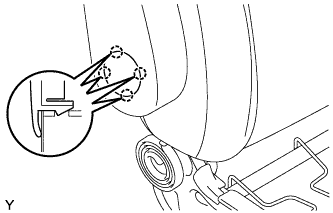 |
Engage the 4 claws and install the front seat armrest cap.
| 6. INSTALL FRONT SEAT ARMREST COVER (for Front Passenger Side) |
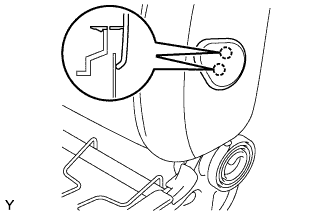 |
Engage the 2 claws and install the front seat armrest cover.
| 7. INSTALL FRONT SEAT HEADREST ASSEMBLY |
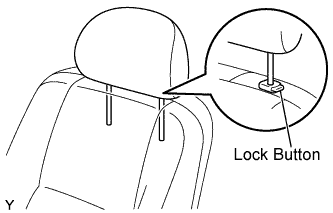 |
Push in the lock button of the front seat headrest support and install the front seat headrest.
| 8. INSTALL FRONT SEAT CUSHION INNER SHIELD |
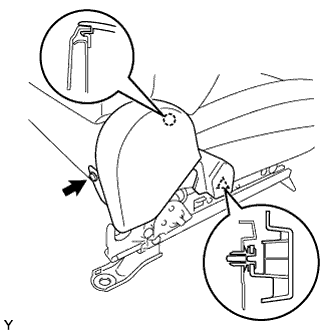 |
Engage the claw and the clip and install the front seat cushion inner shield.
Tighten the screw.
| 9. INSTALL FRONT SEAT INNER BELT ASSEMBLY |
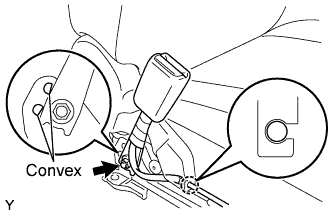 |
Install the front seat inner belt with the bolt.
Install the wire harness into the claw of the front seat cushion inner shield.
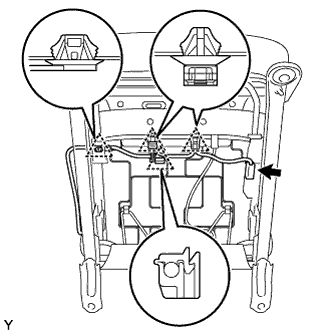 |
for Driver Side:
Install the 2 clamps and the 2 connectors.
Connect the seat position sensor connector.
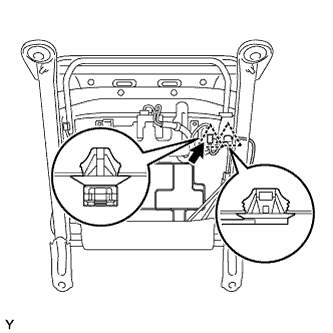 |
for Front Passenger Side:
Install the clamp and the connector.
Connect the buckle switch connector.
| 10. INSTALL FRONT SEAT CUSHION OUTER SHIELD |
|
Engage the claw and the clip and install the front seat cushion inner shield.
Tighten the screw.
| 11. INSTALL RECLINING ADJUSTER RELEASE HANDLE |
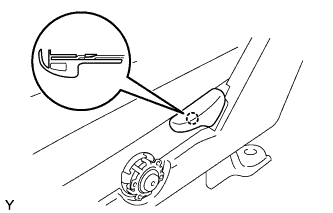 |
Engage the claw and install the reclining adjuster release handle.
| 12. INSTALL VERTICAL SEAT ADJUSTER HANDLE (for Driver Side) |
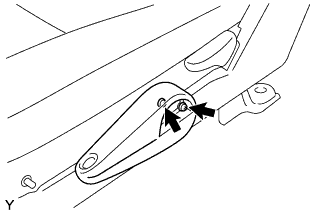 |
Install the vertical seat adjuster handle with the 2 screws.
| 13. INSTALL VERTICAL SEAT ADJUSTER HANDLE COVER (for Driver Side) |
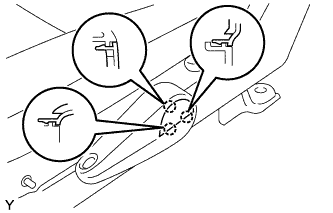 |
Engage the 3 claws and install the vertical seat adjuster handle cover.
| 14. CONNECT SEPARATE TYPE FRONT SEATBACK COVER |
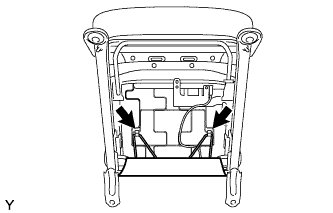 |
Connect the 2 front seatback cover bands.
| 15. INSTALL FRONT SEAT ASSEMBLY |
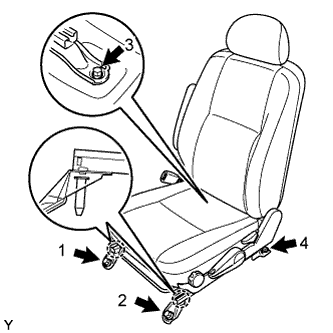 |
Insert the 2 locating pins through the 2 body holes, place the front seat in the most rearward position and make sure that the inner and outer seat tracks are locked securely.
Tighten bolt 1 and then bolt 2 onto the front side.
Move the front seat to the most forward position, and then make sure that the inner and outer seat tracks are locked securely.
Tighten bolt 3 and then bolt 4 onto the rear side.
Make sure that the inner and outer seat tracks lock simultaneously after the seat is moved.
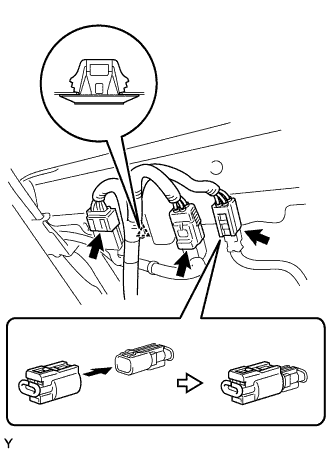 |
for Driver Side:
Connect the 2 buckle switch connectors.
w/ Front Seat Side Airbag:
Install the clamp.
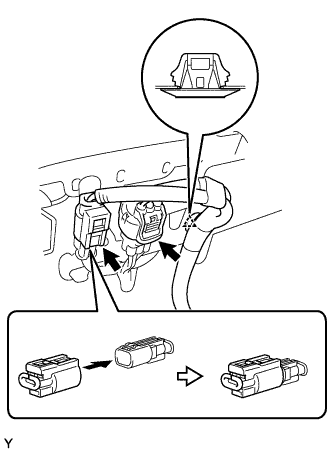 |
for Front Passenger Side:
Connect the connector.
w/ Front Seat Side Airbag:
Install the clamp.
| 16. INSTALL FRONT SEAT TRACK COVER |
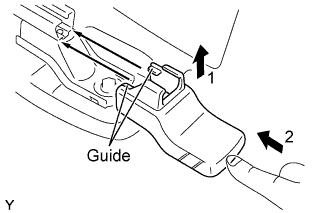 |
Insert the front seat track cover 2 guides in between the seat rail and the seat leg. Then slightly lift up the front seat track cover rear part and carefully push the front seat track cover in until it cannot be pushed in any further.
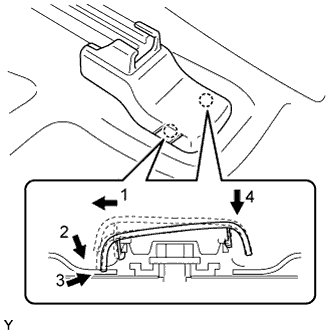 |
Carefully insert the front seat track cover outside claw into the seat leg corner groove according to the procedure shown in the illustration.
Carefully push directly from the top of the front seat track cover inside claw to insert it into the seat leg corner groove, as shown in the illustration.
| 17. CONNECT CABLE TO NEGATIVE BATTERY TERMINAL |
| 18. PERFORM INITIALIZATION |
Perform initialization (Click here).
| 19. INSPECT SRS WARNING LIGHT |