 |
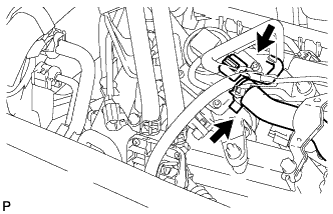
Disconnect the emission control valve set connector.
OIL PUMP > REMOVAL |
| 1. REMOVE ENGINE ASSEMBLY |
| 2. REMOVE EMISSION CONTROL VALVE SET (w/ Secondary Air Injection System) |
|
Disconnect the emission control valve set connector.
Loosen the hose clamp and disconnect the air hose assembly from the emission control valve set.
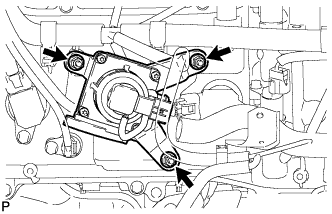 |
Remove the 3 nuts and the emission control valve set from the cylinder head cover sub-assembly.
| 3. REMOVE NO. 2 EMISSION CONTROL VALVE SET (w/ Secondary Air Injection System) |
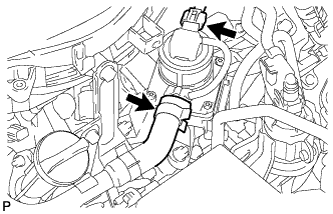 |
Disconnect the No. 2 emission control valve set connector.
Loosen the hose clamp and disconnect the air hose assembly from the No. 2 emission control valve set.
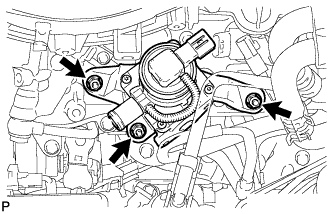 |
Remove the 3 nuts and the No. 2 emission control valve set from the cylinder head cover sub-assembly LH.
| 4. REMOVE IGNITION COIL ASSEMBLY |
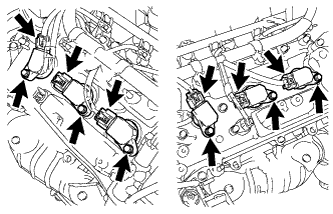 |
Disconnect the 6 ignition coil assembly connectors.
Remove the 6 bolts and the 6 ignition coil assemblies from the cylinder head cover sub-assembly.
| 5. REMOVE ENGINE OIL LEVEL DIPSTICK GUIDE |
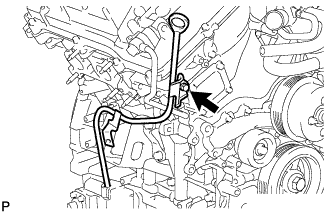 |
Remove the engine oil level dipstick from the engine oil level dipstick guide.
Remove the bolt and engine oil level dipstick guide from the timing chain cover sub-assembly and guide hole.
Remove the O-ring from the engine oil level dipstick guide.
| 6. REMOVE WATER INLET HOUSING |
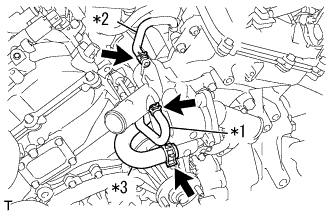 |
Disconnect the No. 1 water by-pass hose, No. 2 water by-pass hose and the No. 3 water by-pass hose from the water inlet housing.
| *1 | No. 1 Water By-pass Hose |
| *2 | No. 2 Water By-pass Hose |
| *3 | No. 3 Water By-pass Hose |
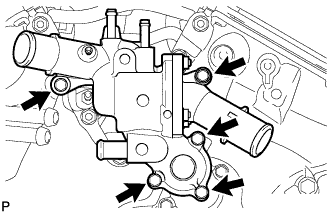 |
Remove the 5 bolts and water inlet housing from the timing chain cover sub-assembly.
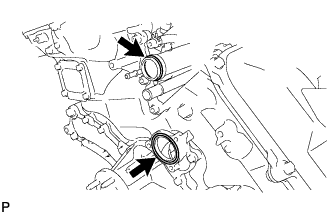 |
Remove the O-ring from the No. 1 water outlet pipe.
Remove the gasket from the water pump assembly.
| 7. REMOVE NO. 1 WATER BY-PASS HOSE |
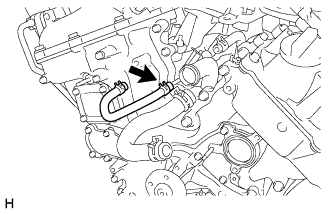 |
Remove the No. 1 water by-pass hose from the cylinder head sub-assembly.
| 8. REMOVE NO. 2 WATER BY-PASS HOSE |
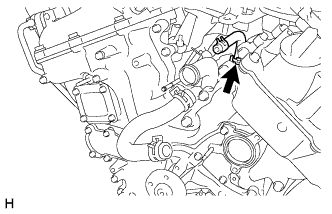 |
Remove the No. 2 water by-pass hose from the cylinder head LH.
| 9. REMOVE NO. 3 WATER BY-PASS HOSE |
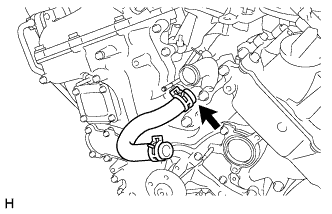 |
Remove the No. 3 water by-pass hose from the No. 1 water outlet pipe.
| 10. REMOVE NO. 1 IDLER PULLEY SUB-ASSEMBLY |
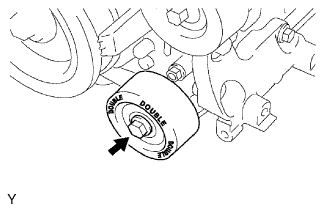 |
Remove the bolt and No. 1 idler pulley sub-assembly from the timing chain cover sub-assembly.
| 11. REMOVE NO. 2 IDLER PULLEY SUB-ASSEMBLY |
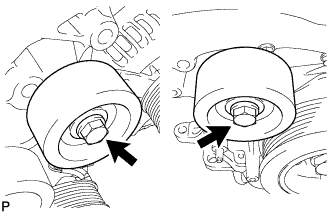 |
for Cover Separate Type:
Remove the 2 bolts, 2 idler pulley cover plates, 2 No. 2 idler pulley sub-assemblies, and 2 No. 2 idler pulley cover plates from the timing chain cover sub-assembly.
for Cover Integrated Type:
Remove the 2 bolts and 2 No. 2 idler pulley sub-assemblies from the timing chain cover sub-assembly.
| 12. REMOVE V-RIBBED BELT TENSIONER ASSEMBLY |
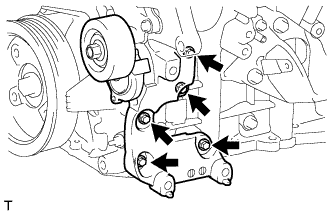 |
Remove the 5 bolts and V-ribbed belt tensioner assembly from the cylinder block sub-assembly and timing chain cover sub-assembly.
| 13. REMOVE OIL FILTER BRACKET |
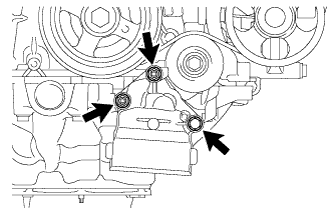 |
Remove the 2 nuts, bolt, oil filter bracket and gasket from the oil pan sub-assembly.
| 14. REMOVE CRANKSHAFT PULLEY |
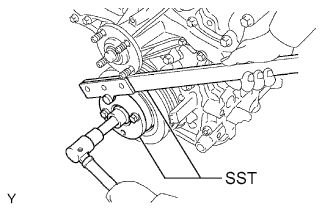 |
Using SST, hold the crankshaft pulley and loosen the pulley bolt. Further loosen the bolt until 2 or 3 threads are screwed into the crankshaft.
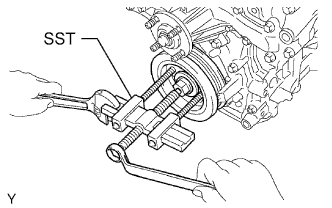 |
Using the pulley set bolt and SST, remove the crankshaft pulley and pulley bolt from the crankshaft.
| 15. REMOVE NO. 1 OIL PIPE |
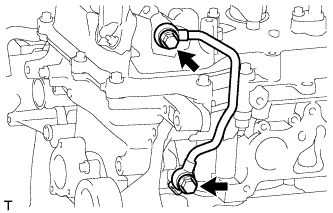 |
Remove the 2 oil pipe unions, gaskets and No. 1 oil pipe from the cylinder head cover sub-assembly LH and cylinder head LH.
Remove the oil control valve filter LH and gaskets from the oil pipe union.
| 16. REMOVE NO. 2 OIL PIPE |
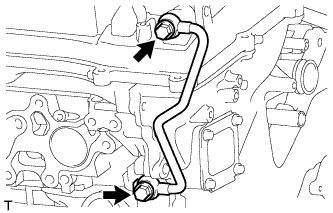 |
Remove the 2 oil pipe unions, gaskets and No. 2 oil pipe from the cylinder head cover sub-assembly and cylinder head sub-assembly.
Remove the oil control valve filter RH and gaskets from the oil pipe union.
| 17. REMOVE REAR CYLINDER HEAD COVER |
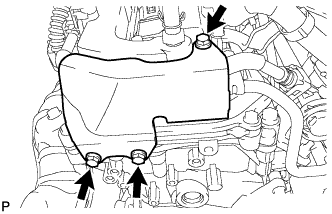 |
Remove the 3 bolts and cover.
| 18. DISCONNECT FUEL PIPE SUB-ASSEMBLY |
Remove the 2 bolts and disconnect the fuel pipe from the cylinder head cover sub-assembly LH.
| 19. REMOVE CYLINDER HEAD COVER SUB-ASSEMBLY LH |
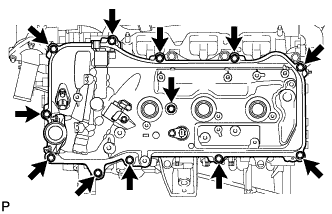 |
Remove the 12 bolts, seal washer, cylinder head cover sub-assembly LH and gasket from the cylinder head LH and timing chain cover sub-assembly.
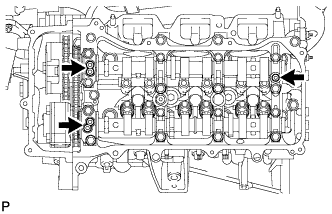 |
Remove the 3 gaskets from the camshaft bearing cap.
| 20. REMOVE CYLINDER HEAD COVER SUB-ASSEMBLY |
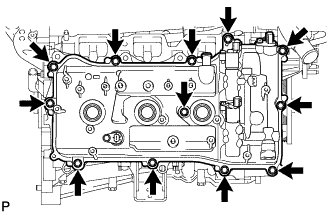 |
Remove the 12 bolts, seal washer, cylinder head cover sub-assembly and gasket from the cylinder head sub-assembly and timing chain cover sub-assembly.
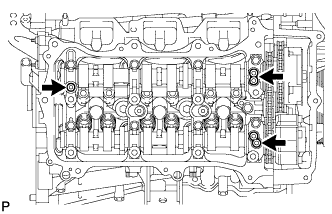 |
Remove the 3 gaskets from the camshaft bearing cap.
| 21. REMOVE NO. 2 OIL PAN SUB-ASSEMBLY |
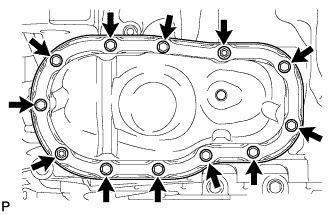 |
Remove the 10 bolts and 2 nuts from the No. 2 oil pan sub-assembly.
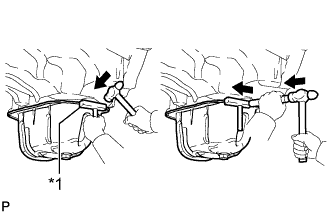 |
Insert the blade of an oil pan seal cutter between the oil pans. Cut through the applied sealer and remove the No. 2 oil pan sub-assembly.
| *1 | Oil Pan Seal Cutter |
| 22. REMOVE OIL STRAINER SUB-ASSEMBLY |
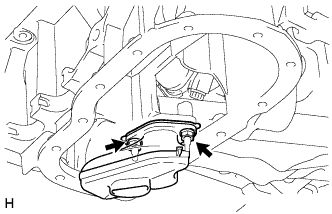 |
Remove the 2 nuts, oil strainer sub-assembly and gasket from the oil pan sub-assembly.
| 23. REMOVE OIL PAN SUB-ASSEMBLY |
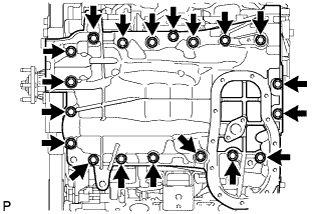 |
Remove the 17 bolts and 2 nuts from the oil pan sub-assembly.
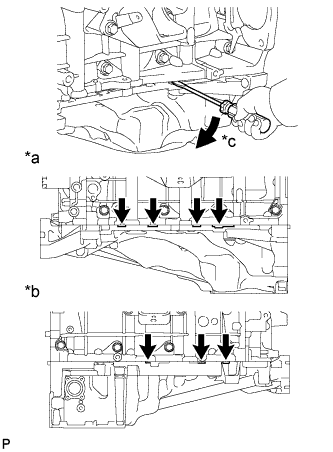 |
Using a screwdriver, remove the oil pan sub-assembly by prying between the oil pan sub-assembly and cylinder block sub-assembly as shown in the illustration.
| *a | LH Side: |
| *b | RH Side: |
| *c | Pry |
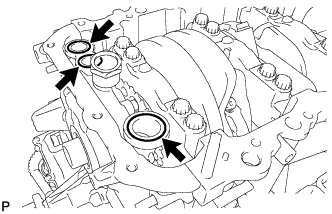 |
Remove the 3 O-rings from the timing chain cover sub-assembly.
| 24. REMOVE TIMING CHAIN COVER SUB-ASSEMBLY |
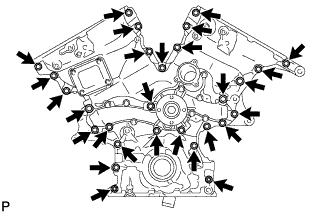 |
Remove the 26 bolts and the 2 nuts from the timing chain cover sub-assembly.
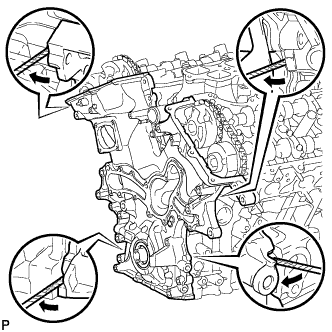 |
Remove the timing chain cover sub-assembly by prying between the timing chain cover sub-assembly and cylinder head sub-assembly or cylinder block sub-assembly with a screwdriver.
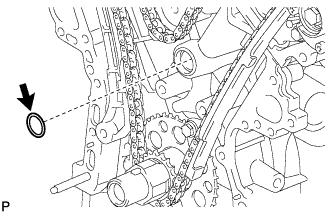 |
Remove the oil pump gasket from the cylinder block sub-assembly.
| 25. REMOVE FRONT CRANKSHAFT OIL SEAL |
Using a screwdriver and wooden block, pry out the front crankshaft oil seal from the timing chain cover sub-assembly.