 |
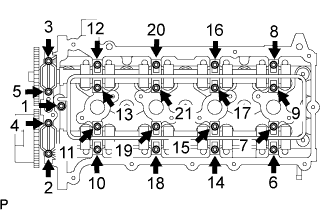
Uniformly loosen and remove the 21 bearing cap bolts and 20 washers on the camshafts in the sequence shown in the illustration.
CYLINDER HEAD > REMOVAL |
| 1. REMOVE MANUAL TRANSMISSION UNIT ASSEMBLY (for Manual Transmission) |
| 2. REMOVE AUTOMATIC TRANSMISSION ASSEMBLY (for Automatic Transmission) |
| 3. REMOVE CHAIN SUB-ASSEMBLY |
| 4. REMOVE CAMSHAFT BEARING CAP |
|
Uniformly loosen and remove the 21 bearing cap bolts and 20 washers on the camshafts in the sequence shown in the illustration.
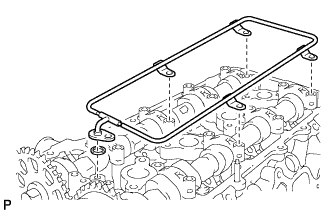 |
Remove the oil delivery pipe and O-ring from the bearing caps.
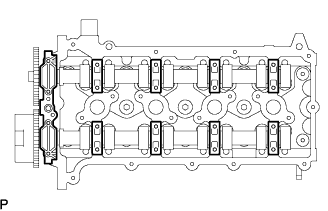 |
Remove the 9 bearing caps.
| 5. REMOVE CAMSHAFT |
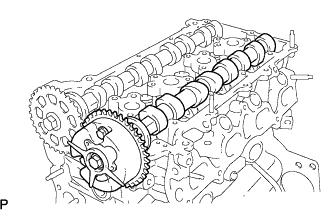 |
Remove the camshaft sub-assembly.
| 6. REMOVE NO.2 CAMSHAFT |
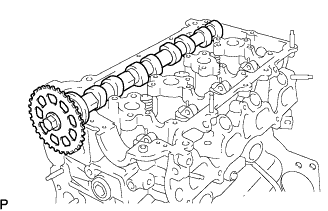 |
Remove the No.2 camshaft sub-assembly.
| 7. REMOVE VALVE ROCKER ARM SUB-ASSEMBLY NO.1 |
| 8. REMOVE VALVE LASH ADJUSTER ASSEMBLY |
| 9. REMOVE VALVE STEM CAP |
| 10. INSPECT VALVE LASH ADJUSTER ASSEMBLY |
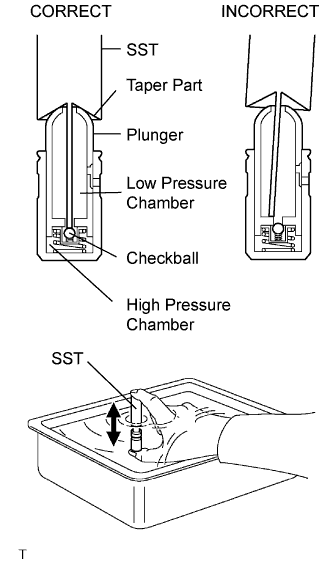 |
Place the lash adjuster into a container full of engine oil.
Insert the tip of SST into the lash adjuster's plunger and use the tip to press down on the checkball inside the plunger.
Squeeze the SST and lash adjuster together to move the plunger up and down 5 to 6 times.
Check the movement of the plunger and bleed air.
After bleeding air, remove the SST. Then quickly and firmly press the plunger with a finger.
| 11. INSPECT CAMSHAFT TIMING GEAR ASSEMBLY |
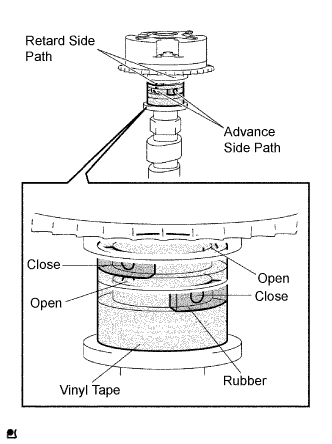 |
Check the lock of the camshaft timing gear.
Clamp the camshaft in a vise, and confirm that the camshaft timing gear is locked.
Release the lock pin.
Cover the 4 oil paths of the cam journal with vinyl tape as shown in the illustration.
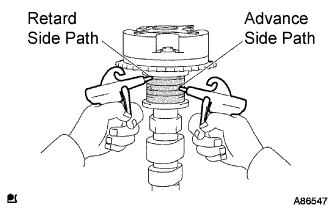 |
Break through the tape of the advance side path and the retard side path on the opposite side to the hole of the advance side path.
Apply approximately 200 kPa (2.0 kgf/cm2, 28 psi) of air pressure to the two broken paths.
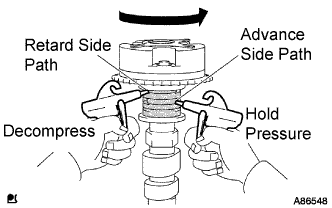 |
Check that the camshaft timing gear revolves in the advance direction when reducing the air pressure applied to the retard side path.
When the camshaft timing gear reaches the most advanced position, release the air pressure from the retard side path and advance side path, in that order.
Check for smooth rotation.
Rotate the camshaft timing gear within its movable range several times, but do not turn it to the most retarded position. Check that the gear rotates smoothly.
Check the lock in the most retarded position.
Confirm that the camshaft timing gear is locked at the most retarded position.
| 12. REMOVE CYLINDER HEAD SUB-ASSEMBLY |
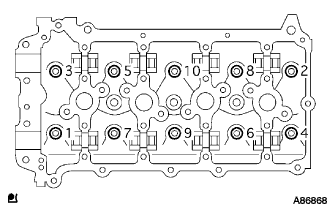 |
Uniformly loosen the 10 bolts in the sequence shown in the illustration. Remove the 10 cylinder head bolts and plate washers.
Remove the cylinder head sub-assembly.
| 13. REMOVE CYLINDER HEAD GASKET |