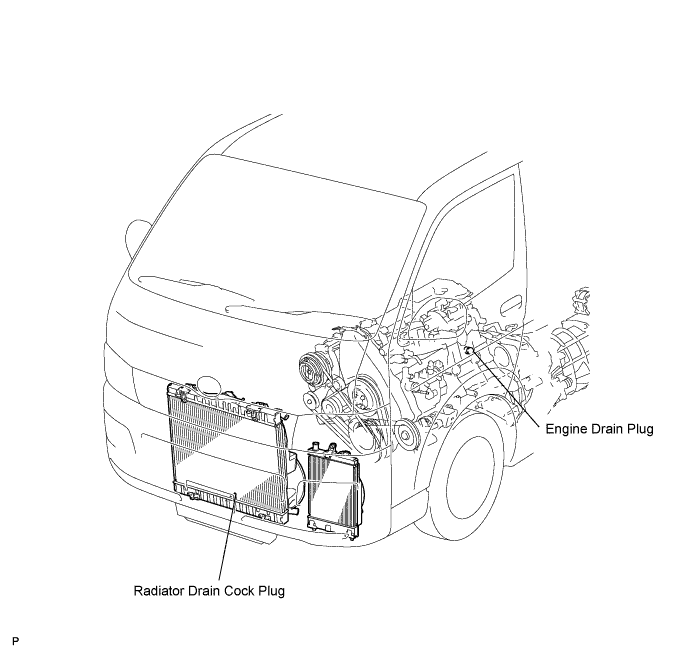
Loosen the radiator drain cock plug and engine drain plug, then drain the coolant.
WATER PUMP > REMOVAL |
| 1. DRAIN ENGINE COOLANT |
Loosen the radiator drain cock plug and engine drain plug, then drain the coolant.
Remove the radiator cap.
| 2. REMOVE FRONT SEAT ASSEMBLY RH |
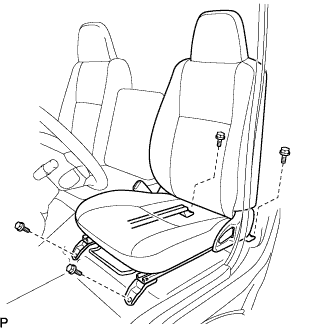 |
Move the front seat assembly fully forward.
Remove the 2 bolts on the rear side of the seat.
Move the front seat assembly to the rearmost position.
Remove the 2 bolts on the front side of the seat.
Move the front seat assembly to the center of the seat slide rail. Set the seatback in the upright position.
Disconnect the front seat inner belt assembly connector.
Remove the front seat assembly.
| 3. REMOVE FRONT DOOR SCUFF PLATE RH |
| 4. REMOVE ENGINE SERVICE HOLE SUB COVER SUB-ASSEMBLY |
Turn back the carpet, and remove the engine service hole cover sub-assembly.
| 5. REMOVE RADIATOR HOSE INLET |
| 6. REMOVE RADIATOR HOSE NO.4 |
| 7. REMOVE VANE PUMP V BELT |
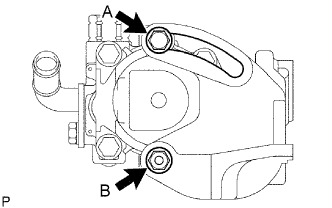 |
Loosen the bolt A and nut B, and remove the V belt.
| 8. REMOVE V (COOLER COMPRESSOR TO CRANKSHAFT PULLEY) BELT NO.1 (w/ Air Conditioning) |
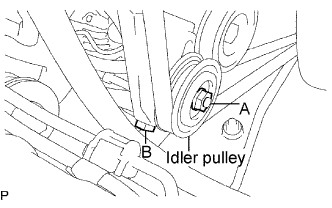 |
Loosen the nut A and bolt B, and remove the V belt.
| 9. REMOVE FAN AND GENERATOR V BELT (w/ Air Conditioning) |
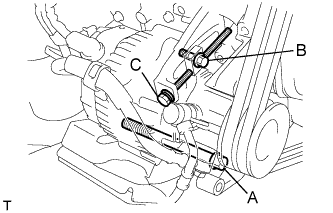 |
Loosen the bolts A and B.
Loosen the adjusting bolt C, and remove the V belt.
| 10. REMOVE FAN AND GENERATOR V BELT (w/o Air Conditioning) |
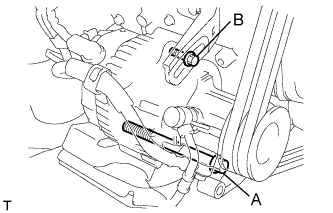 |
Loosen the bolts A and B, and remove the V belt.
| 11. REMOVE WATER PUMP PULLEY |
| 12. REMOVE COMPRESSOR AND MAGNETIC CLUTCH (w/ Air Conditioning) |
Disconnect the connector.
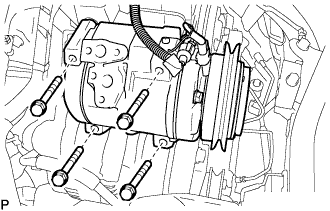 |
Remove the 4 bolts and compressor and magnetic clutch.
| 13. REMOVE COMPRESSOR MOUNTING BRACKET (w/ Air Conditioning) |
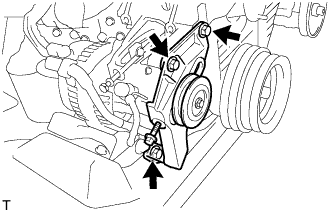 |
Remove the 3 bolts and compressor mounting bracket.
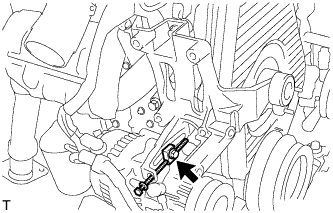 |
Remove the bolt and spacer.
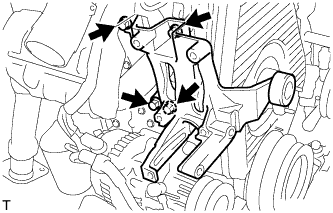 |
Remove the 4 bolts and compressor mounting bracket.
| 14. REMOVE VANE PUMP PULLEY |
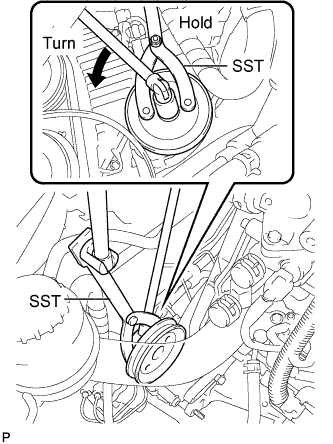 |
Using SST, remove the nut and the vane pump pulley.
| 15. REMOVE CRANKSHAFT PULLEY |
| 16. REMOVE TIMING CHAIN OR BELT COVER SUB-ASSEMBLY |
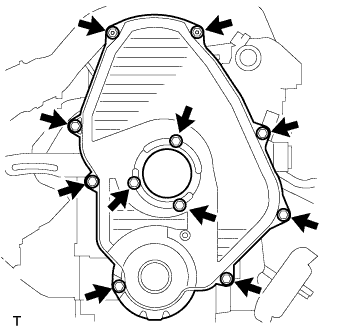 |
Remove the 11 bolts, washers, timing belt cover and 2 gaskets.
| 17. REMOVE TIMING BELT GUIDE |
Remove the timing belt guide.
| 18. SET NO.1 CYLINDER TO TDC/COMPRESSION |
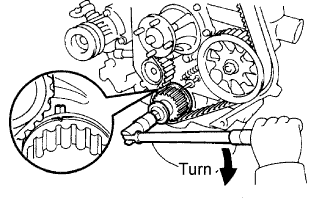 |
Using the crankshaft pulley bolt, align its groove with the timing pointer by turning the crankshaft clockwise.
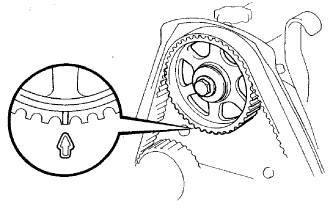 |
Check that the timing marks of the camshaft timing pulley and No.2 timing belt cover are aligned.
If not, turn the crankshaft 1 revolution (360°).
| 19. REMOVE TIMING BELT |
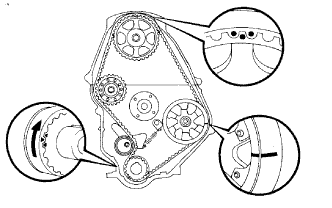 |
Remove the timing belt.
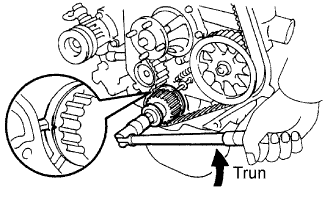 |
Turn the crankshaft 90° counterclockwise, and put the timing mark of the crankshaft timing pulley with the protrusion of the timing gear case.
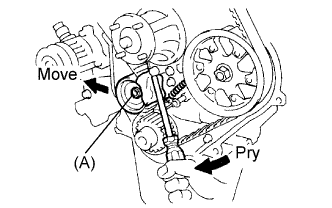 |
Loosen the timing belt idler No.1 bolt (A), and shift the idler to the left as far as possible.
Temporarily tighten the pulley bolt (A), and then relieve the timing belt tension.
Remove the timing belt.
| 20. REMOVE WATER PUMP ASSEMBLY |
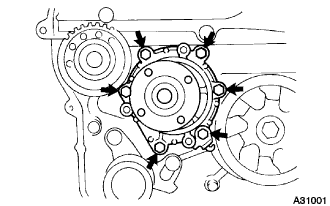 |
Remove the 6 bolts and tension spring bracket.
Remove the water pump and gasket.