 |
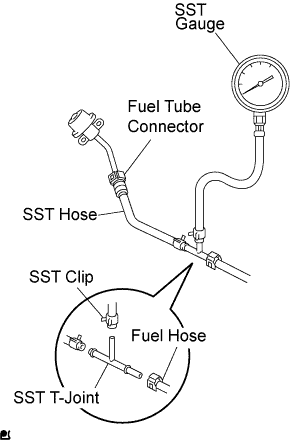
Install SST (pressure gauge) using SSTs and a fuel tube connector as shown in the illustration.
- SST
- 09268-41048
(09268-41120, 90467-13001, 95336-08070, 09268-41500)
FUEL TANK > REMOVAL |
| 1. DISCHARGE FUEL SYSTEM PRESSURE |
Check that the battery voltage is above 12 V.
Disconnect the negative terminal cable from the battery.
Disconnect the fuel hose from the fuel filter assembly.
|
Install SST (pressure gauge) using SSTs and a fuel tube connector as shown in the illustration.
Wipe off any splattered gasoline.
Reconnect the negative terminal cable to the battery.
Connect the intelligent tester to the DLC3 (See step 1 in check fuel pump operation).
Measure the fuel pressure.
Disconnect the intelligent tester from the DLC3.
Stop the engine.
Measure the fuel pressure at idle.
Stop the engine.
Check that the fuel pressure remains as specified for 5 minutes after the engine has stopped.
After checking fuel pressure, disconnect the negative terminal cable from the battery and carefully remove the SST to prevent gasoline from splashing.
Connect the fuel hose to the fuel filter assembly.
Reconnect the negative terminal cable to the battery.
Check for fuel leakage.
| 2. REMOVE PROPELLER SHAFT ASSEMBLY |
| 3. DISCONNECT FUEL TANK WIRE |
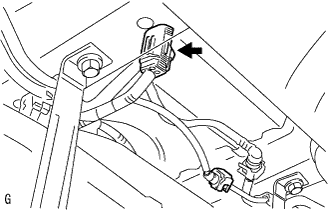 |
Disconnect the fuel tank wire.
| 4. DISCONNECT FUEL EVAPORATION TUBE SUB-ASSEMBLY NO.1 |
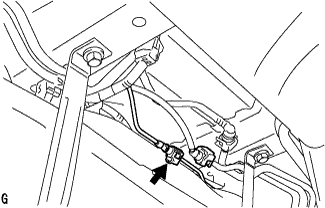 |
Disconnect the evaporation tube sub-assembly No.1.
| 5. DISCONNECT FUEL TANK RETURN TUBE |
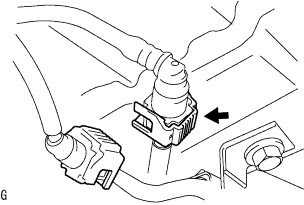 |
Disconnect the fuel tank return tube sub-assembly. (Click here)
| 6. DISCONNECT FUEL TANK MAIN TUBE SUB-ASSEMBLY |
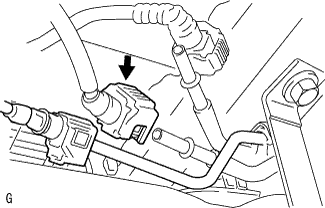 |
Disconnect the fuel tank main tube sub-assembly. (Click here)
| 7. DISCONNECT FUEL TANK BREATHER TUBE |
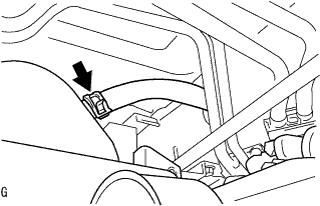 |
Disconnect the clip and fuel tank breather tube.
| 8. DISCONNECT FUEL HOSE NO.3 |
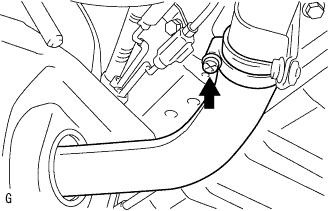 |
Loosen the clamp bolt, and disconnect the fuel hose No.3.
| 9. REMOVE FUEL TANK ASSEMBLY |
Remove the bolt, and disconnect the parking brake cable No.3.
Support the fuel tank with the transmission jack.
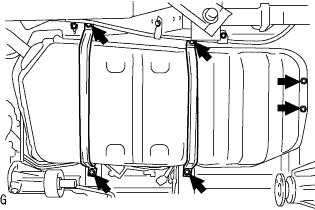 |
Remove the 6 bolts, 2 fuel tank band sub-assemblies and fuel tank assembly.
| 10. DISCONNECT FUEL EVAPORATION TUBE SUB-ASSEMBLY |
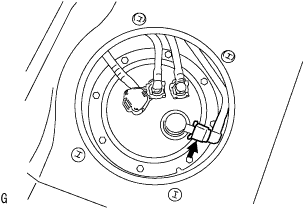 |
Disconnect the fuel evaporation tube sub-assembly. (Click here)
| 11. DISCONNECT FUEL TANK RETURN TUBE |
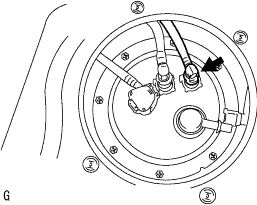 |
Remove the tube joint clip, disconnect the fuel tank return tube.
| 12. DISCONNECT FUEL TANK MAIN TUBE SUB-ASSEMBLY |
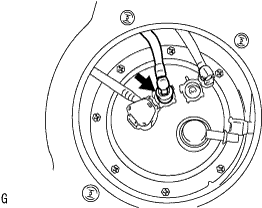 |
Remove the tube joint clip, disconnect the fuel tank main tube sub-assembly.
| 13. DISCONNECT FUEL TANK WIRE |
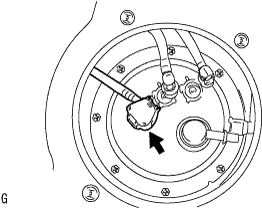 |
Disconnect the fuel tank wire connector from the fuel pump assembly.
| 14. REMOVE FUEL PUMP ASSEMBLY |
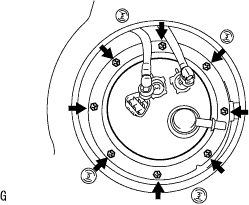 |
Remove the 8 bolts, fuel bent tube set plat and fuel pump assembly from the fuel tank assembly.