REASSEMBLY
Removal / installation · Vehicles built Oct 2014 – Dec 2014
Versions by build date: Oct 2014 – Dec 2014 from Jan 2015
| 1.
INSTALL STARTER CENTER BEARING CLUTCH SUB-ASSEMBLY |
 |
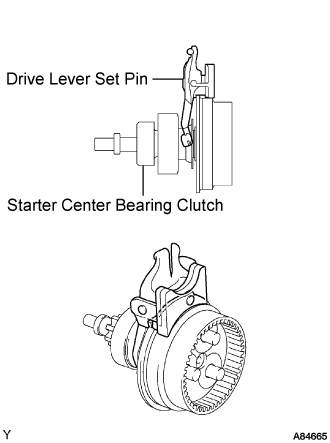
- Install the drive lever set pin to the starter center bearing clutch sub-assembly
Install the starter center bearing clutch with the drive lever set pin to the starter drive housing.
| 2.
INSTALL PLANET GEAR |
|
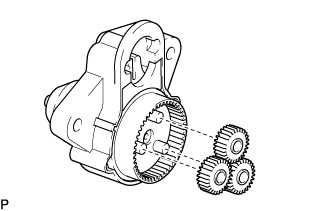
- Apply grease to the planet gears and pin parts of the planet shaft.
Install the 3 planet gears.
| 3.
INSTALL STARTER ARMATURE ASSEMBLY |
|
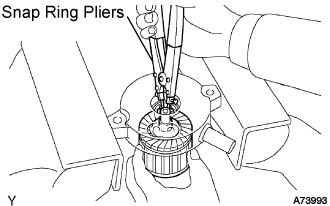
Apply grease to the plate washer and armature shaft.
Install the armature shaft to the starter commutator end frame.
- Using snap ring pliers, install the plate washer and a new snap ring.
- NOTICE:
- Be sure to install the snap ring in the armature shaft groove securely.
- Be sure to properly install the snap ring because it easily expands.
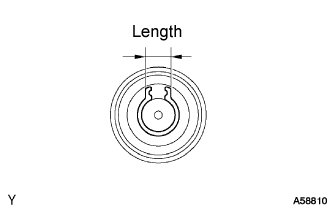
- Using vernier calipers, measure the snap ring.
- Maximum length:
- 5.0 mm (0.197 in.)
If the length is greater than the maximum, replace the snap ring.
| 4.
INSTALL STARTER COMMUTATOR END FRAME COVER |
|
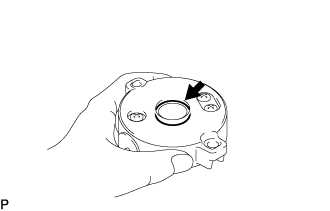
- Install the starter commutator end frame cover to the starter commutator end frame.
| 5.
INSTALL STARTER ARMATURE PLATE |
|
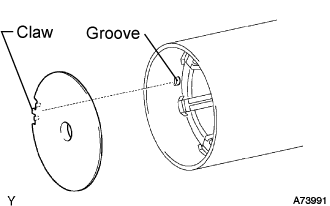
- Align the claw of the armature plate with the groove inside the starter yoke, and install the starter armature plate.
| 6.
INSTALL STARTER COMMUTATOR END FRAME ASSEMBLY |
|
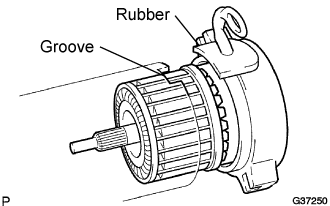
- Align the starter commutator end frame rubber with the groove of the starter yoke.
Install the starter commutator end frame to the starter yoke.
- NOTICE:
- The magnet of the starter yoke may attract the starter armature when the starter commutator end frame is installed, causing the magnet break.
| 7.
INSTALL STARTER YOKE ASSEMBLY |
|
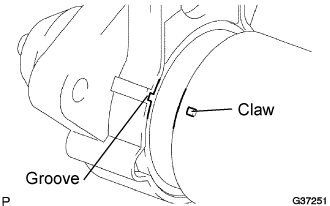
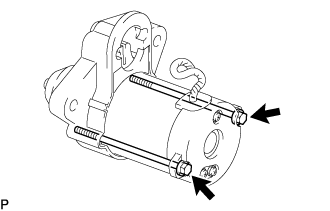
- Align the claw of the starter yoke assembly with the groove inside the starter drive housing.
- Install the starter yoke assembly with the 2 bolts.
-
Torque:
- 6.0 N*m{
61 kgf*cm
, 53 in.*lbf
}
| 8.
INSTALL REPAIR SERVICE STARTER KIT |
|
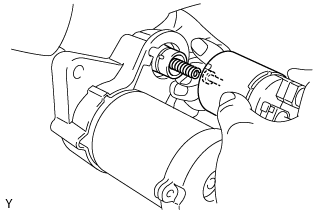
Apply grease to the plunger and hook.
- Hang the plunger hook of the repair service starter kit to the drive lever.
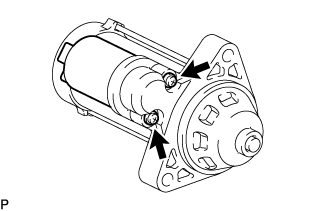
- Install the repair service starter kit with the 2 screws.
-
Torque:
- 7.5 N*m{
77 kgf*cm
, 66 in.*lbf
}
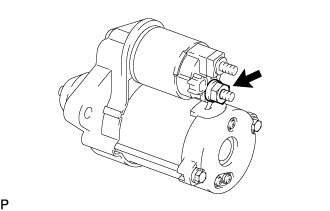
- Connect the lead wire to terminal C with the nut.
-
Torque:
- 10 N*m{
102 kgf*cm
, 7 ft.*lbf
}