DISASSEMBLY
Removal / installation · Vehicles built from Oct 2014
| 1. REMOVE GENERATOR WITH CLUTCH PULLEY (w/ Clutch Pulley) |

Using a screwdriver, remove the generator pulley cap from the generator with clutch pulley.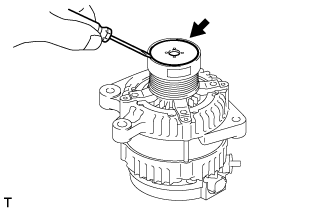

Mount the generator in a vise between aluminum plates.
Install SST (A) and SST (B) to the generator with clutch pulley as shown in the illustration.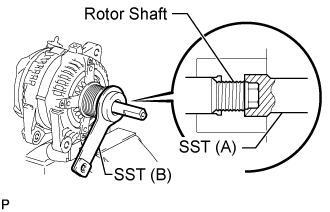
- SST
- 09820-63020
- NOTICE:
- Securely attach SST to the generator with clutch pulley and generator rotor shaft.
Use a wrench to hold SST (A) and turn SST (B) counterclockwise to loosen the generator with clutch pulley.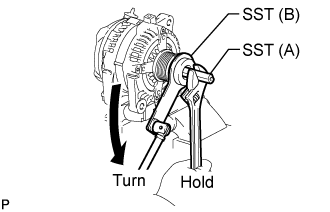
- NOTICE:
- Be careful as the generator with clutch pulley or generator rotor shaft may be damaged if the position of SST is not securely maintained while performing this operation.
Remove SST from the generator.
Remove the generator with clutch pulley from the rotor shaft.
| 2. REMOVE GENERATOR PULLEY (w/o Clutch Pulley) |
Install SST (1-A) to the pulley shaft.
- SST
- 09820-63010
(09820-06010, 09820-06020)
HINT: SST (1-A) and (1-B)
09820-06010
SST 2
09820-06020
Install SST (1-B) to SST (1-A).
Hold SST (1-A) with a torque wrench, and tighten SST (1-B) clockwise with the specified torque.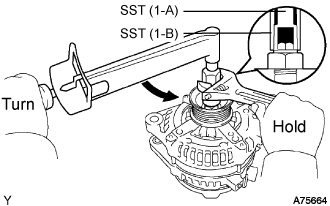
- Torque:
- 39 N*m{ 400 kgf*cm , 29 ft.*lbf }
- NOTICE:
- Check that SST is secured to the generator rotor shaft.
Mount the generator in a vise between aluminum plates.
Insert SST 2 and attach it to the pulley nut.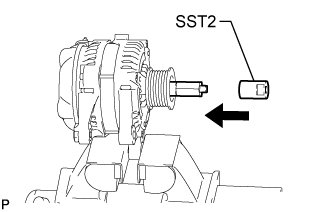
To loosen the pulley nut, turn SST (1-A) in the direction shown in the illustration.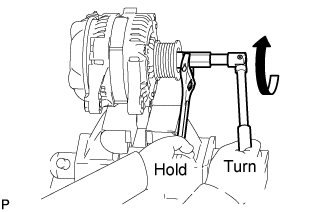
- NOTICE:
- To prevent damage to the rotor shaft, do not loosen the pulley nut more than one-half turn.
Remove SST 2 from the generator.
Turn SST (1-A), and remove SST (1-A) and (1-B).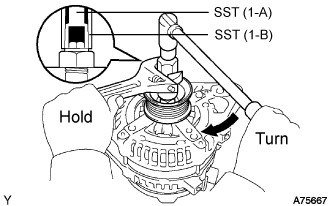
Remove the generator pulley nut and generator pulley.
| 3. REMOVE GENERATOR REAR END COVER |
Remove the 3 nuts and generator rear end cover.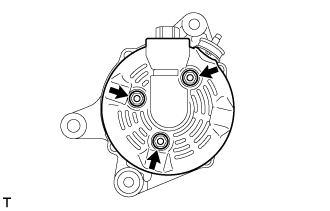
| 4. REMOVE TERMINAL INSULATOR |
Remove the terminal insulator.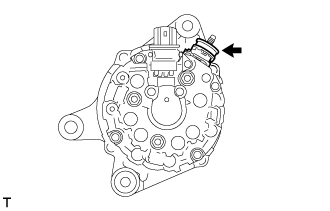
| 5. REMOVE GENERATOR BRUSH HOLDER ASSEMBLY |
Remove the 2 screws and generator brush holder assembly.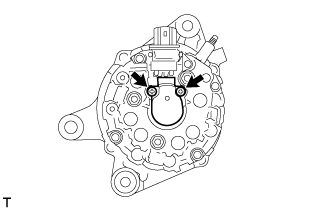
| 6. REMOVE GENERATOR COIL ASSEMBLY |
Remove the 4 through bolts.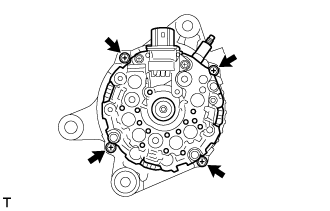
Using SST, remove the generator coil assembly.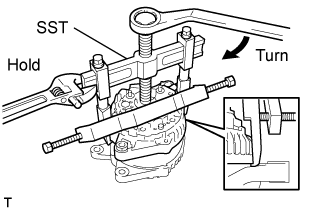
- SST
- 09950-40011
(09951-04020, 09952-04010, 09953-04020, 09954-04010, 09955-04071, 09957-04010, 09958-04011)
| 7. REMOVE GENERATOR ROTOR ASSEMBLY |
Remove the generator washer.
Remove the generator rotor assembly from the generator rear end cover.
| 8. INSPECT GENERATOR DRIVE END FRAME BEARING |
Check that the generator drive end frame bearing is not rough or worn.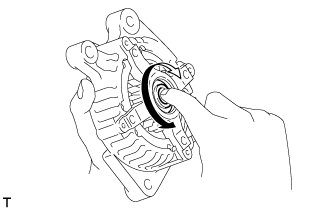
If necessary, replace the generator drive end frame bearing.
| 9. REMOVE GENERATOR DRIVE END FRAME BEARING |
Remove the 4 screws and bearing retainer.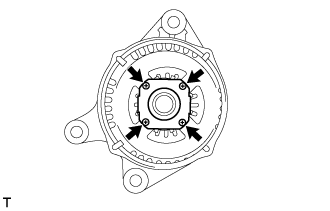
Using SST and a hammer, tap out the generator drive end frame bearing.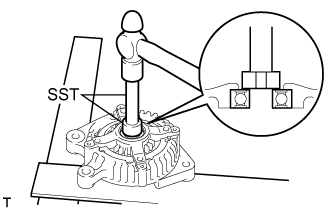
- SST
- 09950-60010
(09951-00250)
09950-70010 (09951-07100)