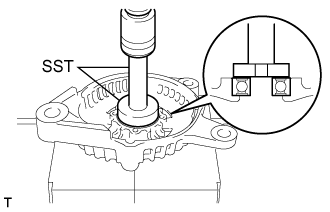
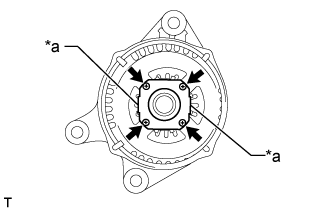
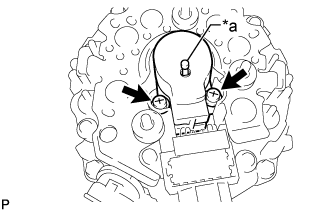
Align the claws of the retainer plate with the grooves inside the generator drive end frame assembly.
Text in Illustration
*a
Claw
Install the retainer plate with the 4 screws.
Torque:
2.3 N*m{
23 kgf*cm
, 20 in.*lbf
}
2.
INSTALL GENERATOR ROTOR ASSEMBLY
Install the generator rotor assembly to the generator drive end frame assembly.
Install a new generator washer to the generator rotor assembly.
3.
INSTALL GENERATOR COIL ASSEMBLY
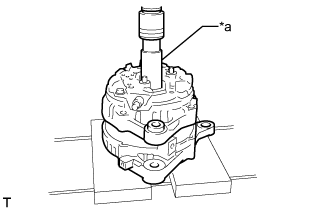
Using a deep socket wrench (21 mm) and press, slowly press on the generator coil assembly.
Text in Illustration
*a
Deep Socket Wrench (21 mm)
Install the generator coil assembly with the 4 through bolts.
Torque:
5.9 N*m{
60 kgf*cm
, 52 in.*lbf
}
4.
INSTALL GENERATOR BRUSH HOLDER ASSEMBLY
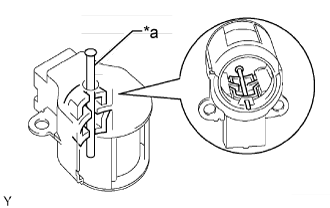
While pushing the 2 brushes into the generator brush holder assembly, insert a pin with a diameter of 1.0 mm (0.0394 in.) into the generator brush holder hole.
Text in Illustration
*a
Pin
Install the generator brush holder assembly with the 2 screws.
Torque:
1.8 N*m{
18 kgf*cm
, 16 in.*lbf
}
Text in Illustration
*a
Pin
Pull out the pin from the generator brush holder assembly.
5.
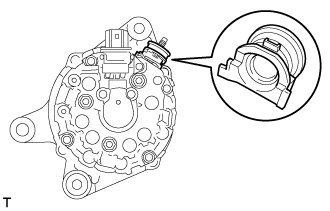
INSTALL TERMINAL INSULATOR
Install the terminal insulator.
6.
INSTALL GENERATOR REAR END COVER
Install the generator rear end cover with the 3 nuts.
Torque:
4.6 N*m{
46 kgf*cm
, 40 in.*lbf
}
7.
INSTALL GENERATOR WITH CLUTCH PULLEY
Temporarily install the generator with clutch pulley by hand.
Mount the generator assembly in a vise between aluminum plates.
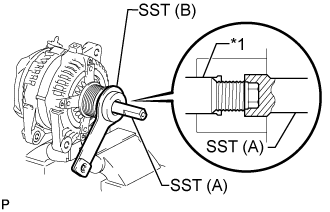
Install SST (A) and SST (B) to the generator with clutch pulley as shown in the illustration.
SST
09820-63021
Text in Illustration
*1
Generator Rotor Shaft
NOTICE:
Securely attach SST to the generator with clutch pulley and generator rotor shaft.
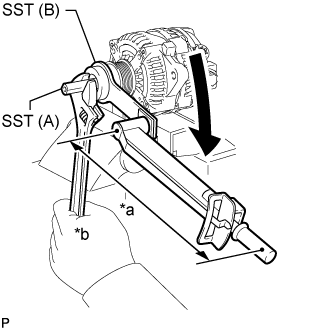
Using a wrench to hold SST (A), turn SST (B) clockwise to tighten the generator with clutch pulley.
Torque:
without SST:
80 N*m{
816 kgf*cm
, 59 ft.*lbf
}
with SST:
64 N*m{
653 kgf*cm
, 47 ft.*lbf
}
Text in Illustration
*a
Fulcrum Length
*b
Hold
Turn
NOTICE:
Be careful as the generator with clutch pulley or generator rotor shaft may be damaged if the position of SST is not securely maintained while performing this operation.
HINT:
Use a torque wrench with a fulcrum length of 400 mm (15.7 in.). When using a torque wrench with a fulcrum length that is not 400 mm (15.7 in.), calculate the torque specification for the torque wrench and SST based on the "without SST" torque specification (Click here).
Make sure SST and the wrench are connected in a straight line.
Remove SST from the generator assembly.
Check that the generator with clutch pulley rotates smoothly.
8.
INSTALL GENERATOR PULLEY CAP
Install a new generator pulley cap to the generator with clutch pulley.