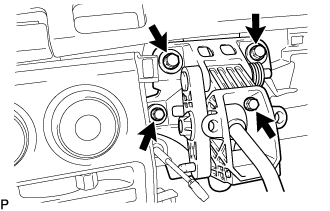
Install the shift lever assembly with the 4 bolts.
Torque:
14 N*m{
140 kgf*cm
, 10 ft.*lbf
}
2.
INSTALL TRANSMISSION CONTROL CABLE ASSEMBLY
Install the transmission control cable assembly to the shift lever.
NOTICE:
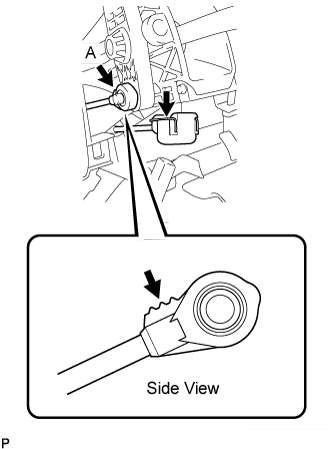
Install the transmission control cable assembly so that the end section of the select cable indicated by the arrow, as shown in the side view, (A in the illustration) faces upward.
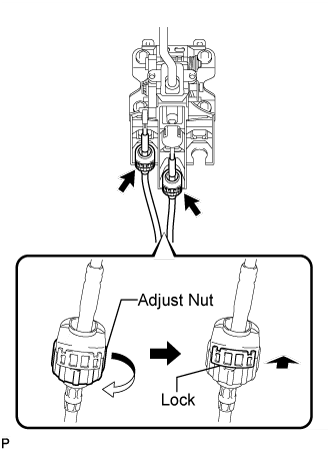
Turn the control cable assembly adjust nut clockwise 180°. While holding the adjust nut, push in the locks.
Install the control cable assembly to the shift lever.
NOTICE:
Make sure that the control cable assembly is firmly installed to the shift lever.
HINT:
When the cable is installed to the shift lever, the locks are released and the adjust nut rotates 180°. Then, the locks are engaged again.
3.
INSTALL INSTRUMENT PANEL FINISH PANEL LOWER CENTER
Attach the 8 claws to install the instrument panel finish panel lower center.
4.
INSTALL SHIFTING HOLE COVER ASSEMBLY
for Manual Transmission: Attach the 6 claws to install the shifting hole cover assembly.
for Automatic Transmission: Attach the 8 claws to install the shifting hole cover assembly.
5.
INSTALL SHIFT LEVER KNOB
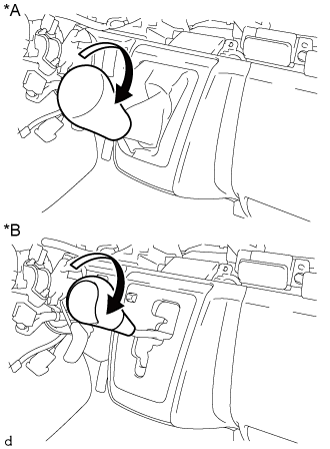
Turn the shift lever knob in the direction indicated by the arrow and install it.
Text in Illustration
*A
for Manual Transmission
*B
for Automatic Transmission
6.
INSTALL PARKING BRAKE HOLE COVER
Attach the 6 claws to install the parking brake hole cover.
7.
INSTALL INSTRUMENT PANEL UNDER COVER SUB-ASSEMBLY NO.1
Attach the 3 claws to instrument panel under cover sub-assembly No. 1.
Install the the 2 clips.
8.
INSTALL INSTRUMENT PANEL FINISH PANEL LOWER
Connect the fuel lid lock control cable and bonnet (hood) control cable assembly to the instrument panel finish lower.
Attach the 4 clips to install the instrument panel finish panel lower.
Install the 2 clips.
9.
CONNECT CABLE TO NEGATIVE BATTERY TERMINAL
10.
PERFORM INITIALIZATION
Some systems need initialization after reconnecting the cable to the negative battery terminal (Click here).