DISASSEMBLY
Removal / installation · Vehicles built from Oct 2014
| 1. DISCONNECT CABLE FROM NEGATIVE BATTERY TERMINAL |
| 2. REMOVE SLIDE DOOR WINDOW GARNISH LH |

Disengage the 4 clips and remove the slide door window garnish.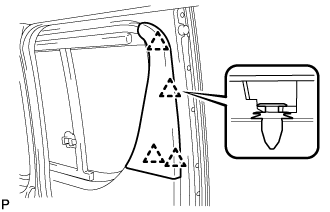

| 3. REMOVE REAR DOOR TRIM BOARD SUB-ASSEMBLY LH |
Using "TORX" socket wrench T25, remove the 2 screws.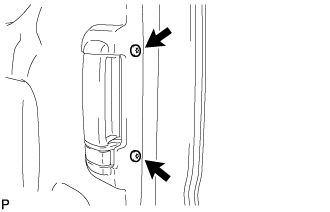
Disengage the claw and 19 clips, and remove the rear door trim board.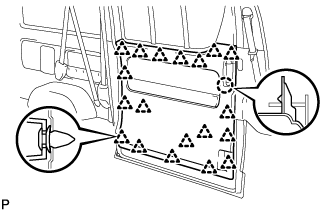
| 4. REMOVE REAR DOOR SCUFF PLATE LH |
Disengage the claw and 12 clips.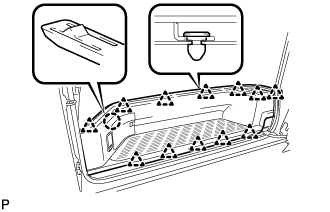
Disconnect the connector and remove the rear door scuff plate.
| 5. REMOVE SIDE STEP REAR SUPPORT LH |
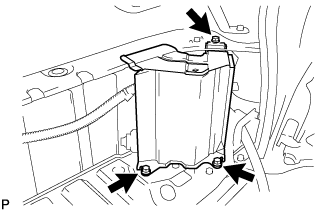 |
Remove the 3 bolts and the side step rear support.
| 6. REMOVE DOOR CONTROL RELAY ASSEMBLY |
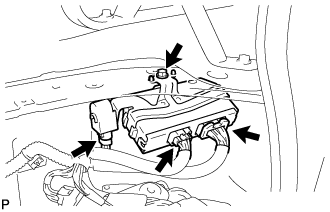 |
Disconnect the connectors.
Remove the bolt and the door control relay.
| 7. REMOVE REAR NO. 2 DOOR WIRE |
Remove the bolt.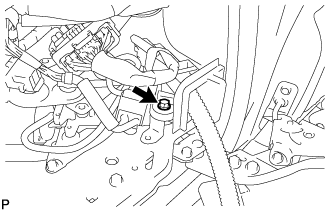
Disconnect the connector from the vehicle.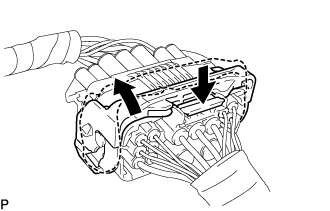
Remove the 4 bolts, and then disengage the 4 clips.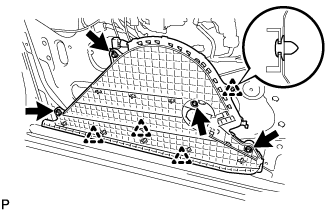
Disconnect the connector of the door, and remove the rear No. 2 door wire.
- NOTICE:
- Do not put anything on the rear No. 2 door wire after removal.
| 8. REMOVE SLIDE DOOR SERVICE HOLE COVER LH |
Disengage the clamp.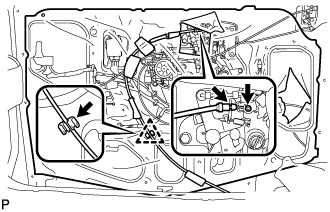
Disconnect the cable from the slide door lock remote control.
Remove the slide door service hole cover.
| 9. REMOVE REAR DOOR INSIDE HANDLE SUB-ASSEMBLY LH |
Disconnect the 2 links.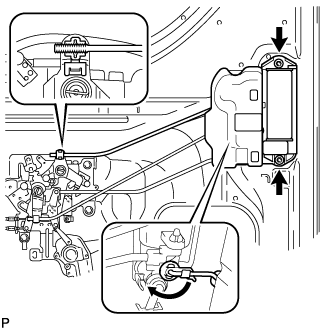
Remove the 2 bolts and the rear door inside handle.
| 10. REMOVE REAR DOOR OUTSIDE HANDLE ASSEMBLY LH |
Disconnect the 2 links.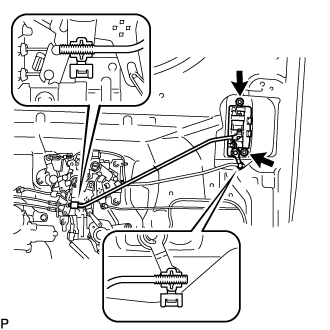
Remove the 2 bolts and the rear door outside handle.
| 11. REMOVE REAR DOOR LOCK CHILD PROTECTION COVER LH |
for Clip Type:
Remove the clip and the rear door lock child protection cover.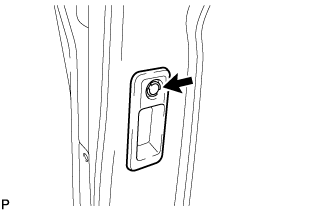
for Tape Type:
Remove the rear door lock child protection cover.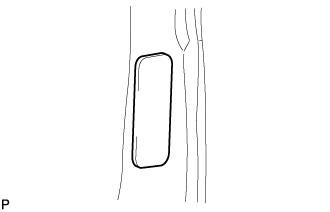
| 12. REMOVE SLIDE DOOR FRONT LOCK ASSEMBLY LH |
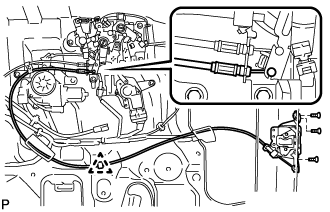 |
Disconnect the cable.
Using "TORX" socket wrench T30, remove the 3 screws and the slide door front lock.
| 13. REMOVE POWER SLIDE DOOR TOUCH SENSOR |
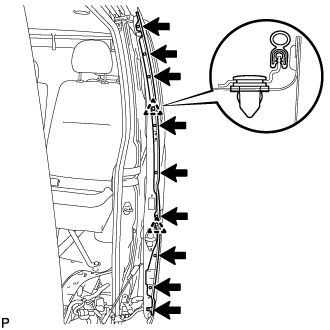 |
Disconnect the connector.
Using "TORX" socket wrench T25, remove the 6 screws.
Remove the 3 bolts.
Disengage the 2 clips and the power slide door touch sensor.
| 14. REMOVE SLIDE DOOR DOWN FEMALE STOPPER |
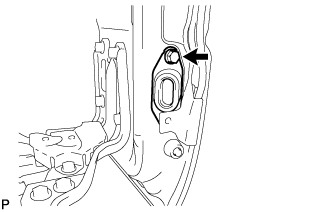 |
Remove the bolt and the slide door down female stop.
| 15. REMOVE SLIDE DOOR FULL OPEN STOP LOCK ASSEMBLY LH |
Disengage the clamp.
Remove the 2 bolts and the slide door full open stop lock assembly.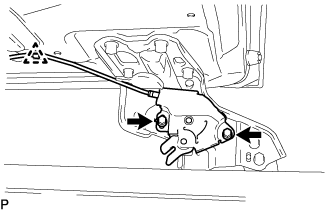
| 16. REMOVE DOOR OPENING RELAY |
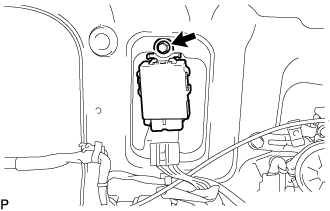 |
Disconnect the connector.
Remove the bolt and the door opening relay.
| 17. REMOVE POWER SLIDE DOOR LOCK ASSEMBLY LH |
Disconnect the cable.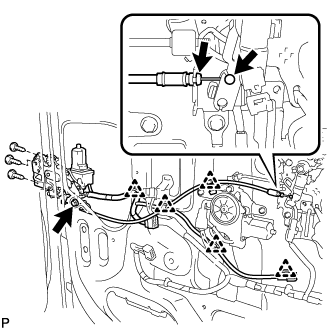
Disengage the clamps and remove the bolt.
Using "TORX" socket wrench T30, remove the 3 screws and the power slide door lock.
| 18. REMOVE SLIDE DOOR LOCK RELEASE MOTOR |
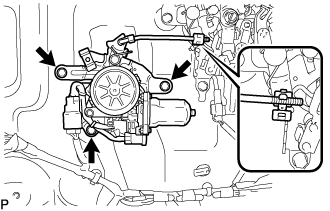 |
Disconnect the connector.
Disconnect the link.
Remove the 3 bolts and the slide door lock release motor.
| 19. REMOVE SLIDE DOOR LOCK REMOTE CONTROL ASSEMBLY LH |
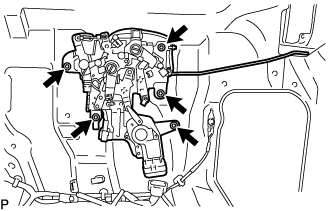 |
Disconnect the connector.
Remove the 5 bolts and the slide door lock remote control.
| 20. REMOVE SLIDE DOOR WIRE |
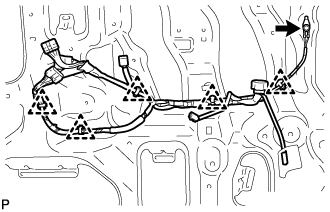 |
Remove the bolt.
Disengage the clamps, and remove the slide door wire.
| 21. REMOVE POWER SLIDE DOOR MOTOR ASSEMBLY |
Remove the 2 bolts.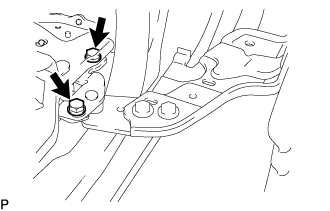
Remove the bolt and the slide door lower rail plate.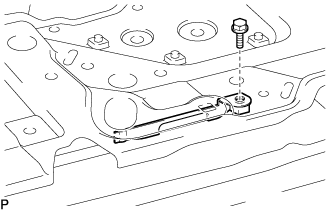
Remove the slide door lower roller assembly LH from the belt bracket of the power slide door motor assembly.
Remove the 2 grommets.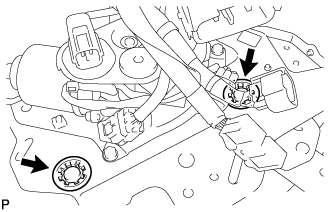
Remove the 10 bolts and the power slide door motor.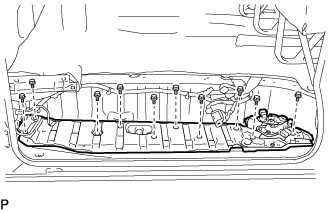
| 22. REMOVE SLIDE RAIL END MOULDING LH |
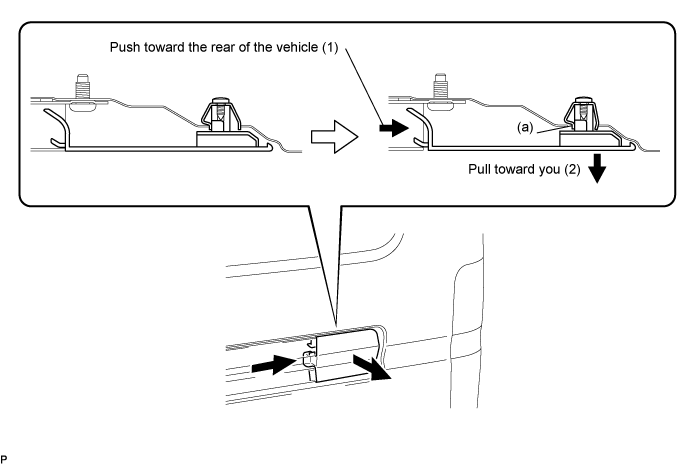
Pull the end moulding toward rear of the vehicle and pull it toward you, and disengage the clip (portion a) to remove the slide rail end moulding LH.
- NOTICE:
- If the clip (portion a) can't be removed, apply protective tape around the slide rail end moulding, disengage the clip by pushing it toward the rear of the vehicle using a screwdriver with its tip wrapped in protective tape and remove the slide rail end moulding.
| 23. REMOVE SLIDE DOOR UPPER RAIL CUSHION LH |
Remove the bolt and the slide door upper rail cushion.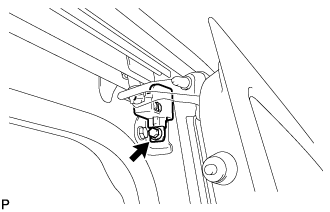
| 24. REMOVE SLIDE DOOR SUB-ASSEMBLY LH |
Remove the slide door roller assembly lower base from the cut area on the slide door rail lower.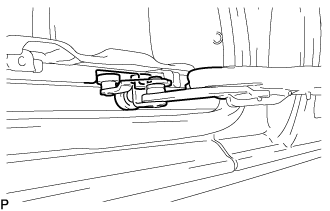
Remove the slide door roller assembly upper base from the cut area on the slide door rail upper.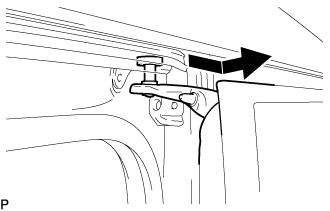
Slide the door toward the rear of the vehicle, remove the slide door hinge center base from the slide door rail center, and remove the slide door.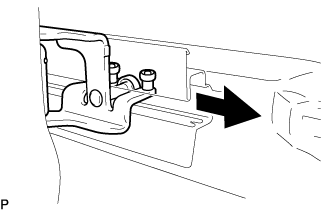
| 25. REMOVE SLIDE DOOR ROLLER ASSEMBLY LH |
Remove the 2 bolts and the slide door roller.
| 26. REMOVE SLIDE DOOR CENTER HINGE ASSEMBLY LH |
Remove the 2 bolts and the slide door center hinge.
| 27. REMOVE SLIDE DOOR LOWER ROLLER ASSEMBLY LH |
Remove the 4 bolts and the slide door lower roller.