REASSEMBLY
Removal / installation · Vehicles built from Jan 2017
Versions by build date: Oct 2014 – Dec 2016 from Jan 2017
| 1.
INSTALL DOOR CONTROL MOTOR |
 |
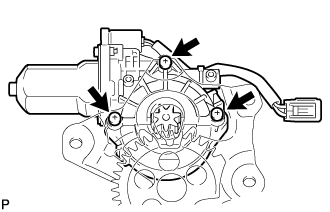
Apply MP grease to the sliding parts of the door control motor.
- Using a T25 "TORX" socket wrench, install the door control motor with the 3 "TORX" screws.
-
Torque:
- 5.4 N*m{
55 kgf*cm
, 48 in.*lbf
}
- HINT:
- A new door control motor uses self-tapping screws to thread new installation holes when the self-tapping screws are inserted.
| 2.
INSTALL BACK DOOR CLOSER MOTOR ASSEMBLY |
|
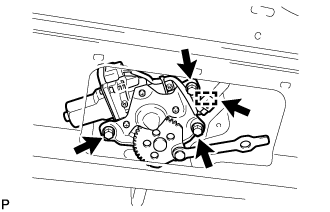
- Install the back door control motor assembly with the 3 bolts.
-
Torque:
- 7.8 N*m{
80 kgf*cm
, 69 in.*lbf
}
Connect the connectors and attach the clamp.
| 3.
INSTALL BACK DOOR LOCK ASSEMBLY |
|
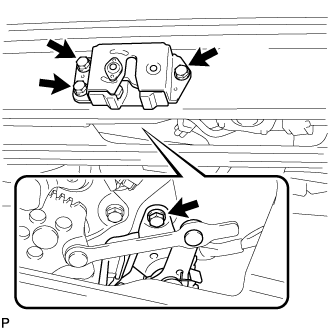
Apply MP grease to the sliding parts of the back door lock assembly.
- Install the back door lock assembly with the 4 bolts.
-
Torque:
- 8.0 N*m{
82 kgf*cm
, 71 in.*lbf
}
| 4.
INSTALL PIN HOLD CLIP |
|
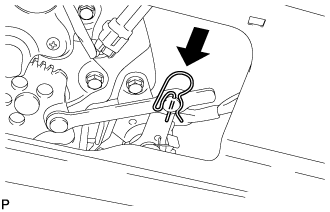
- Install the pin hold clip.
| 5.
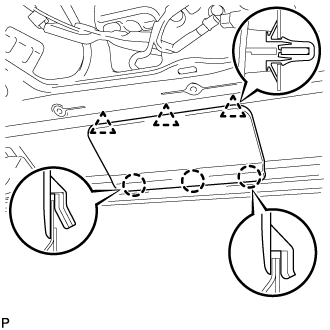
INSTALL BACK DOOR CLOSER COVER
|
|
- Attach the 3 claws and 3 clips to install the back door closer cover.
| 6.
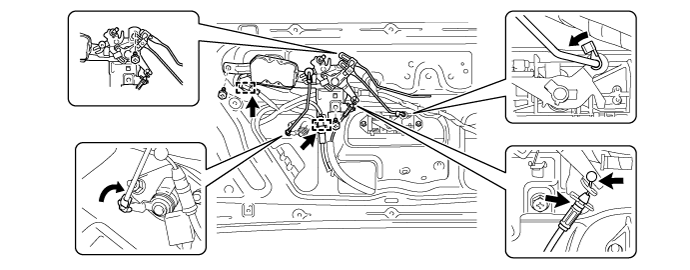
INSTALL BACK DOOR REMOTE CONTROL ASSEMBLY |
|
Install the back door remote control assembly with the 3 screws.
Connect the wire and link.
Attach the 2 clamps.

| 7.
INSTALL BACK DOOR INSIDE HANDLE ASSEMBLY
|
|
Install the back door inside handle assembly with the 3 screws.
Connect the link.
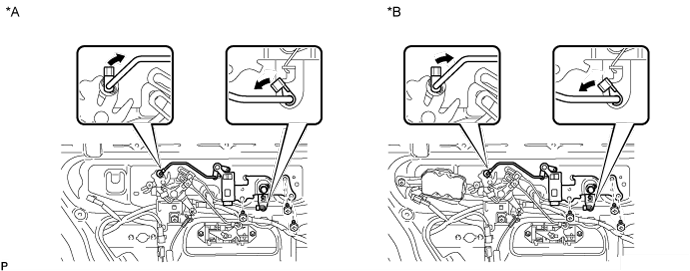
Text in Illustration
*A
|
w/o Power Door Lock
|
*B
|
w/ Power Door Lock
|
| 8.
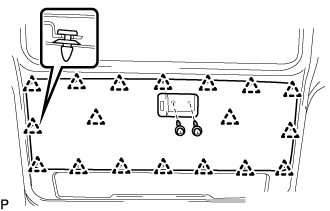
INSTALL BACK DOOR TRIM BOARD
|
|
- Attach the 18 clips to install the back door trim board.
Install the 2 screws.
| 9.
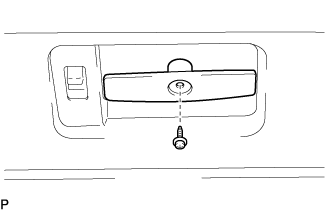
INSTALL BACK DOOR INSIDE HANDLE ASSEMBLY
|
|
- Install the back door inside handle assembly with the screw.