REMOVAL
Removal / installation · Vehicles built Oct 2014 – Dec 2014
Versions by build date: Oct 2014 – Dec 2014 Jan 2015 – Mar 2016 Apr 2016 – Dec 2016 from Jan 2017
| 1. DISCHARGE FUEL SYSTEM PRESSURE |

Check that the battery positive voltage is above 12 V.
Discharge the fuel system pressure (Click here).
Disconnect the negative terminal cable from the battery.
Pinch and pull the No. 1 fuel hose (fuel tube connector) to disconnect it from the fuel pressure pulsation damper assembly.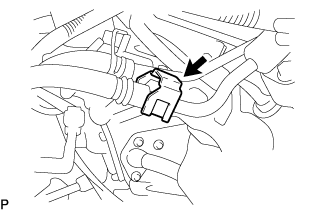

- CAUTION:
- Always read the precautions (Click here) before disconnecting the fuel tube connector (quick type).
- The fuel tube may spray fuel as a result of pressure that remains in it. Do not allow fuel to be sprayed in the engine compartment.
- Always read the precautions (Click here) before disconnecting the fuel tube connector (quick type).
Install SST (pressure gauge) as shown in the illustration.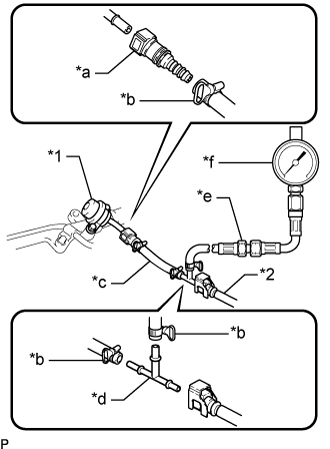
- SST
- 09268-45101
(09268-41250, 09268-41260, 09268-41280, 09268-41500, 09268-41700, 95336-08070)
Text in Illustration *1
Fuel Pressure Pulsation Damper Assembly
*2
No. 1 Fuel Hose
*a
SST (Fuel Tube Connector)
*b
SST (Hose Band)
*c
SST (Hose)
*d
SST (T-Joint)
*e
SST (Hose Joint)
*f
SST (Pressure Gauge)
Wipe off any gasoline.
Reconnect the negative terminal cable.
Operate the fuel pump.
Connect the intelligent tester to the DLC3.
Turn the ignition switch to ON.
- NOTICE:
- Do not start the engine.
Turn the intelligent tester on.
Enter the following menus: Powertrain / Engine and ECT / Active Test / Control the Fuel Pump / Speed.
Measure the fuel pressure.
- Standard fuel pressure:
- 281 to 287 kPa (2.87 to 2.93 kgf/cm2, 40.8 to 41.7 psi)
If the pressure is lower than the specification, check the fuel hoses and connections, fuel pump, fuel filter assembly and fuel pressure regulator assembly.
Start the engine.
Measure the fuel pressure.
- Standard fuel pressure:
- 281 to 287 kPa (2.87 to 2.93 kgf/cm2, 40.8 to 41.7 psi)
Stop the engine.
Check that the fuel pressure remains as specified for 5 minutes after the engine has stopped.
- Standard fuel pressure:
- 147 kPa (1.5 kgf/cm2, 21 psi) or more
After checking the fuel pressure, disconnect the negative terminal cable and carefully remove SST and the fuel tube connector to prevent gasoline from spraying.
Reconnect the No. 1 fuel hose (fuel tube connector) to the fuel pressure pulsation damper assembly.
| 2. DISCONNECT BATTERY NEGATIVE CABLE |
| 3. DRAIN ENGINE COOLANT |
- CAUTION:
- Do not remove the radiator reservoir cap sub-assembly while the engine and radiator are still hot. Pressurized, hot engine coolant and steam may be released and cause serious burns.
- HINT:
- Collect the engine coolant in a container and dispose of it according to local regulations.
Loosen the radiator drain cock plug and drain the engine coolant.
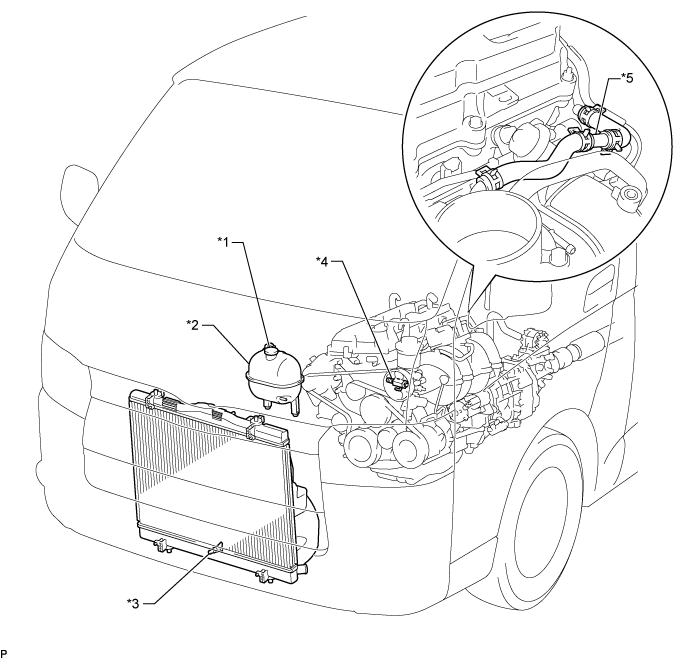
Text in Illustration *1
Radiator Reservoir Cap Sub-assembly
*2
Radiator Reservoir Assembly
*3
Radiator Drain Cock Plug
*4
Cylinder Block Water Drain Cock Plug
*5
2-Way
-
-
Remove the radiator reservoir cap sub-assembly.
Loosen the cylinder block water drain cock plug and drain the engine coolant from the engine.
| 4. REMOVE FRONT SEAT ASSEMBLY RH (for Hi-back Seat Type) |
- HINT:
- Use the same procedures described for the LH side. (Click here)
| 5. REMOVE FRONT SEAT ASSEMBLY RH (for Low-back Seat Type) |
- HINT:
- Use the same procedures described for the LH side. (Click here)
| 6. REMOVE FRONT DOOR SCUFF PLATE RH |
| 7. REMOVE ENGINE SERVICE HOLE SUB COVER SUB-ASSEMBLY |
Roll up the carpet, and remove the 5 bolts and engine service hole sub cover.
| 8. REMOVE INTAKE AIR CONNECTOR |
Slide the clamp and disconnect the No. 2 ventilation hose and vacuum hose. (A)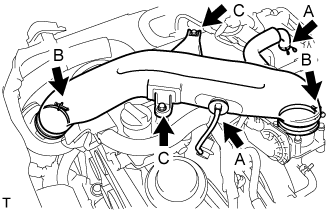
Loosen the 2 hose clamp bolts. (B)
Remove the 2 bolts and intake air connector. (C)
| 9. REMOVE THROTTLE BODY ASSEMBLY |
Disconnect the throttle motor connector. (A)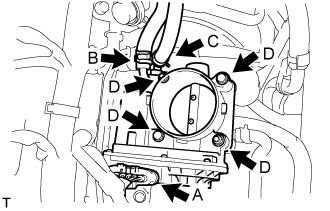
Slide the clamp and disconnect the water by-pass hose. (B)
Slide the clamp and disconnect the No. 2 water by-pass hose. (C)
for Type A:
Remove the 2 bolts and 2 nuts, and then remove the throttle body assembly. (D)
for Type B:
Remove the 4 bolts and throttle body assembly. (D)
Remove the gasket from the intake manifold.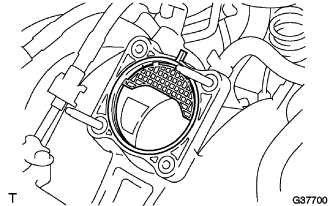
| 10. DISCONNECT FUEL HOSE |
Pull the fuel hose connector cover up to release the lock. (Click here)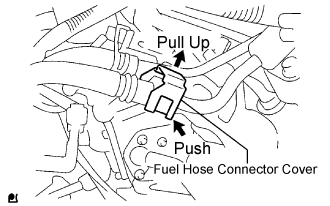
Disengage the fuel connector to disconnect the fuel hose. (Click here)
| 11. REMOVE FUEL DELIVERY PIPE SUB-ASSEMBLY |
- NOTICE:
- Be careful not to drop the injectors when removing the delivery pipe.
Disconnect the fuel hoses.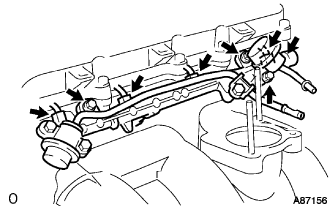
Disconnect the 4 injector connectors.
Remove the 2 bolts O-ring and fuel pulsation damper assembly.
Remove the 2 bolts and delivery pipe together with the 4 injectors.
Remove the delivery pipe spacers.
Using a screwdriver, pry out the 4 spacers from the cylinder head.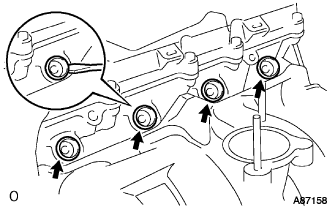
| 12. REMOVE INJECTOR ASSEMBLY |
Pull out the 4 injectors from the delivery pipe.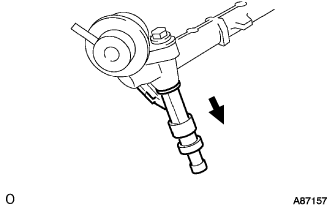
Remove the O-rings from the injectors.