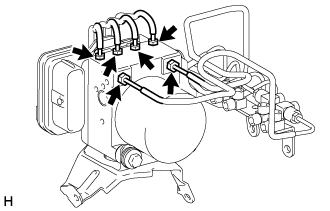
REMOVAL
Removal / installation · Vehicles built from Jan 2015
| 1. DRAIN BRAKE FLUID |
| 2. REMOVE FRONT WHEEL |
| 3. REMOVE FRONT BUMPER |

- for Standard Body:
- (Click here)
- for Wide Body:
- (Click here)
| 4. REMOVE FRONT MUDGUARD |
Remove the 3 clips and front mudguard.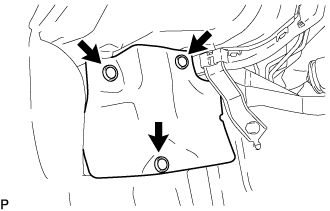

| 5. DISCONNECT FRONT NO. 1 BRAKE TUBE WAY |
Using a union nut wrench, disconnect the 6 brake tubes from the front No. 1 brake tube way.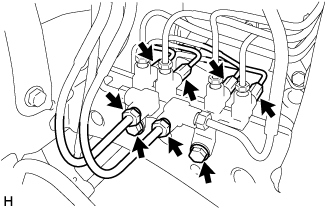
Remove the 2 bolts and disconnect the front No. 1 brake tube way from the body.
| 6. DISCONNECT FRONT NO. 1 BRAKE TUBE |
Disconnect the front No. 1 brake tube from the clamp.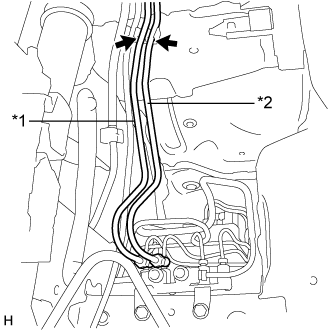
Text in Illustration *1
Front No. 1 Brake Tube
*2
Rear No. 1 Brake Tube
| 7. DISCONNECT REAR NO. 1 BRAKE TUBE |
Disconnect the rear No. 1 brake tube from the clamp.
| 8. REMOVE BRAKE ACTUATOR ASSEMBLY WITH BRACKET |
Release the lock lever and disconnect the brake actuator connector.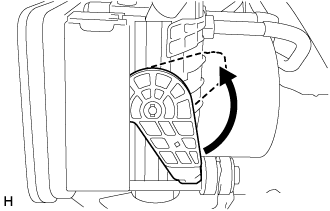
- NOTICE:
- Be careful not to allow brake fluid to enter the removed connector.
Remove the 3 bolts.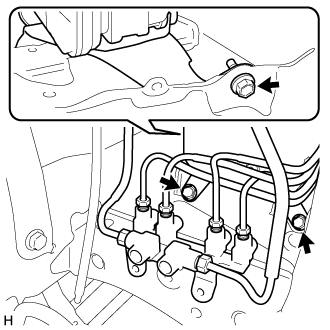
Remove the brake actuator assembly with bracket together with the front No. 1 brake tube way and brake tube.
- NOTICE:
- Do not bend or damage the brake tube.
- HINT:
- Remove these in the direction of the front of the vehicle.
| 9. REMOVE BRAKE TUBE |
Use tags or make a memo to identify the places to reconnect.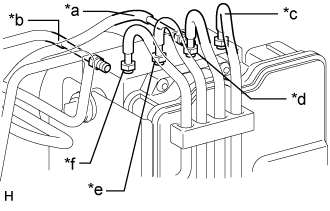
Text in Illustration *a
From Front Master Cylinder
*b
From Rear Master Cylinder
*c
To Front Wheel Cylinder Assembly RH
*d
To Front Wheel Cylinder Assembly LH
*e
To Rear Wheel Cylinder Assembly RH
*f
To Rear Wheel Cylinder Assembly LH
Using a union nut wrench, remove the 6 brake tubes and front No. 1 brake tube way.