REASSEMBLY
Removal / installation · Vehicles built from Oct 2014
| 1. INSTALL EVAPORATOR TEMPERATURE SENSOR |

Install the sensor to the evaporator as shown in the illustration.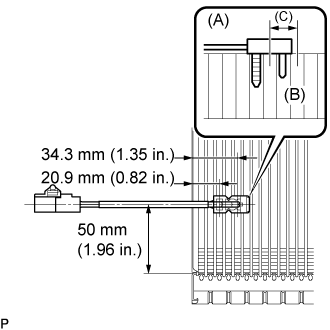

Check that the sensor sticks to the evaporator surface as shown in the illustration (A: Sensor, B: Evaporator).
- NOTICE:
- If reusing the evaporator, do not insert the sensor to the position that it had been inserted before. Insert it between position C shown in the illustration.
| 2. INSTALL COOLER EVAPORATOR SUB-ASSEMBLY NO.1 |
Sufficiently apply compressor oil (ND-OIL 8) to 2 new O-rings and the fitting surface. Install the 2 O-rings to the cooler evaporator No.1.
- Compressor oil:
- ND-OIL 8 or equivalent
Install the cooler evaporator sub-assembly.
Install the connector.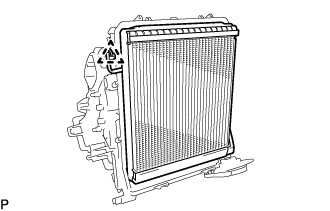
Install the heater case lower with the 2 claws and 4 screws.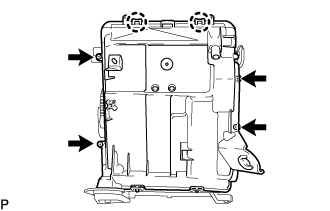
| 3. INSTALL COOLER EXPANSION VALVE |
Using a hexagon wrench 4 mm, install the cooler expansion valve with the 2 hexagon bolts.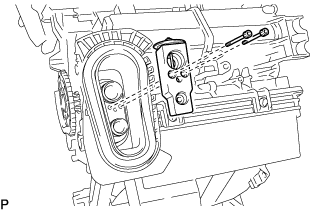
- Torque:
- 3.5 N*m{ 35 kgf*cm , 30 in.*lbf }
| 4. INSTALL HEATER BRACKET |
Install the heater bracket with the bolt.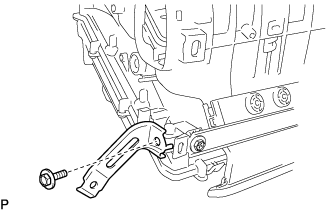
| 5. INSTALL DRAIN COOLER HOSE |
Install the drain cooler hose.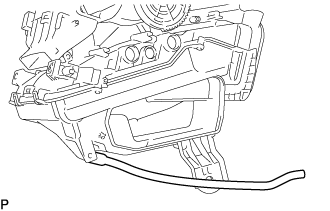
| 6. INSTALL AIR DUCT NO.3 |
Engage the 2 claws to install the air duct No.3.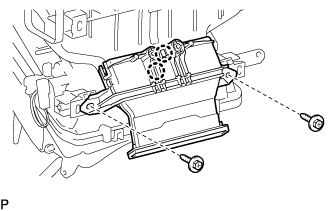
Install the 2 screws.
| 7. INSTALL HEATER RADIATOR UNIT SUB-ASSEMBLY |
Install the heater radiator unit sub-assembly with the screw.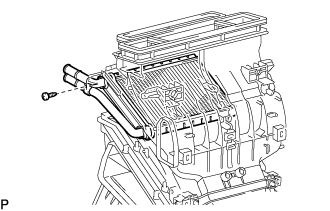
| 8. INSTALL QUICK HEATER ASSEMBLY (w/ PTC) |
Install the quick heater assembly with the 2 screws.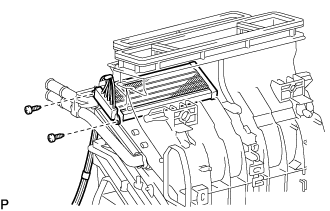
| 9. INSTALL INSTRUMENT PANEL REGS CONNECTOR ASSEMBLY CENTER |
Engage the 4 claws to install instrument panel regs connector assembly.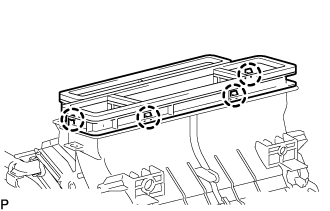
| 10. INSTALL AIR MIX CONTROL CABLE |
Fully turn the air mix control cable gear and unit gear in the direction indicated by the arrows to set them at "MAX. COOL".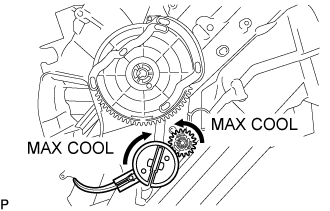
Install the air mix control cable.
| 11. INSTALL MODE CONTROL CABLE |
Fully turn the air mode control cable gear and unit link in the direction indicated by the arrows to set them at "FACE".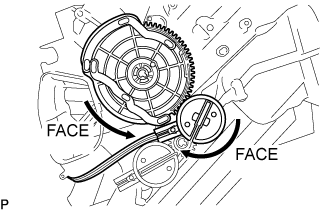
Install the mode control cable.