DISASSEMBLY
Removal / installation · Vehicles built from Oct 2014
| 1.
REMOVE PROPELLER SHAFT ASSEMBLY |
 |
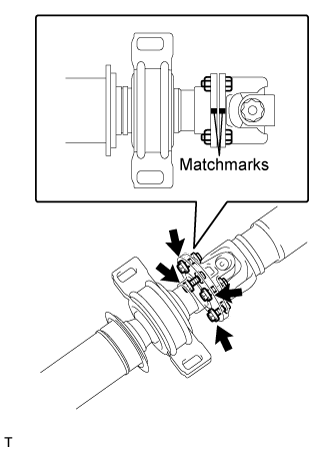
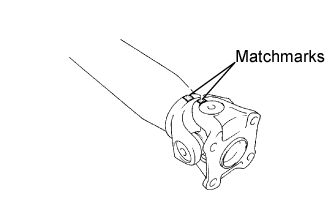
- Put matchmarks on both flanges.
Remove the 4 nuts, bolts, washers and propeller shaft assembly.
| 2.
REMOVE CENTER SUPPORT BEARING ASSEMBLY NO.1 |
|
Hold the intermediate shaft assembly in a vise between aluminium plates.
- NOTICE:
- Do not overtighten the vise.
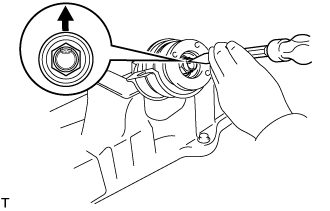
- Using a chisel and a hammer, release the staked part of the nut.
- NOTICE:
- Release the staked part of the nut completely, otherwise the threads of the intermediate shaft may be damaged.
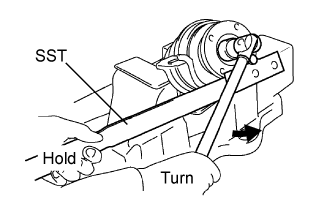
- Using SST to hold the universal joint flange, remove the nut and intermediate shaft washer.
- SST
- 09330-00021
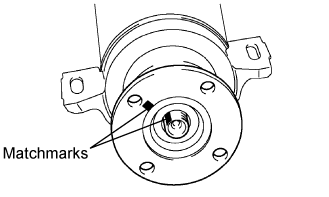
- Put matchmarks on the intermediate shaft assembly and universal joint flange.
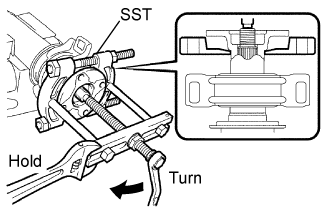
- Using SST, remove the universal joint flange from the intermediate shaft assembly.
- SST
- 09950-00020
09950-00030
- NOTICE:
- Apply grease to the threads and tip of the SST center bolt before use.
Remove the center support bearing assembly No.1 and washer from the intermediate shaft assembly.
| 3.
INSPECT PROPELLER SHAFT ASSEMBLY |
|
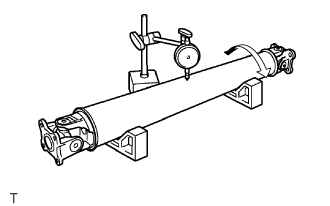
- Using a dial indicator, inspect the runout of the propeller shaft.
- Maximum runout:
- 0.3 mm (0.0118 in.)
- HINT:
- The dial indicator must be set at a right angle to the center of the propeller shaft.
If the shaft runout exceeds the maximum, replace the propeller shaft.
| 4.
INSPECT INTERMEDIATE SHAFT |
|
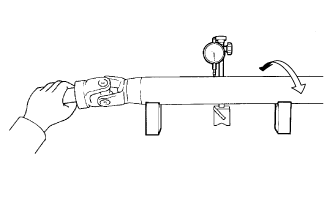
- Using a dial indicator, inspect the runout of the intermediate shaft.
- Maximum runout:
- 0.3 mm (0.0118 in.)
- HINT:
- The dial indicator must be set at a right angle to the center of the propeller shaft.
If the shaft runout exceeds the maximum, replace the propeller shaft.
| 5.
REMOVE UNIVERSAL JOINT SPIDER ASSEMBLY |
|
- Put matchmarks on the flange yoke and propeller shaft assembly.
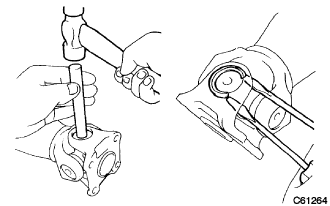
- Using a brass bar and a hammer, slightly tap in the spider bearing outer races.
Using 2 screwdrivers, remove the 4 snap rings from the grooves.
Hold the propeller shaft assembly in a vise between aluminium plates.
- NOTICE:
- Do not overtighten the vise.
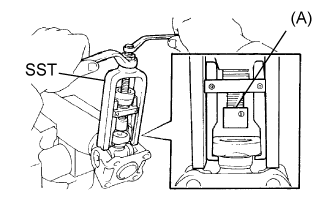
- Using SST, push out the spider bearing from the propeller shaft.
- SST
- 09332-25010
- NOTICE:
- Sufficiently raise the part indicated by (A) so that it does not come into contact with the spider bearing.
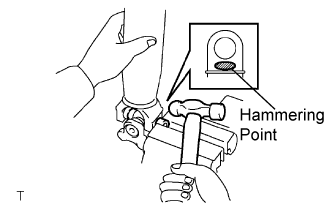
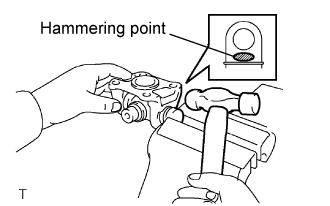
- Clamp the spider bearing outer race in a vise between aluminium plates and tap off the propeller shaft with a hammer.
- NOTICE:
- Do not overtighten the vise.
- Do not tap the shaft.
- HINT:
- Remove the spider bearing on the opposite side using the same procedure.
Install the 2 removed spider bearing outer races to the spider.
Hold the flange yoke in a vise between aluminium plates.
- NOTICE:
- Do not overtighten the vise.
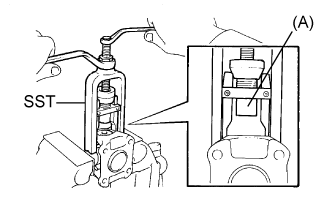
- Using SST, push out the spider bearing from the yoke.
- SST
- 09332-25010
- HINT:
- Sufficiently raise the part indicated by (A) so that it does not come into contact with the spider bearing.
- Clamp the spider bearing outer race in a vise between aluminium plates and tap off the propeller shaft with a hammer.
- NOTICE:
- Do not overtighten the vise.
Remove the spider.
- NOTICE:
- Do not damage the flange yoke.
- HINT:
- Remove the spider bearing on the opposite side using the same procedure.