Removal / installation · Vehicles built Oct 2014 – Dec 2016
Versions by build date: Oct 2014 – Dec 2016from Jan 2017
1.
CHECK FOR COMPENSATION CODE
NOTICE:
When the ECM is replaced, all of the existing injector compensation codes must be input into the new ECM and the learning value of the supply pump assembly must be input.
Using the GTS, check that the ID codes registered in the injector assemblies installed on each cylinder match the ECM (Click here). If the codes do not match, correct the registered data and recheck the problem symptom by following the steps below.
Using SST, manually correct the registered ID code (Click here).
Check if the same symptom occurs when the vehicle was brought in.
HINT:
If the symptom does not occur, the problem may be caused by improper registration of an ID code.
2.
REMOVE BATTERY SERVICE HOLE COVER (w/ Sub-battery)
3.
DISCONNECT CABLE FROM NEGATIVE BATTERY TERMINAL
4.
REMOVE FRONT DOOR SCUFF PLATE RH
5.
REMOVE FRONT SEAT ASSEMBLY RH (for Hi-back Seat Type)
HINT:
Use the same procedure described for the LH side (Click here).
6.
REMOVE FRONT SEAT ASSEMBLY RH (for Low-back Seat Type)
HINT:
Use the same procedure described for the LH side (Click here).
7.
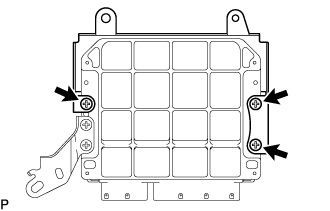
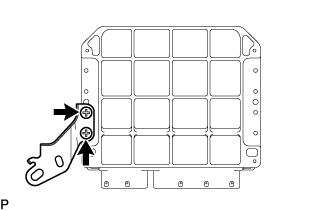
REMOVE ECM
Fold back the floor carpet.
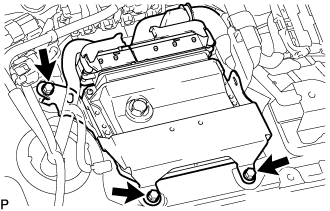
Remove the 3 bolts from the ECM.
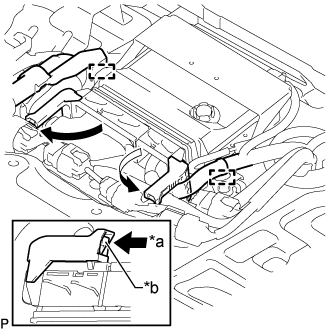
Detach the 2 wire harness clamps from the No. 1 ECM bracket and No. 2 ECM bracket.
Raise the 2 levers while pushing the locks on the 2 levers, disconnect the 2 ECM connectors and remove the ECM.
Text in Illustration
*a
Push
*b
Lock
NOTICE:
After disconnecting a ECM connector, make sure that dirt, water and other foreign matter does not contact the ECM connector.