INSTALLATION
Removal / installation · Vehicles built from Jan 2015
Versions by build date: Oct 2014 – Dec 2014 from Jan 2015
| 1. INSTALL CAMSHAFT TIMING OIL CONTROL VALVE ASSEMBLY (w/o Dual VVT-i) |

Apply a light coat of engine oil to on O-ring of the camshaft timing oil control valve assembly.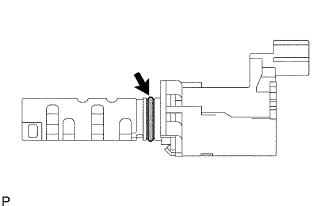

Install the camshaft timing oil control valve assembly with the bolt.
- Torque:
- 9.0 N*m{ 92 kgf*cm , 80 in.*lbf }
- NOTICE:
- When reusing the camshaft timing oil control valve assembly, inspect the O-ring.
- Make sure that the O-ring is not cracked or jammed when installing the camshaft timing oil control valve assembly.
- When reusing the camshaft timing oil control valve assembly, inspect the O-ring.
Connect the camshaft timing oil control valve connector.
| 2. INSTALL CAMSHAFT TIMING OIL CONTROL VALVE ASSEMBLY (w/ Dual VVT-i) |
for Intake Side: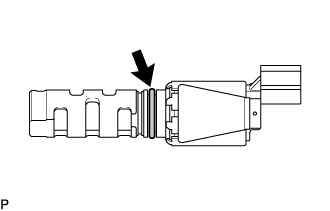
Apply a light coat of engine oil to the a new O-ring, and install it to the camshaft timing oil switching valve assembly.
- NOTICE:
- Do not damage the O-ring when installing.
- HINT:
- An O-ring is already installed in a new camshaft timing oil switching valve assembly. So, the O-ring only needs to be coated with engine oil when the assembly is replaced with a new one.
Install the camshaft timing oil switching valve assembly to the cylinder head sub-assembly with the bolt.
- Torque:
- 9.0 N*m{ 92 kgf*cm , 80 in.*lbf }
- NOTICE:
- Replace with a new part if it is dropped or if it receives a strong impact.
- Make sure that the O-ring is not cracked or jammed when installing.
- Replace with a new part if it is dropped or if it receives a strong impact.
Connect the camshaft timing oil switching valve connector.
for Exhaust Side:
Apply a light coat of engine oil to the a new O-ring, and install it to the camshaft timing oil switching valve assembly.
- NOTICE:
- Do not damage the O-ring when installing.
- HINT:
- An O-ring is already installed in a new camshaft timing oil switching valve assembly. So, the O-ring only needs to be coated with engine oil when the assembly is replaced with a new one.
Install the camshaft timing oil switching valve assembly to the cylinder head cover sub-assembly with the bolt.
- Torque:
- 9.0 N*m{ 92 kgf*cm , 80 in.*lbf }
- NOTICE:
- Replace with a new part if it is dropped or if it receives a strong impact.
- Make sure that the O-ring is not cracked or jammed when installing.
- Replace with a new part if it is dropped or if it receives a strong impact.
Connect the camshaft timing oil switching valve connector.
| 3. CONNECT VANE PUMP ASSEMBLY |
Connect the vane pump assembly with the 2 bolts.
- Torque:
- 21 N*m{ 214 kgf*cm , 15 ft.*lbf }
Connect the oil pressure switch connector.
| 4. INSTALL INTAKE AIR CONNECTOR (w/ Dual VVT-i) |
| 5. INSTALL FAN AND GENERATOR V BELT |