REMOVAL
Removal / installation · Vehicles built Oct 2014 – Mar 2016
Versions by build date: Oct 2014 – Mar 2016 from Apr 2016
| 1.
REMOVE NO. 1 ENGINE UNDER COVER (for Cold Area Specification Vehicles)
|
 |
Remove the 4 bolts and No. 1 engine under cover.
| 2.
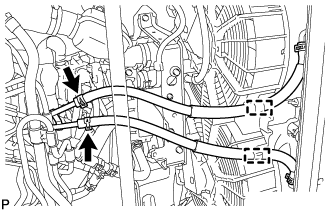
DISCONNECT OIL COOLER TUBE (for Automatic Transmission)
|
|
- Detach the 2 oil cooler hose clamps.
Slide the 2 hose clamps and disconnect the 2 oil cooler hoses from the 2 oil cooler tubes.
| 3.
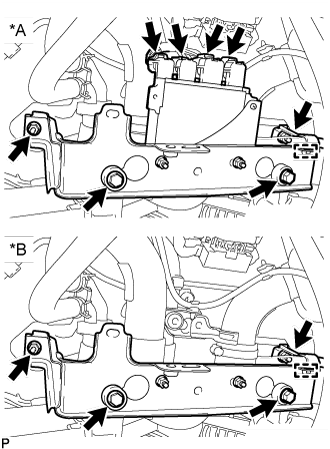
REMOVE FAN BRACKET SUB-ASSEMBLY
|
|
- w/ DPF:
Disconnect the 4 connectors from the injector driver.
Text in Illustration
*A
|
w/ DPF
|
*B
|
w/o DPF
|
Detach the clamp.
Remove the 2 bolts, 2 nuts and fan bracket sub-assembly.
| 4.
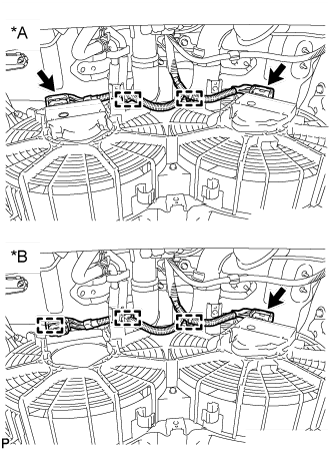
REMOVE FAN SHROUD
|
|
- w/ Air Conditioning System:
Detach the 2 clamps and disconnect the 2 connectors.
Text in Illustration
*A
|
w/ Air Conditioning System
|
*B
|
w/o Air Conditioning System
|
w/o Air Conditioning System:
Detach the 3 clamps and disconnect the connector.
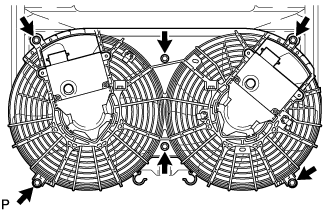
- Remove the 6 bolts and fan shroud from the underside of the vehicle.
| 5.
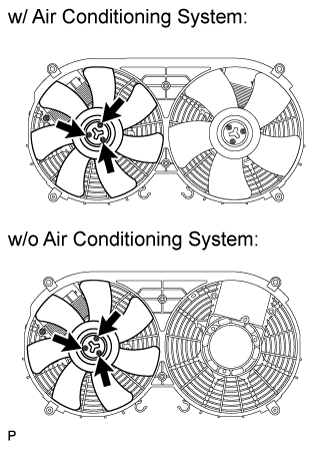
REMOVE NO. 1 FAN |
|
- Remove the 3 screws and No. 1 fan.
| 6.
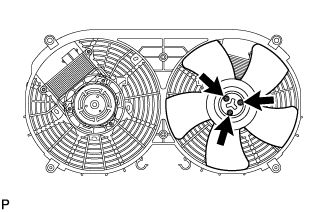
REMOVE NO. 2 FAN (w/ Air Conditioning System) |
|
- Remove the 3 screws and No. 2 fan.
| 7.
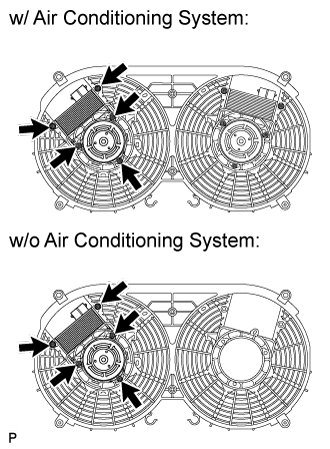
REMOVE NO. 1 COOLING FAN MOTOR |
|
Remove the 5 screws and No. 1 cooling fan motor.
| 8.
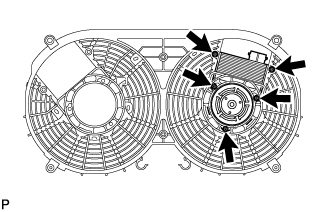
REMOVE NO. 2 COOLING FAN MOTOR (w/ Air Conditioning System) |
|
Remove the 5 screws and No. 2 cooling fan motor.