DISASSEMBLY
Removal / installation · Vehicles built Oct 2014 – Dec 2014
| 1. REMOVE DRAIN PLUG |

Remove the drain plug and gasket.
| 2. REMOVE BREATHER HOSE SUB-ASSEMBLY |
Remove the bolt and clamp.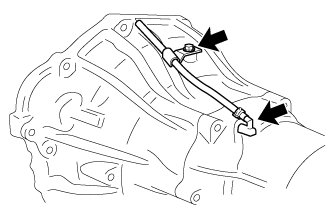

Remove the breather hose sub-assembly.
Remove the No. 1 breather plug and No. 2 breather plug from the breather hose.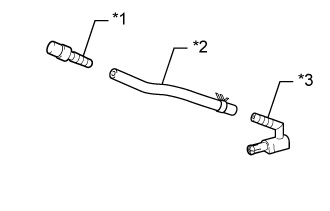
Text in Illustration *1
No. 1 Breather Plug
*2
Breather Hose
*3
No. 2 Breather Plug
| 3. REMOVE TRANSMISSION CONTROL SHAFT LEVER LH |
Remove the nut, spring washer and transmission control shaft lever LH.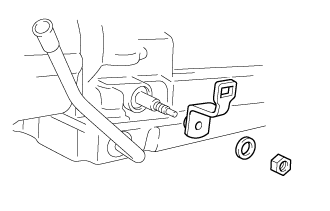
| 4. REMOVE WIRE HARNESS CLAMP BRACKET |
Remove the bolt and wire harness clamp bracket.
| 5. REMOVE PARK/NEUTRAL POSITION SWITCH ASSEMBLY |
Using a screwdriver, bend the tabs of the lock washer.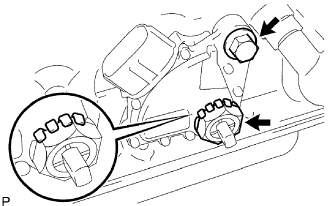
Remove the nut and lock washer.
Remove the bolt and park/neutral position switch assembly.
| 6. REMOVE ATF TEMPERATURE SENSOR |
Remove the bolt and ATF temperature sensor.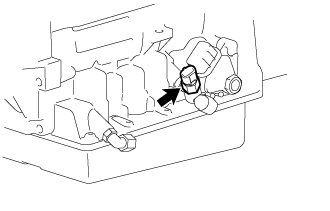
| 7. REMOVE OIL COOLER TUBE UNION |
Remove the 2 oil cooler tube unions.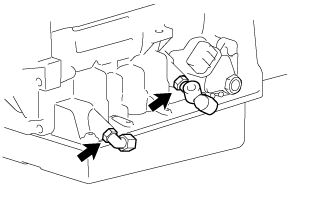
Remove the O-rings from the oil cooler tube unions.
| 8. REMOVE SPEED SENSOR |
Remove the bolt and speed sensor NC0.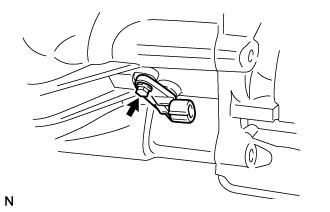
Remove the O-ring from the speed sensor NC0.
Remove the bolt and speed sensor SP2.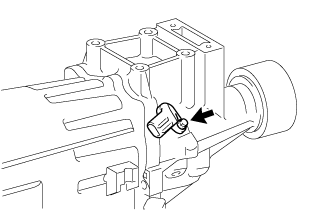
Remove the O-ring from the speed sensor SP2.
| 9. REMOVE EXTENSION HOUSING REAR OIL SEAL |
Using SST, remove the extension housing rear oil seal together with the dust seal and retainer.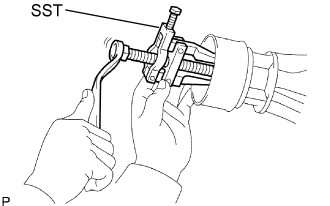
- SST
- 09308-10010
- NOTICE:
- Be careful not to damage the extension housing sub-assembly.
| 10. REMOVE OIL PUMP ASSEMBLY |
Remove the 7 bolts.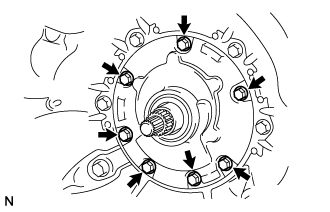
Using SST, remove the oil pump assembly.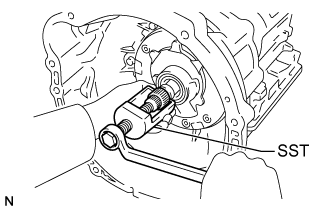
- SST
- 09610-20012
Grasp the front pump stator shaft assembly and pull the oil pump assembly from the transmission case.
- NOTICE:
- Do not damage the stator shaft assembly bushing surface.
Remove the bearing from the oil pump assembly.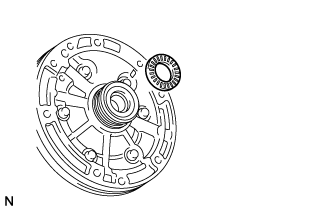
Remove the O-ring from the oil pump assembly.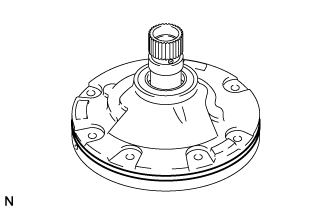
| 11. REMOVE AUTOMATIC TRANSMISSION HOUSING |
Remove the 6 bolts and automatic transmission housing.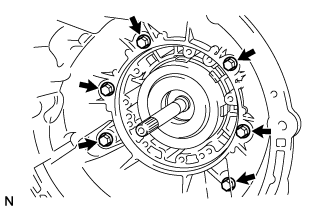
Remove the O-ring from the overdrive case sub-assembly.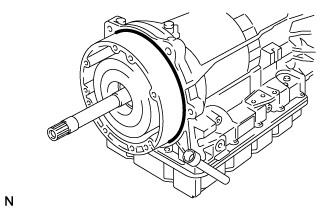
| 12. REMOVE EXTENSION HOUSING SUB-ASSEMBLY |
Remove the 6 bolts.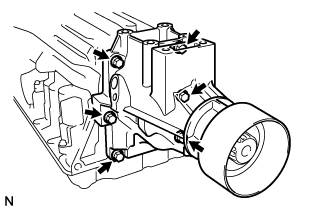
Remove the extension housing sub-assembly and gasket.
| 13. REMOVE EXTENSION HOUSING BUSH APPLY TUBE |
Remove the bush apply tube gasket and extension housing bush apply tube from the extension housing sub-assembly.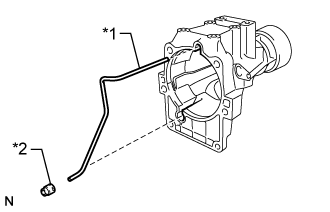
Text in Illustration *1
Extension Housing Bush Apply Tube
*2
Bush Apply Tube Gasket
| 14. REMOVE EXTENSION HOUSING DUST DEFLECTOR |
Hold the extension housing sub-assembly in a vise between aluminum plates.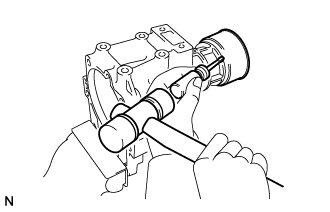
- NOTICE:
- Do not overtighten the vise.
Using a screwdriver and a hammer, remove the extension housing dust deflector.
| 15. INSPECT EXTENSION HOUSING SUB-ASSEMBLY |
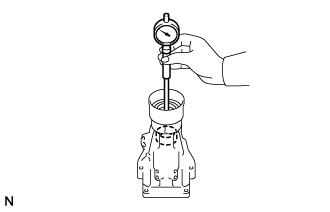 |
Using a cylinder gauge, measure the inside diameter of the extension housing sub-assembly bush.
- Maximum inside diameter:
- 38.09 mm (1.50 in.)
| 16. REMOVE SENSOR ROTOR |
Using a snap ring expander, remove the rear side snap ring.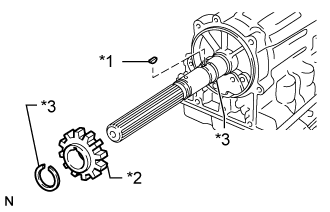
Text in Illustration *1
Key
*2
Sensor Rotor
*3
Snap Ring
Remove the sensor rotor and key.
Using a snap ring expander, remove the front side snap ring.
| 17. REMOVE TRANSMISSION CASE REAR COVER |
Remove the 3 screws.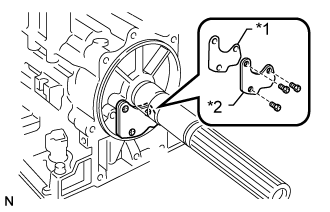
Text in Illustration *1
Gasket
*2
Transmission Case Rear Cover
Remove the transmission case rear cover and gasket.
| 18. FIX TRANSMISSION CASE |
Install the transmission case to an overhaul attachment.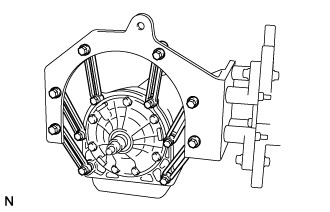
| 19. REMOVE AUTOMATIC TRANSMISSION OIL PAN SUB-ASSEMBLY |
- NOTICE:
- Do not turn the transmission over as foreign matter in the bottom of the automatic transmission oil pan sub-assembly will contaminate the transmission valve body assembly.
Remove the 14 bolts.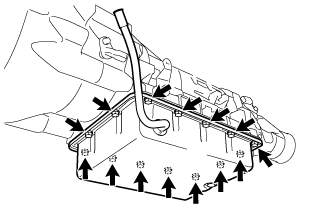
Remove the automatic transmission oil pan sub-assembly and automatic transmission oil pan gasket from the transmission case.
Remove the 2 transmission oil cleaner magnets from the automatic transmission oil pan sub-assembly.
| 20. INSPECT AUTOMATIC TRANSMISSION OIL PAN SUB-ASSEMBLY |
Remove the 2 automatic transmission oil cleaner magnets and use them to collect steel particles. Carefully look at the foreign matter and particles in the automatic transmission oil pan sub-assembly and on the 2 automatic transmission oil cleaner magnets to determine the type of wear you will find in the automatic transmission assembly.
Steel (magnetic): bearing, gear and clutch plate wear
Brass (non-magnetic): bush wear
| 21. REMOVE VALVE BODY OIL STRAINER ASSEMBLY |
Remove the 3 bolts and valve body oil strainer assembly.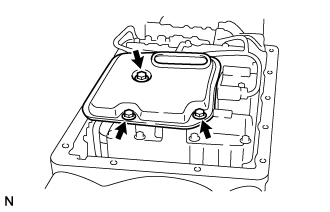
- NOTICE:
- Be careful as some fluid will leak out of the oil strainer.
Remove the 3 gaskets from the valve body oil strainer assembly.
| 22. REMOVE OVERDRIVE BRAKE TUBE |
Pry out both ends of the overdrive brake tube with a large screwdriver and remove the overdrive brake tube.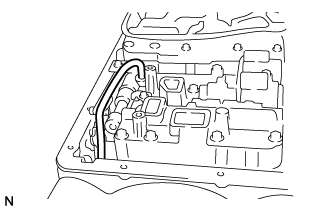
- NOTICE:
- Be careful not to damage the input shaft sub-assembly.
- HINT:
- Tape the screwdriver tip before use.
| 23. REMOVE TRANSMISSION WIRE |
Disconnect the 4 shift solenoid valve connectors.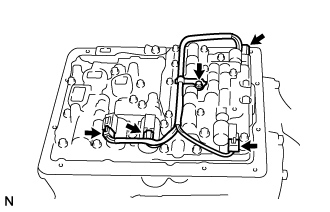
Remove the bolt and clamp.
Remove the bolt.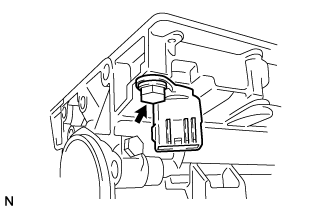
Pull out the transmission wire from the transmission case to remove it.
Remove the O-ring from the transmission wire.
| 24. REMOVE TRANSMISSION VALVE BODY ASSEMBLY |
Remove the 17 bolts and transmission valve body assembly.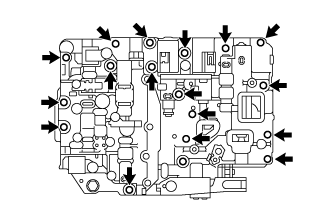
| 25. REMOVE ACCUMULATOR PISTON AND SPRING |
Position a cloth to catch each piston.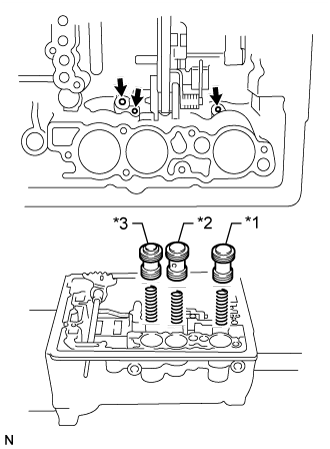
Text in Illustration *1
C-1 Accumulator Piston
*2
C-2 Accumulator Piston
*3
B-2 Accumulator Piston
Apply compressed air to the oil holes shown in the illustration and remove the 3 accumulator pistons and 3 springs.
Remove the 2 O-rings from each piston.
| 26. REMOVE PARKING LOCK PAWL BRACKET |
Remove the 2 bolts, 2 washers and parking lock pawl bracket.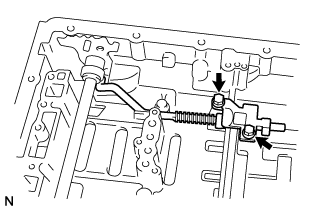
| 27. REMOVE PARKING LOCK ROD SUB-ASSEMBLY |
Disconnect the parking lock rod sub-assembly from the manual valve lever and remove it.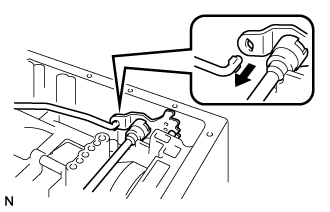
| 28. REMOVE PARKING LOCK PAWL SHAFT |
Pull out the parking lock pawl shaft from the front side, then remove the parking lock pawl and spring.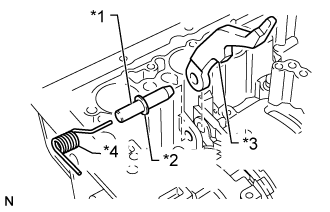
Text in Illustration *1
Parking Lock Pawl Shaft
*2
E-ring
*3
Parking Lock Pawl
*4
Spring
Remove the E-ring from the parking lock pawl shaft.
| 29. REMOVE MANUAL VALVE LEVER SHAFT |
Using a hammer and screwdriver, cut off the spacer and remove it from the manual valve lever shaft.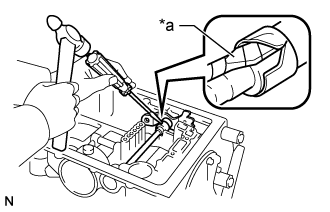
Text in Illustration *a
Protective Tape
- NOTICE:
- Be careful not to damage the manual valve lever shaft.
- HINT:
- Wrap the tip of the screwdriver with protective tape.
Using a pin punch and hammer, tap out the spring pin.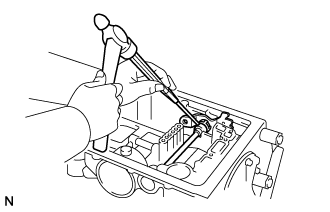
- HINT:
- Slowly tap out the spring pin so that it does not fall into the transmission case.
Pull out the manual valve lever shaft through the case to remove it, and then remove the manual valve lever.
| 30. REMOVE MANUAL VALVE LEVER SHAFT OIL SEAL |
Using a screwdriver, pry out the 2 manual valve lever shaft oil seals.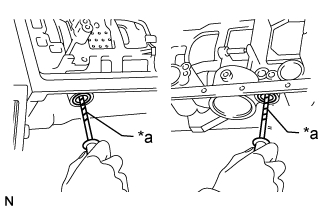
Text in Illustration *a
Protective Tape
- NOTICE:
- Be careful not to damage the transmission case.
- HINT:
- Wrap the tip of the screwdriver with protective tape.
| 31. INSPECT INSTALLATION DISTANCE OF OVERDRIVE DIRECT CLUTCH |
Place SST on the transmission case.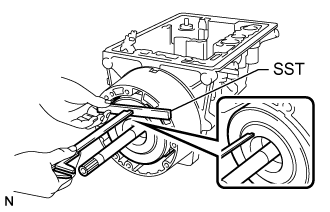
- SST
- 09350-20015
(09370-12010)
Using a vernier caliper, measure the distance between the top of the overdrive direct clutch drum sub-assembly and SST.
- HINT:
- Make a note of the measurement for reference during reassembly.
| 32. REMOVE OVERDRIVE PLANETARY GEAR ASSEMBLY WITH OVERDRIVE DIRECT CLUTCH DRUM SUB-ASSEMBLY |
Remove the overdrive planetary gear assembly together with the overdrive direct clutch drum sub-assembly from the transmission case.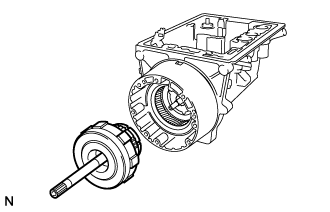
Remove the race and thrust washer.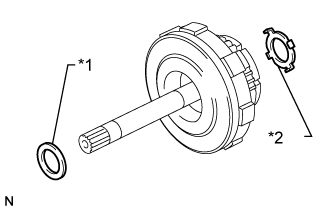
Text in Illustration *1
Race
*2
Thrust Washer
| 33. INSPECT OVERDRIVE ONE-WAY CLUTCH |
Hold the overdrive direct clutch drum sub-assembly and turn the overdrive planetary gear assembly. Check that the overdrive planetary gear assembly can be turned clockwise but cannot be turned counterclockwise.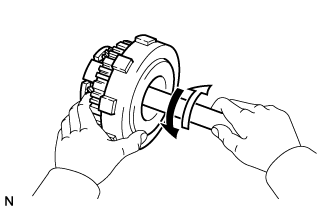
Text in Illustration 
Lock

Free
| 34. REMOVE OVERDRIVE DIRECT CLUTCH DRUM |
Remove the overdrive direct clutch drum from the overdrive planetary gear assembly.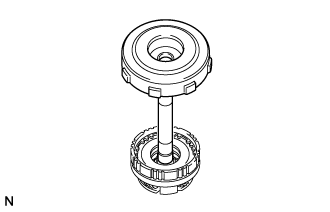
| 35. INSPECT OVERDRIVE DIRECT CLUTCH PISTON |
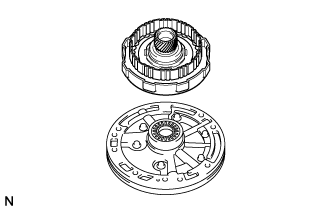 |
Place the overdrive direct clutch drum sub-assembly onto the oil pump assembly.
Using a dial indicator, measure the overdrive direct clutch piston sub-assembly stroke by applying and releasing compressed air (392 kPa (4.0 kgf/cm2, 57 psi)) as shown in the illustration.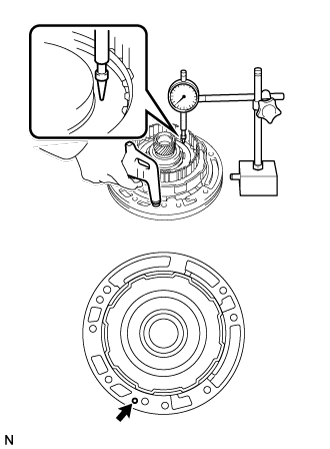
- Standard piston stroke:
- 1.74 to 2.44 mm (0.0686 to 0.0960 in.)
Remove the overdrive direct clutch drum sub-assembly from the oil pump assembly.
| 36. REMOVE OVERDRIVE BRAKE HUB |
Using a screwdriver, remove the snap ring.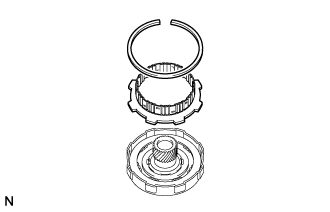
- NOTICE:
- Be careful not to damage the overdrive direct clutch drum.
- HINT:
- Wrap the tip of the screwdriver with protective tape.
Remove the overdrive brake hub.
| 37. REMOVE OVERDRIVE CLUTCH DISC SET |
Remove the overdrive clutch disc.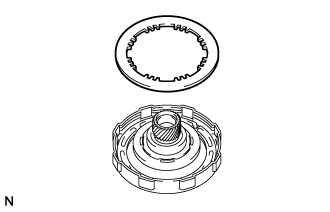
Using a screwdriver, remove the snap ring.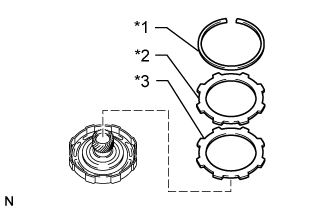
Text in Illustration *1
Snap Ring
*2
Flange
*3
Cushion Plate
- NOTICE:
- Be careful not to damage the overdrive direct clutch drum sub-assembly.
- HINT:
- Wrap the tip of the screwdriver with protective tape.
Remove the flange and cushion plate.
| 38. INSPECT OVERDRIVE CLUTCH DISC |
Check whether the sliding surfaces of the overdrive clutch disc and overdrive clutch flange are worn or burnt.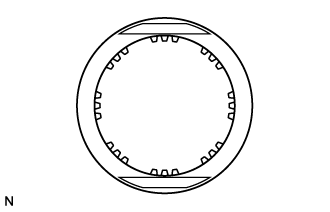
If necessary, replace the disc and flange.- NOTICE:
- If the lining of the overdrive clutch disc is peeled off or discolored, or if any part of the printed numbers are damaged, replace the disc.
- Before assembling a new disc, soak it in ATF for at least 15 minutes.
- If the lining of the overdrive clutch disc is peeled off or discolored, or if any part of the printed numbers are damaged, replace the disc.
| 39. REMOVE OVERDRIVE CLUTCH RETURN SPRING SUB-ASSEMBLY |
Place SST on the overdrive clutch return spring sub-assembly and compress the overdrive clutch return spring sub-assembly with a press.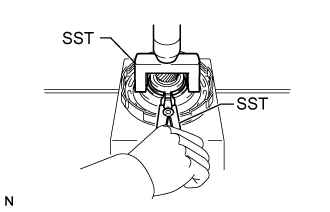
- SST
- 09350-20015
(09369-20040)
Using SST, remove the snap ring.
- SST
- 09350-30020
(09350-07070)
- NOTICE:
- Do not expand the snap ring excessively.
Remove the overdrive clutch return spring sub-assembly.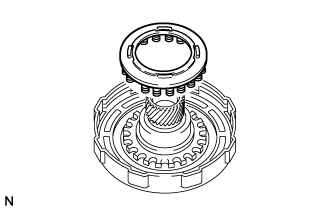
| 40. REMOVE OVERDRIVE DIRECT CLUTCH PISTON |
Place the overdrive direct clutch drum onto the oil pump assembly.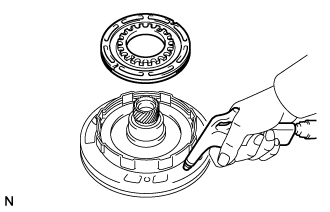
Hold the overdrive direct clutch piston and apply compressed air to the oil pump assembly to remove the overdrive direct clutch piston.
Remove the 2 O-rings from the overdrive direct clutch piston.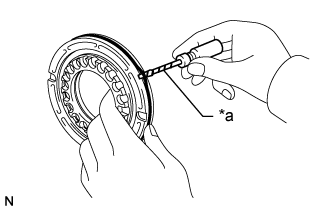
Text in Illustration *a
Protective Tape
- NOTICE:
- Be careful not to damage the overdrive direct clutch piston.
- HINT:
- Wrap the tip of the screwdriver with protective tape.
| 41. INSPECT OVERDRIVE DIRECT CLUTCH PISTON SUB-ASSEMBLY |
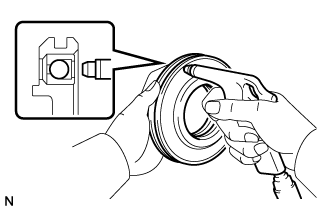 |
Check that the check ball is free by shaking the overdrive direct clutch piston.
Check that the valve does not have leaks by applying low-pressure compressed air.
| 42. INSPECT OVERDRIVE DIRECT CLUTCH DRUM SUB-ASSEMBLY |
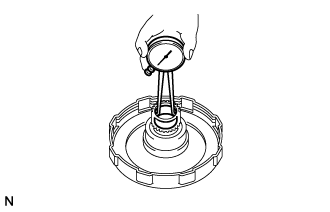 |
Using a caliper gauge, measure the inside diameter of the overdrive direct clutch drum sub-assembly bush.
- Maximum inside diameter:
- 23.14 mm (0.911 in.)
| 43. REMOVE OVERDRIVE ONE-WAY CLUTCH |
Using a screwdriver, remove the snap ring.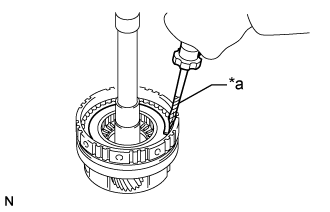
Text in Illustration *a
Protective Tape
- NOTICE:
- Be careful not to damage the overdrive planetary gear assembly.
- HINT:
- Wrap the tip of the screwdriver with protective tape.
Remove the 2 thrust washers, overdrive one-way clutch and bearing.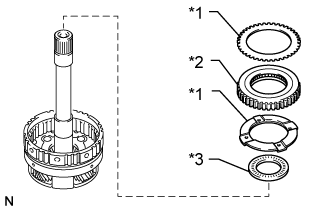
Text in Illustration *1
Thrust Washer
*2
Overdrive One-way Clutch
*3
Bearing
Remove the 2 one-way clutch retainers.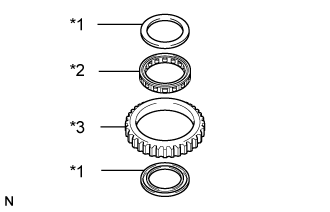
Text in Illustration *1
One-way Clutch Retainer
*2
Overdrive One-way Clutch
*3
Outer Race
Remove the overdrive one-way clutch from the outer race.
| 44. INSPECT OVERDRIVE PLANETARY GEAR ASSEMBLY |
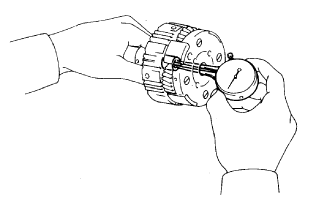 |
Using a caliper gauge, measure the inside diameter of the overdrive planetary gear assembly bush.
- Maximum inside diameter:
- 11.27 mm (0.444 in.)
Using a feeler gauge, measure the planetary pinion gear thrust clearance.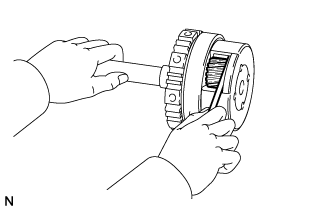
- Standard clearance:
- 0.20 to 0.50 mm (0.00788 to 0.0196 in.)
| 45. INSPECT PISTON STROKE OF OVERDRIVE BRAKE PISTON |
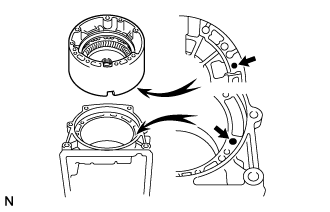 |
Place the overdrive case sub-assembly onto the transmission case with the cutout of the overdrive case sub-assembly facing downward.
- HINT:
- Make sure that the oil hole of the overdrive case sub-assembly is aligned with the oil hole of the transmission case.
Using a dial indicator, measure the overdrive brake disc set pack clearance by applying and releasing compressed air (392 kPa (4.0 kgf/cm2, 57 psi)) as shown in the illustration.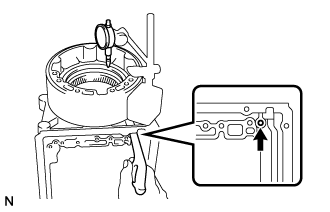
- Standard pack clearance:
- 0.75 to 1.25 mm (0.0296 to 0.0492 in.)
- HINT:
- If the piston stroke is still not as specified, replace the plates with ones of a different thickness.
- There are 2 types of plates that can be used to adjust the pack clearance. Select the one with the most appropriate thickness.
- If the piston stroke is still not as specified, replace the plates with ones of a different thickness.
- Plate Thickness:
Part No.
Thickness
35634-30080
1.95 to 2.05 mm (0.0768 to 0.0807 in.)
34634-30010
2.25 to 2.35 mm (0.0886 to 0.0925 in.)
Remove the overdrive case sub-assembly from the transmission case.
| 46. REMOVE OVERDRIVE CASE SUB-ASSEMBLY |
Remove the overdrive case sub-assembly from the transmission case.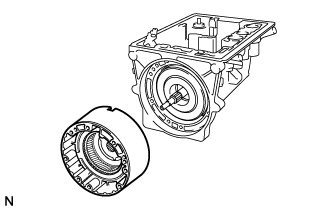
- HINT:
- When the overdrive brake is removed, the front clutch drum may adhere to it.
Remove the race and thrust washer.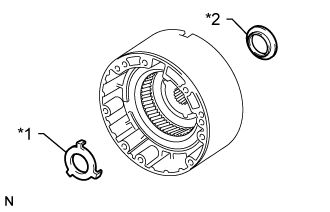
Text in Illustration *1
Thrust Washer
*2
Race
Remove the 2 oil seal rings.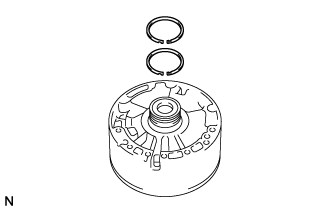
| 47. REMOVE OVERDRIVE BRAKE DISC SET |
Using a screwdriver, remove the snap ring.
- NOTICE:
- Be careful not to damage the overdrive case sub-assembly.
- HINT:
- Wrap the tip of the screwdriver with protective tape.
Remove the flange, 3 overdrive brake discs and 3 plates.
| 48. INSPECT OVERDRIVE BRAKE DISC |
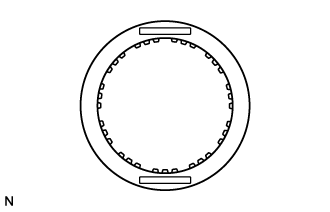 |
Check whether the sliding surfaces of the overdrive brake discs, plates and flange are worn or burnt.
If necessary, replace the overdrive brake discs, plates and flange.- NOTICE:
- If the lining of an overdrive brake disc is peeled off or discolored, or if any part of the printed numbers are damaged, replace all the overdrive brake discs.
- Before assembling new overdrive brake discs, soak them in ATF for at least 15 minutes.
- If the lining of an overdrive brake disc is peeled off or discolored, or if any part of the printed numbers are damaged, replace all the overdrive brake discs.
| 49. REMOVE OVERDRIVE PLANETARY RING GEAR |
Remove the overdrive planetary ring gear.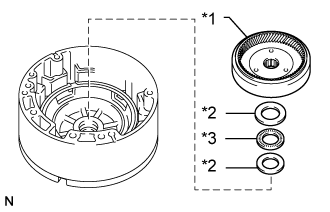
Text in Illustration *1
Overdrive Planetary Ring Gear
*2
Race
*3
Bearing
Remove the bearing and 2 races.
| 50. REMOVE OVERDRIVE BRAKE RETURN SPRING SUB-ASSEMBLY |
Using a screwdriver, remove the snap ring.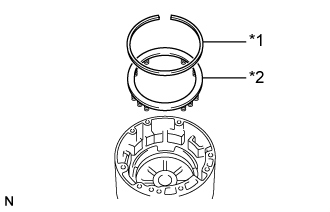
Text in Illustration *1
Snap Ring
*2
Overdrive Brake Return Spring Sub-assembly
- NOTICE:
- Be careful not to damage the overdrive case sub-assembly.
- HINT:
- Wrap the tip of the screwdriver with protective tape.
Remove the overdrive brake return spring sub-assembly.
| 51. REMOVE OVERDRIVE BRAKE PISTON |
Hold the overdrive brake piston by hand and apply compressed air to the passage to remove the overdrive brake piston.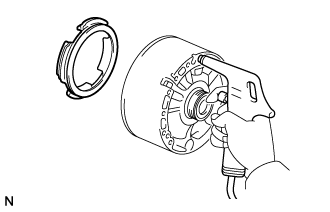
Remove the 2 O-rings from the overdrive brake piston.
| 52. INSPECT INSTALLATION DISTANCE OF FRONT CLUTCH ASSEMBLY |
Place SST on the transmission case.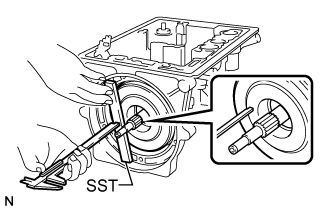
- SST
- 09350-20015
(09370-12010)
Using a vernier caliper, measure the distance between the top of the front clutch drum and SST.
- HINT:
- Make a note of the measurement for reference during reassembly.
| 53. REMOVE FRONT CLUTCH DRUM |
Remove the front clutch drum from the transmission case.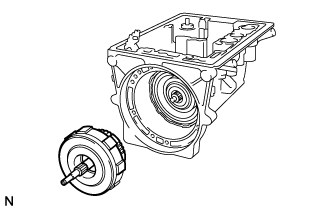
Remove the 2 bearings and race.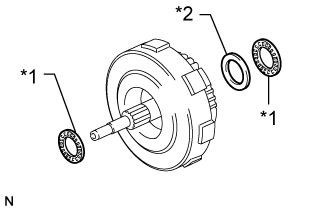
Text in Illustration *1
Bearing
*2
Race
| 54. REMOVE REAR CLUTCH HUB AND FRONT CLUTCH HUB |
Place the front clutch drum onto the overdrive case sub-assembly.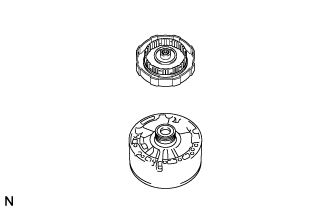
Using a screwdriver, remove the snap ring.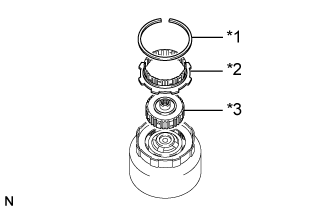
Text in Illustration *1
Snap Ring
*2
Rear Clutch Hub
*3
Front Clutch Hub
- NOTICE:
- Be careful not to damage the front clutch drum.
- HINT:
- Wrap the tip of the screwdriver with protective tape.
Remove the rear clutch hub and front clutch hub.
Remove the bearing and 2 races.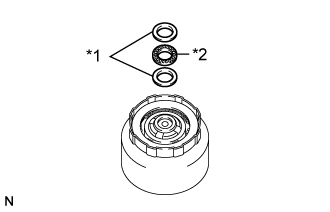
Text in Illustration *1
Race
*2
Bearing
| 55. INSPECT PISTON STROKE OF FRONT CLUTCH PISTON SUB-ASSEMBLY |
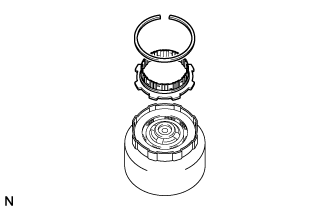 |
In order to check the piston stroke, install the rear clutch hub.
Install the snap ring.
Using SST and a dial indicator, measure the front clutch piston sub-assembly stroke by applying and releasing compressed air (392 kPa (4.0 kgf/cm2, 57 psi)) as shown in the illustration.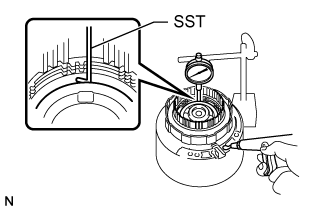
- SST
- 09350-20015
(09350-06120)
- Standard piston stroke:
- 1.40 to 1.60 mm (0.0552 to 0.0629 in.)
- HINT:
- If the piston stroke is still not as specified, replace the plates with ones of a different thickness.
- There are 2 types of plates that can be used to adjust the pack clearance. Select the one with the most appropriate thickness.
- Plate Thickness:
Part No.
Thickness
35634-22040
1.75 to 1.85 mm (0.0689 to 0.0728 in.)
34634-30070
1.95 to 2.05 mm (0.0768 to 0.0807 in.)
- If the piston stroke is still not as specified, replace the plates with ones of a different thickness.
| 56. REMOVE FRONT CLUTCH DISC SET |
Remove the front clutch disc.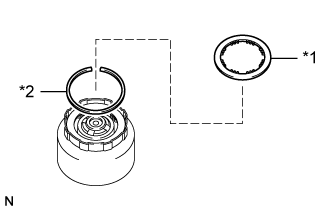
Text in Illustration *1
Front Clutch Disc
*2
Snap Ring
Using a screwdriver, remove the snap ring.
- NOTICE:
- Be careful not to damage the front clutch drum.
- HINT:
- Wrap the tip of the screwdriver with protective tape.
Remove the 4 plates and 3 front clutch discs.
| 57. INSPECT FRONT CLUTCH DISC |
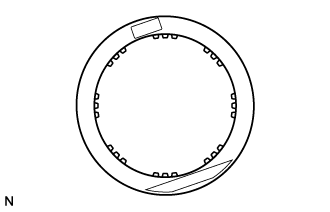 |
Check whether the sliding surfaces of the front clutch discs and plates are worn or burnt.
If necessary, replace them.- NOTICE:
- If the lining of a disc is peeled off or discolored, or if any part of the printed numbers are damaged, replace all the front clutch discs.
- Before assembling new front clutch discs, soak them in ATF for at least 15 minutes.
- If the lining of a disc is peeled off or discolored, or if any part of the printed numbers are damaged, replace all the front clutch discs.
| 58. REMOVE FRONT CLUTCH RETURN SPRING SUB-ASSEMBLY |
Place SST on the front clutch return spring sub-assembly and compress the front clutch return spring sub-assembly with a press.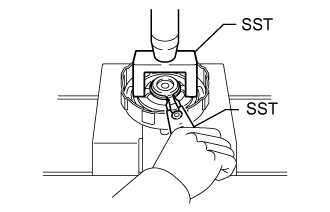
- SST
- 09350-20015
(09369-20040)
Using SST, remove the snap ring.
- SST
- 09350-30020
(09350-07070)
- NOTICE:
- Do not expand the snap ring excessively.
Remove the front clutch return spring sub-assembly.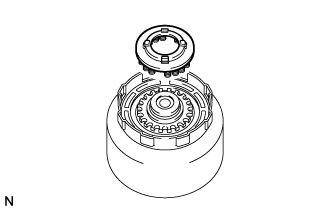
| 59. REMOVE FRONT CLUTCH PISTON SUB-ASSEMBLY |
Hold the front clutch piston sub-assembly by hand, apply compressed air to the overdrive case sub-assembly and remove the front clutch piston sub-assembly.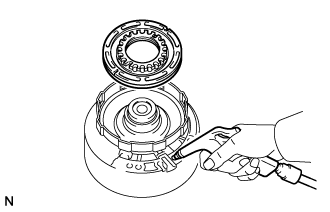
Remove the 2 O-rings from the front clutch piston sub-assembly.
Text in Illustration *a
Protective Tape
- NOTICE:
- Be careful not to damage the front clutch piston sub-assembly.
- HINT:
- Wrap the tip of the screwdriver with protective tape.
| 60. INSPECT FRONT CLUTCH PISTON SUB-ASSEMBLY |
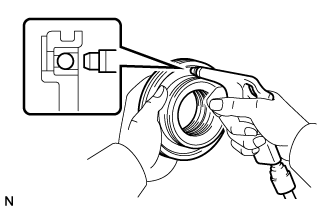 |
Check that the check ball is free by shaking the front clutch piston sub-assembly.
Check that the valve does not have leaks by applying low-pressure compressed air.
| 61. REMOVE REAR CLUTCH DRUM |
Remove the rear clutch drum from the transmission case.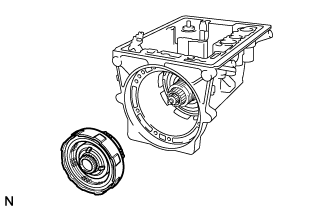
Remove the race.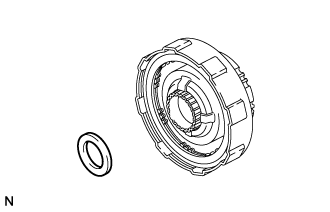
| 62. INSPECT PISTON STROKE OF REAR CLUTCH PISTON SUB-ASSEMBLY |
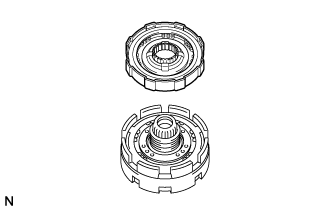 |
Place the rear clutch drum onto the center support sub-assembly.
Using a dial indicator, measure the rear clutch piston stroke by applying and releasing compressed air (392 kPa (4.0 kgf/cm2, 57 psi)) as shown in the illustration.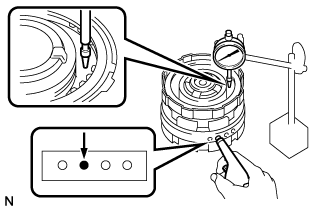
- Standard piston stroke:
- 0.90 to 1.30 mm (0.0355 to 0.0511 in.)
- HINT:
- If the piston stroke is still not as specified, replace the flange with one of a different thickness.
- There are 3 types of flanges that can be used to adjust the pack clearance. Select the one with the most appropriate thickness.
- Flange Thickness:
Part No.
Mark
Thickness
35675-22120
A
3.475 to 3.600 mm (0.137 to 0.141 in.)
35675-22130
B
3.675 to 3.800 mm (0.145 to 0.149 in.)
35675-22140
-
3.925 to 4.050 mm (0.155 to 0.159 in.)
- If the piston stroke is still not as specified, replace the flange with one of a different thickness.
| 63. REMOVE REAR CLUTCH DISC SET |
Using a screwdriver, remove the snap ring.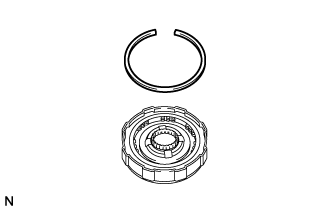
- NOTICE:
- Be careful not to damage the rear clutch drum.
- HINT:
- Wrap the tip of the screwdriver with protective tape.
Remove the flange, 3 rear clutch discs and 3 plates.
| 64. INSPECT REAR CLUTCH DISC |
|
|
Check whether the sliding surfaces of the rear clutch discs, plates and rear clutch flange are worn or burnt.
If necessary, replace them.- NOTICE:
- If the lining of a rear clutch disc is peeled off or discolored, or if any part of the printed numbers are damaged, replace all the rear clutch discs.
- Before assembling new rear clutch discs, soak them in ATF for at least 15 minutes.
- If the lining of a rear clutch disc is peeled off or discolored, or if any part of the printed numbers are damaged, replace all the rear clutch discs.
| 65. REMOVE REAR CLUTCH RETURN SPRING SUB-ASSEMBLY |
Place SST on the rear clutch return spring sub-assembly and compress the rear clutch return spring sub-assembly with a press.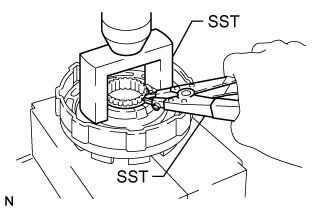
- SST
- 09350-20015
(09369-20040)
Using SST, remove the snap ring.
- SST
- 09350-30020
(09350-07070)
- NOTICE:
- Do not expand the snap ring excessively.
Remove the rear clutch return spring sub-assembly.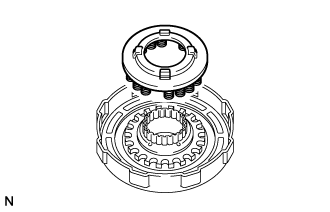
| 66. REMOVE CENTER SUPPORT SUB-ASSEMBLY |
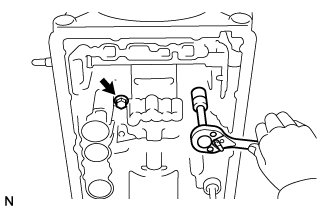 |
Remove the 2 bolts and 2 washers.
- HINT:
- After removing one bolt, the other will be loose.
Remove the center support sub-assembly from the transmission case.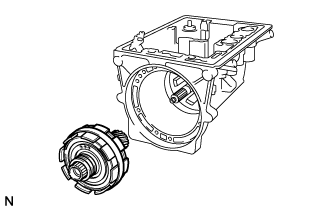
Remove the 3 oil seal rings.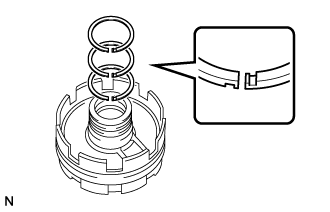
| 67. REMOVE PLANETARY SUN GEAR SUB-ASSEMBLY WITH NO. 1 ONE-WAY CLUTCH |
Using SST, remove the snap ring.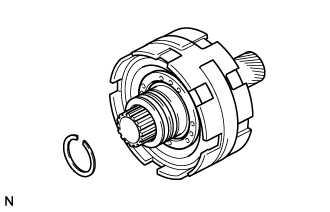
- SST
- 09350-30020
(09350-07070)
- NOTICE:
- Do not expand the snap ring excessively.
Remove the planetary sun gear sub-assembly with No. 1 one-way clutch.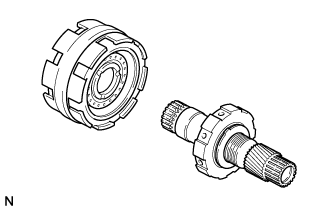
| 68. INSPECT PISTON STROKE OF NO. 1 BRAKE |
Using a dial indicator, measure the No. 1 brake piston stroke by applying and releasing compressed air (392 kPa (4.0 kgf/cm2, 57 psi)) as shown in the illustration.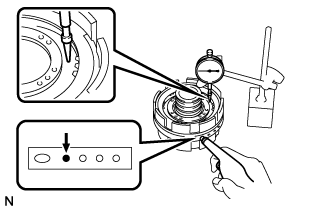
- Standard piston stroke:
- 0.75 to 1.35 mm (0.0296 to 0.0531 in.)
| 69. REMOVE NO. 1 BRAKE DISC SET |
Using a screwdriver, remove the snap ring.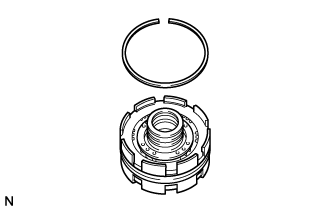
- NOTICE:
- Be careful not to damage the center support.
- HINT:
- Wrap the tip of the screwdriver with protective tape.
Remove the flange, 2 No. 1 brake discs and 3 plates.
| 70. INSPECT NO. 1 BRAKE DISC |
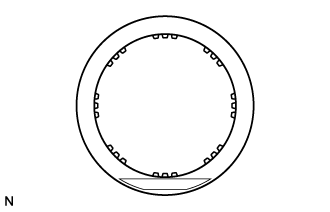 |
Check whether the sliding surfaces of the No. 1 brake discs, plates and flange are worn or burnt.
If necessary, replace them.- NOTICE:
- If the lining of a No. 1 brake disc is peeled off or discolored, or if any part of the printed numbers are damaged, replace all the No. 1 brake discs.
- Before assembling new No. 1 brake discs, soak them in ATF for at least 15 minutes.
- If the lining of a No. 1 brake disc is peeled off or discolored, or if any part of the printed numbers are damaged, replace all the No. 1 brake discs.
| 71. REMOVE NO. 1 BRAKE PISTON RETURN SPRING SUB-ASSEMBLY |
Place SST on the No. 1 brake piston return spring sub-assembly and compress the No. 1 brake piston return spring sub-assembly with a press.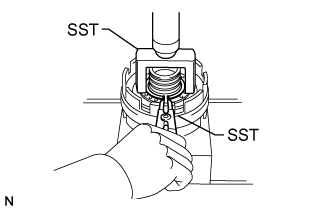
- SST
- 09350-20015
(09369-20040)
Using SST, remove the snap ring.
- SST
- 09350-30020
(09350-07070)
- NOTICE:
- Do not expand the snap ring excessively.
Remove the No. 1 brake piston return spring sub-assembly.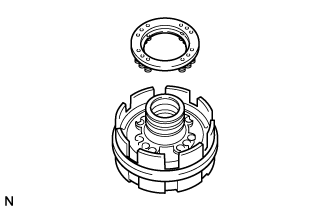
| 72. REMOVE NO. 1 BRAKE PISTON |
Hold the No. 1 brake piston by hand and apply compressed air to the center support sub-assembly to remove the brake piston.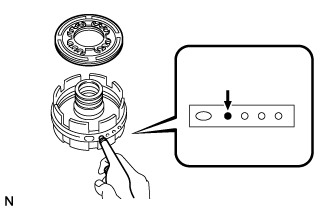
Remove the 2 O-rings from the No. 1 brake piston.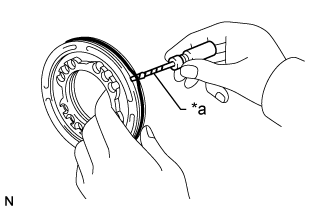
Text in Illustration *a
Protective Tape
- NOTICE:
- Be careful not to damage the No. 1 brake piston.
- HINT:
- Wrap the tip of the screwdriver with protective tape.
| 73. INSPECT CENTER SUPPORT SUB-ASSEMBLY |
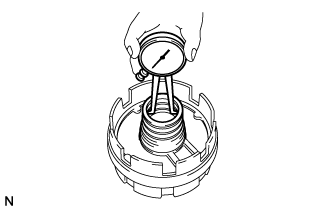 |
Using a caliper gauge, measure the inside diameter of the center support sub-assembly bush.
- Maximum inside diameter:
- 36.41 mm (1.43 in.)
| 74. INSPECT PISTON STROKE OF NO. 2 BRAKE PISTON |
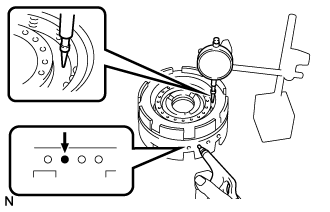 |
Using a dial indicator, measure the No. 2 brake piston stroke by applying and releasing compressed air (392 kPa (4.0 kgf/cm2, 57 psi)) as shown in the illustration.
- Standard piston stroke:
- 0.98 to 1.71 mm (0.0386 to 0.0673 in.)
| 75. REMOVE NO. 2 BRAKE DISC SET |
Using a screwdriver, remove the snap ring.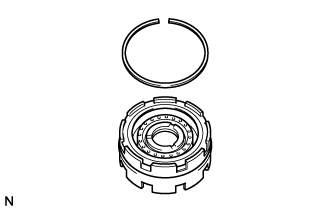
- NOTICE:
- Be careful not to damage the center support.
- HINT:
- Wrap the tip of the screwdriver with protective tape.
Remove the flange, 3 No. 2 brake discs and 3 plates.
| 76. INSPECT NO. 2 BRAKE DISC |
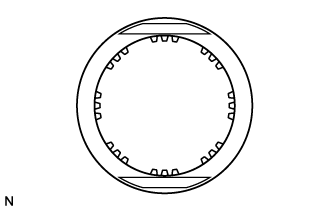 |
Check whether the sliding surfaces of the No. 2 brake discs, plates and No. 2 brake flange are worn or burnt.
If necessary, replace them.- NOTICE:
- If the lining of a No. 2 brake disc is peeled off or discolored, or if any part of the printed numbers are damaged, replace all the No. 2 brake discs.
- Before assembling new No. 2 brake discs, soak them in ATF for at least 15 minutes.
- If the lining of a No. 2 brake disc is peeled off or discolored, or if any part of the printed numbers are damaged, replace all the No. 2 brake discs.
| 77. REMOVE NO. 2 BRAKE PISTON RETURN SPRING SUB-ASSEMBLY |
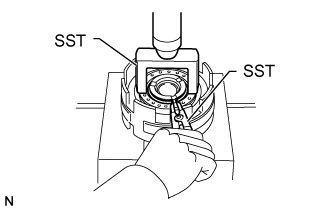 |
Place SST on the No. 2 brake piston return spring sub-assembly and compress the No. 2 brake piston return spring sub-assembly with a press.
- SST
- 09350-20015
(09369-20040)
Using SST, remove the snap ring.
- SST
- 09350-30020
(09350-07070)
- NOTICE:
- Do not expand the snap ring excessively.
Remove the No. 2 brake piston return spring sub-assembly.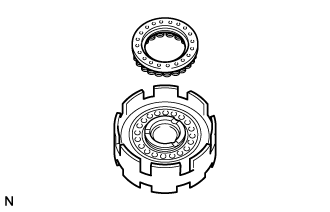
| 78. REMOVE NO. 2 BRAKE PISTON |
Hold the No. 2 brake piston by hand, apply compressed air to the center support sub-assembly and remove the No. 2 brake piston.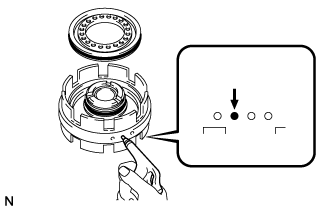
Using a screwdriver, remove the 2 O-rings from the No. 2 brake piston and center support sub-assembly.
- NOTICE:
- Be careful not to damage the No. 2 brake piston and center support sub-assembly.
- HINT:
- Wrap the tip of the screwdriver with protective tape.
| 79. REMOVE REAR CLUTCH PISTON |
Place the rear clutch drum onto the center support sub-assembly.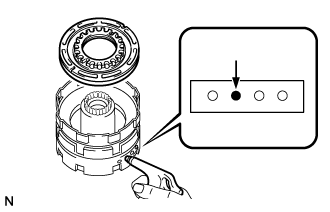
Hold the rear clutch piston by hand, apply compressed air to the center support sub-assembly and remove the rear clutch piston and rear No. 2 clutch piston.
Remove the 4 O-rings from the rear clutch piston and rear No. 2 clutch piston.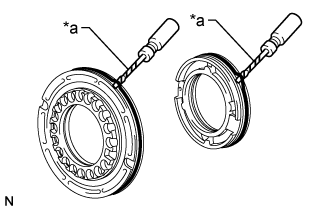
Text in Illustration *a
Protective Tape
- NOTICE:
- Be careful not to damage the rear clutch piston and rear No. 2 clutch piston.
- HINT:
- Wrap the tip of the screwdriver with protective tape.
| 80. INSPECT REAR CLUTCH PISTON |
|
|
Check that the check ball is free by shaking the rear clutch piston sub-assembly.
Check that the valve does not have leaks by applying low-pressure compressed air.
| 81. INSPECT NO. 1 ONE-WAY CLUTCH ASSEMBLY |
Hold the No. 1 one-way clutch and turn the planetary sun gear sub-assembly. Check that the planetary sun gear sub-assembly can be turned counterclockwise but cannot be turned clockwise.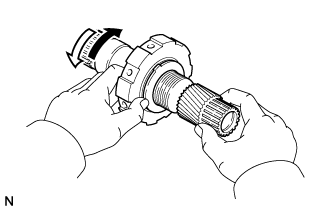
Text in Illustration
Lock
Free
| 82. REMOVE NO. 1 ONE-WAY CLUTCH |
Remove the No. 1 one-way clutch from the planetary sun gear sub-assembly.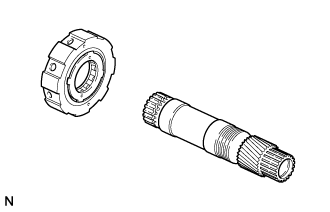
Using a screwdriver, loosen the staked parts of the 2 one-way clutch retainers.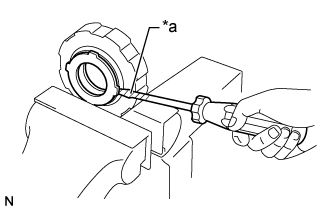
Text in Illustration *a
Protective Tape
- NOTICE:
- Be careful not to damage the one-way clutch assembly.
- HINT:
- Wrap the tip of the screwdriver with protective tape.
Remove the No. 1 one-way clutch and 2 one-way clutch retainers from the outer race.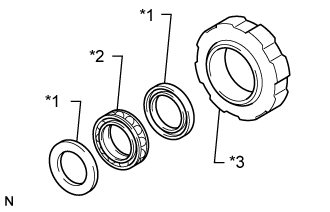
Text in Illustration *1
One-way Clutch Retainer
*2
No. 1 One-way Clutch
*3
Outer Race
Remove the 2 oil seal rings.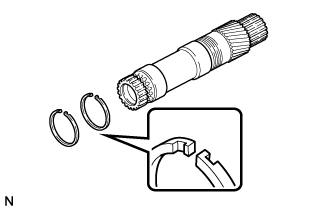
| 83. INSPECT PLANETARY SUN GEAR SUB-ASSEMBLY |
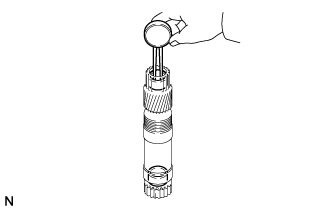 |
Using a caliper gauge, measure the inside diameter of the planetary sun gear sub-assembly bush.
- Maximum inside diameter:
- 21.53 mm (0.848 in.)
| 84. REMOVE FRONT PLANETARY GEAR SUB-ASSEMBLY |
Using 2 screwdrivers, remove the snap ring.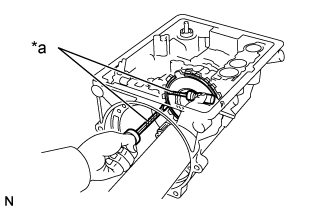
Text in Illustration *a
Protective Tape
- NOTICE:
- Be careful not to damage the automatic transmission case.
- HINT:
- Wrap the tip of the screwdriver with protective tape.
Insert 2 wires into the front planetary gear sub-assembly and remove it.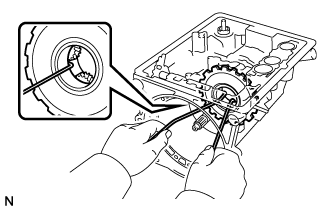
Remove the thrust washer.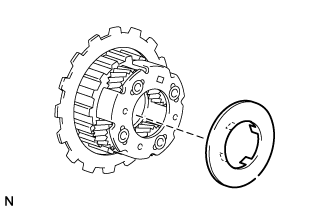
| 85. INSPECT NO. 2 ONE-WAY CLUTCH |
Hold the No. 2 one-way clutch inner race sub-assembly and turn the front planetary gear sub-assembly. Check that the front planetary gear sub-assembly can be turned counterclockwise but cannot be turned clockwise.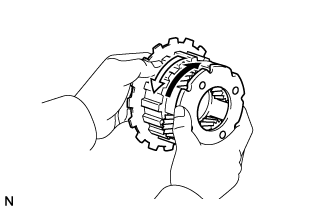
Text in Illustration
Lock
Free
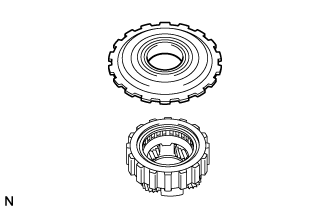
| 86. REMOVE NO. 2 ONE-WAY CLUTCH INNER RACE SUB-ASSEMBLY |
 |
| 87. REMOVE NO. 2 ONE-WAY CLUTCH |
Using a screwdriver, remove the snap ring.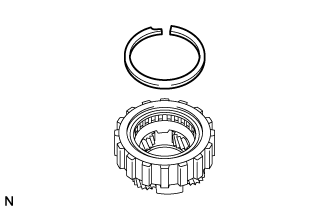
- NOTICE:
- Be careful not to damage the front planetary gear sub-assembly.
- HINT:
- Wrap the tip of the screwdriver with protective tape.
Remove the No. 2 one-way clutch and 2 one-way clutch retainers from the front planetary gear sub-assembly.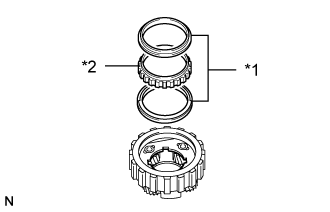
Text in Illustration *1
One-way Clutch Retainer
*2
No. 2 One-way Clutch
Remove the thrust washer.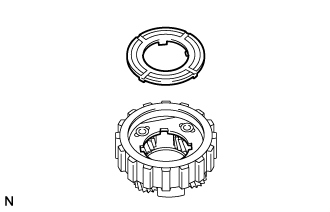
| 88. INSPECT FRONT PLANETARY GEAR SUB-ASSEMBLY |
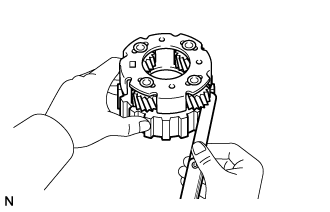 |
Using a feeler gauge, measure the planetary pinion gear thrust clearance.
- Standard clearance:
- 0.20 to 0.50 mm (0.00788 to 0.0196 in.)
| 89. INSPECT PACK CLEARANCE OF NO. 3 BRAKE |
Using a vernier caliper, measure the clearance between the No. 3 brake disc and transmission case as shown in the illustration.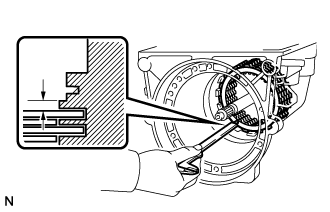
- Standard pack clearance:
- 0.52 to 1.27 mm (0.0205 to 0.0499 in.)
- HINT:
- If the result is not as specified, replace the pressure plate with one of a different thickness.
- There are 6 types of pressure plates that can be used to adjust the pack clearance. Select the one with the most appropriate thickness.
- If the result is not as specified, replace the pressure plate with one of a different thickness.
- Pressure Plate Thickness:
Part No.
Mark
Thickness
35639-22010
-
2.95 to 3.05 mm (0.117 to 0.120 in.)
35639-22020
325
3.20 to 3.30 mm (0.126 to 0.129 in.)
35639-22030
350
3.45 to 3.55 mm (0.136 to 0.139 in.)
35639-22040
375
3.70 to 3.80 mm (0.146 to 0.149 in.)
35639-22050
400
3.95 to 4.05 mm (0.156 to 0.159 in.)
35639-22060
425
4.20 to 4.30 mm (0.166 to 0.169 in.)
| 90. REMOVE NO. 3 BRAKE DISC SET |
Remove the 5 No. 3 brake discs, 4 plates and pressure plate.
| 91. INSPECT NO. 3 BRAKE DISC |
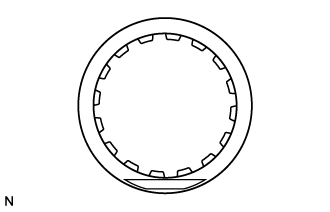 |
Check whether the sliding surfaces of the No. 3 brake discs and plates are worn or burnt.
If necessary, replace them.- NOTICE:
- If the lining of a No. 3 brake disc is peeled off or discolored, or if any part of the printed numbers are damaged, replace all the No. 3 brake discs.
- Before assembling new No. 3 brake discs, soak them in ATF for at least 15 minutes.
- If the lining of a No. 3 brake disc is peeled off or discolored, or if any part of the printed numbers are damaged, replace all the No. 3 brake discs.
| 92. REMOVE INTERMEDIATE SHAFT SUB-ASSEMBLY WITH REAR PLANETARY GEAR ASSEMBLY AND OUTPUT SHAFT ASSEMBLY |
Remove the intermediate shaft sub-assembly with rear planetary gear assembly and output shaft assembly from the transmission case.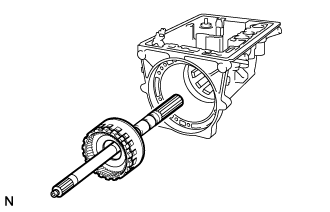
Remove the bearing.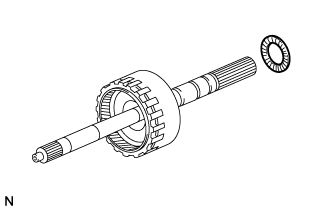
Remove the thrust washer.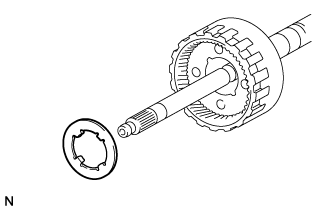
| 93. REMOVE FRONT PLANETARY RING GEAR |
Using a snap ring expander, remove the front planetary ring gear while compressing the snap ring.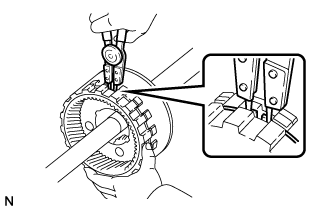
Using a screwdriver, remove the snap ring from the ring gear.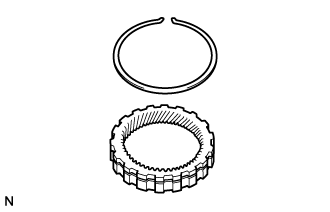
- NOTICE:
- Be careful not to damage the front planetary ring gear.
- Do not expand the snap ring excessively.
- Be careful not to damage the front planetary ring gear.
- HINT:
- Wrap the tip of the screwdriver with protective tape.
Remove the oil seal ring.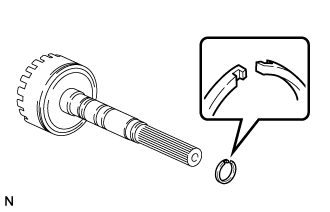
| 94. REMOVE INTERMEDIATE SHAFT SUB-ASSEMBLY WITH REAR PLANETARY GEAR ASSEMBLY AND REAR PLANETARY RING GEAR SUB-ASSEMBLY |
Remove the intermediate shaft sub-assembly with rear planetary gear assembly and rear planetary ring gear sub-assembly from the output shaft assembly.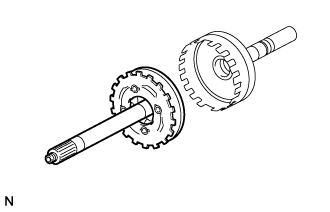
Remove the bearing and race.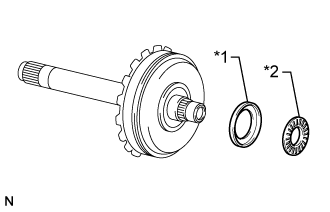
Text in Illustration *1
Race
*2
Bearing
| 95. INSPECT OUTPUT SHAFT ASSEMBLY |
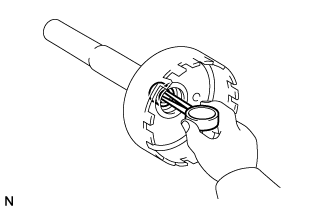 |
Using a caliper gauge, measure the inside diameter of the output shaft assembly bush.
- Maximum inside diameter:
- 18.03 mm (0.710 in.)
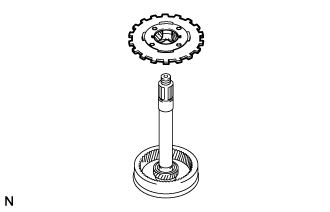
| 96. REMOVE REAR PLANETARY GEAR ASSEMBLY |
 |
| 97. INSPECT REAR PLANETARY GEAR ASSEMBLY |
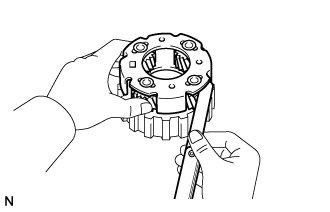 |
Using a feeler gauge, measure the planetary pinion gear thrust clearance.
- Standard clearance:
- 0.20 to 0.50 mm (0.00788 to 0.0196 in.)
| 98. REMOVE REAR PLANETARY SUN GEAR |
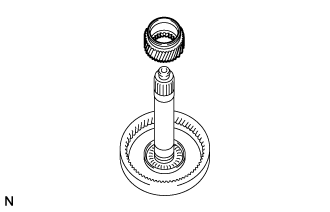 |
| 99. REMOVE REAR PLANETARY RING GEAR SUB-ASSEMBLY |
Using a screwdriver, remove the set ring.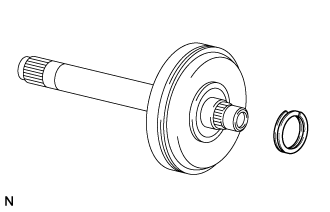
Remove the rear planetary ring gear sub-assembly.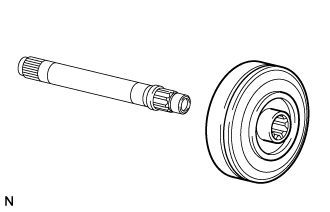
Remove the bearing from the rear planetary ring gear sub-assembly.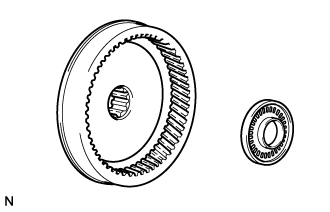
Using a screwdriver, remove the oil seal ring.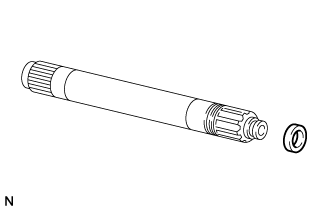
- NOTICE:
- Be careful not to damage the intermediate shaft sub-assembly.
- HINT:
- Wrap the tip of the screwdriver with protective tape.
| 100. REMOVE BRAKE APPLY TUBE |
Remove the brake apply tube.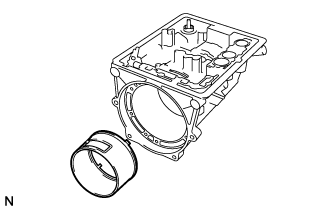
Remove the race from the transmission case.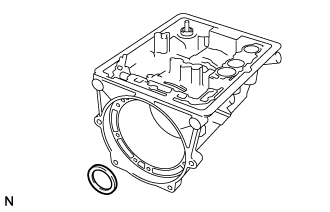
| 101. REMOVE BRAKE PLATE STOPPER SPRING |
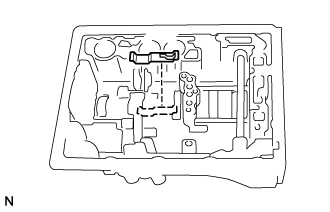 |
| 102. INSPECT NO. 3 BRAKE PISTON MOVEMENT |
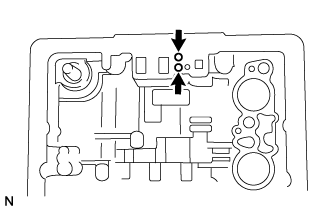 |
Check that the No. 3 brake pistons move smoothly when applying compressed air into and releasing compressed air from the transmission case.
| 103. REMOVE NO. 3 BRAKE PISTON RETURN SPRING SUB-ASSEMBLY |
Set SST on the No. 3 brake piston return spring sub-assembly and compress the No. 3 brake piston return spring sub-assembly.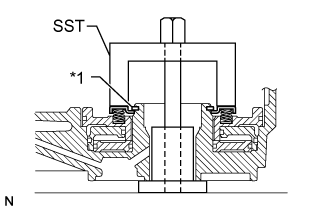
- SST
- 09350-20015
(09369-20040)
Text in Illustration *1
Snap Ring
Using a snap ring expander, remove the snap ring.
- NOTICE:
- Do not expand the snap ring excessively.
Remove the No. 3 brake piston return spring sub-assembly.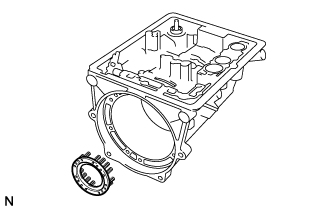
| 104. REMOVE NO. 3 BRAKE PISTON |
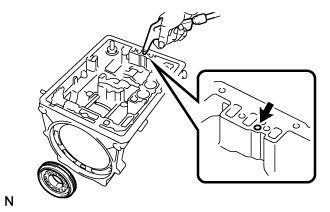 |
While holding the No. 3 brake piston by hand, apply compressed air to the transmission case and then remove the No. 3 brake piston.
If the No. 3 brake piston does not pop out with compressed air, lift the No. 3 brake piston out with needle-nose pliers.
Remove the O-ring from the No. 3 brake piston.
Insert SST behind the brake reaction sleeve and gradually lift it out of the transmission case to remove the brake reaction sleeve.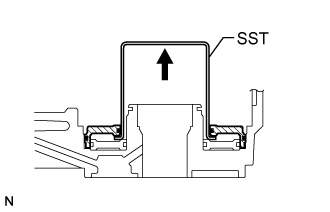
- SST
- 09350-30020
(09350-07080)
Remove the 2 O-rings from the brake reaction sleeve.
Insert SST behind the inner piston and gradually lift it out of the transmission case to remove the inner piston.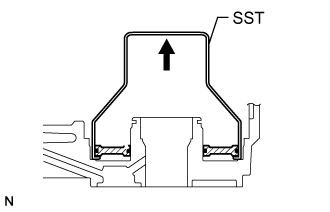
- SST
- 09350-30020
(09350-07090)
Remove the 2 O-rings from the inner piston.
| 105. INSPECT TRANSMISSION CASE |
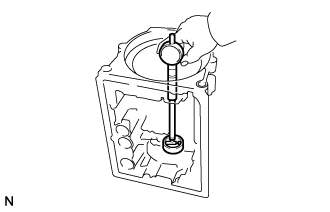 |
Using a cylinder gauge, measure the inside diameter of the transmission case bush.
- Maximum inside diameter:
- 38.19 mm (1.50 in.)