INSPECTION
Inspection · Vehicles built from Oct 2014
| INSPECT SWIRL CONTROL VALVE ASSEMBLY |

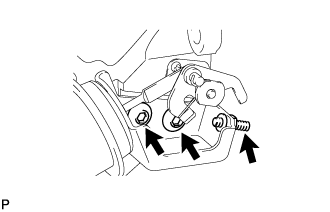  |
- NOTICE:
- Do not adjust the adjusting screw or 2 swirl control valve actuator installation bolts.
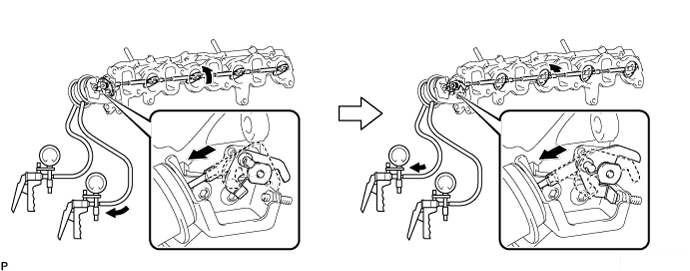
Check the operation of the swirl control valve.
Check that the valve is fully opened under normal conditions.
Connect the vacuum pumps as shown in the illustration. First apply negative pressure to the diaphragm closer to the intake manifold. This cause the actuator rod to move, which causes the swirl control valve to move. Then, apply negative pressure to the diaphragm on the outer side. This cause the actuator rod to move further, which also causes the swirl control valve to move further. Check that the valve is fully closed when a negative pressure of 35 kPa (263 mmHg, 10.3 in.Hg) is applied.
Wait for 1 minute and check that the vacuum pump needle does not move. If the result is not as specified, replace the intake manifold.
- HINT:
- When applying negative pressure to the diaphragm on the outer side, the diaphragm closer to the intake manifold must be in a vacuum state.
-
| INSPECT NO. 1 VACUUM SWITCHING VALVE ASSEMBLY (for Swirl Control Valve) |
Check the resistance of the vacuum switching valve.
Measure the resistance according to the value(s) in the table below.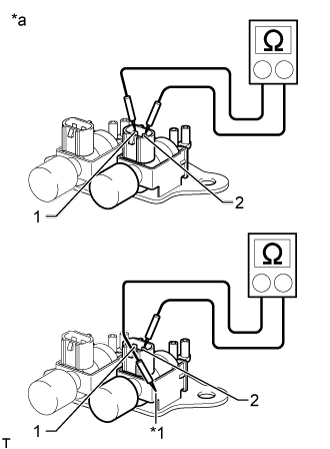
- Standard Resistance:
Tester Connection
Condition
Specified Condition
1 - 2
20°C (68°F)
33 to 39 Ω
1 - Body ground
Always
10 kΩ or higher
2 - Body ground
If the result is not as specified, replace the No. 1 vacuum switching valve assembly.Text in Illustration *a
Component without harness connected
(No. 1 vacuum switching valve)
*1
Body
Check the operation of the vacuum switching valve.
Check that air flows from port E to the filter.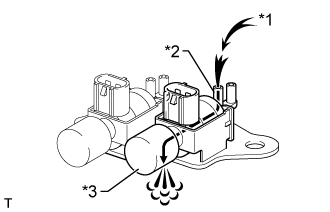
If the result is not as specified, replace the No. 1 vacuum switching valve assembly.Text in Illustration *1
Air
*2
Port E
*3
Filter
Apply battery voltage across the terminals.
Check that air flows from port E to port F.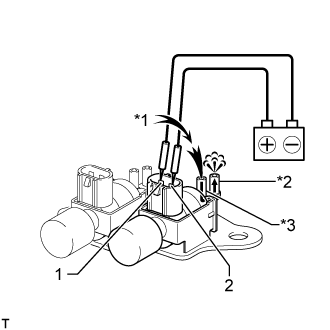
If the result is not as specified, replace the No. 1 vacuum switching valve assembly.Text in Illustration *1
Air
*2
Port F
*3
Port E
| INSPECT NO. 2 VACUUM SWITCHING VALVE ASSEMBLY (for Swirl Control Valve) |
Check the resistance of the vacuum switching valve.
Measure the resistance according to the value(s) in the table below.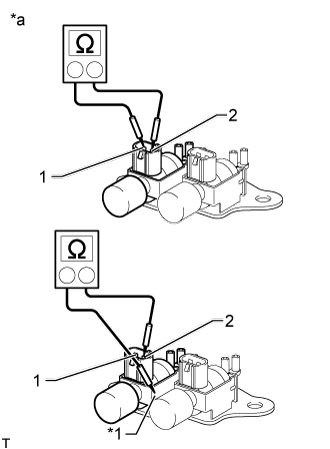
- Standard Resistance:
Tester Connection
Condition
Specified Condition
1 - 2
20°C (68°F)
33 to 39 Ω
1 - Body ground
Always
10 kΩ or higher
2 - Body ground
If the result is not as specified, replace the No. 2 vacuum switching valve assembly.Text in Illustration *a
Component without harness connected
(No. 2 vacuum switching valve)
*1
Body
Check the operation of the vacuum switching valve.
Check that air flows from port E to the filter.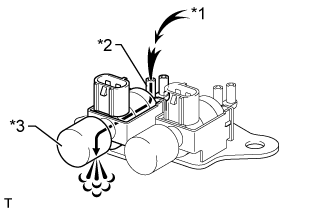
If the result is not as specified, replace the No. 2 vacuum switching valve assembly.Text in Illustration *1
Air
*2
Port E
*3
Filter
Apply battery voltage across the terminals.
Check that air flows from port E to port F.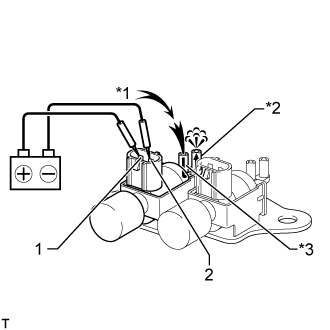
If the result is not as specified, replace the No. 2 vacuum switching valve assembly.Text in Illustration *1
Air
*2
Port F
*3
Port E