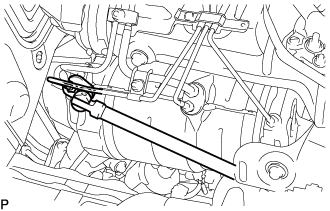
REMOVAL
Removal / installation · Vehicles built from Jan 2017
| 1. REMOVE SEAT TRACK COVER LH |

Using a clip remover, remove the clip.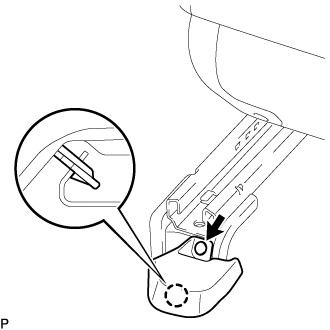

Detach the claw and remove the seat track cover LH.
| 2. REMOVE FRONT SEAT ASSEMBLY RH |
Move the front seat assembly fully forward.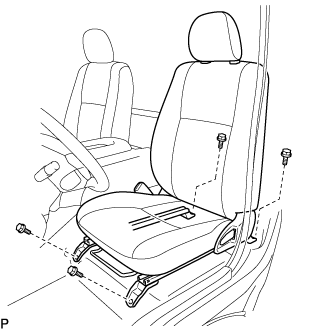
Remove the 2 bolts on the rear side of the seat.
Move the front seat assembly to the rearmost position.
Remove the 2 bolts on the front side of the seat.
Move the front seat assembly to the center of the seat slide rail. Set the seatback in the upright position.
Disconnect the front seat inner belt assembly connector.
Remove the front seat assembly.
| 3. REMOVE FRONT DOOR SCUFF PLATE RH |
| 4. REMOVE ENGINE SERVICE HOLE SUB COVER SUB-ASSEMBLY |
Fold back the floor carpet.
Remove the 5 bolts and engine service hole sub cover sub-assembly.
| 5. REMOVE ENGINE ASSEMBLY |
- HINT:
- Perform this procedure only when removal or installation of the No. 3 exhaust gas temperature sensor.
| 6. REMOVE EXHAUST GAS TEMPERATURE SENSOR |
- CAUTION:
- To prevent burns, do not touch the engine, exhaust manifold or other high temperature components while the engine is hot.
Disconnect the 3 connectors from the 3 exhaust gas temperature sensors.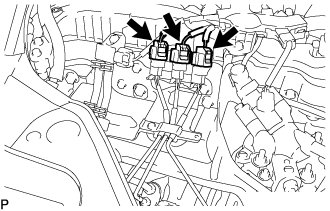
Remove the nut and disconnect the No. 3 exhaust gas temperature sensor from the No. 1 vacuum pipe.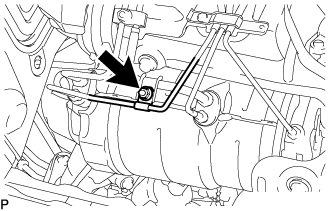
Remove the bolt and open the clamp of the pipe clamp.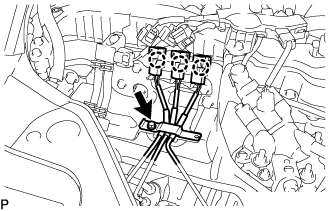
Detach the 3 connectors from the pipe clamp.
Using a 14 mm union nut wrench, remove the exhaust gas temperature sensor from the exhaust manifold converter sub-assembly.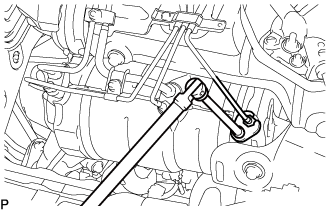
Using a 14 mm union nut wrench, remove the No. 2 exhaust gas temperature sensor from the exhaust manifold converter sub-assembly.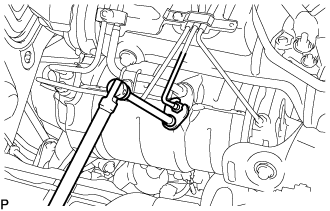
Using a 14 mm union nut wrench, remove the No. 3 exhaust gas temperature sensor from the exhaust manifold converter sub-assembly.