HEATING / AIR CONDITIONING COMPRESSOR(for 1GD-FTV) INSTALLATION
PROCEDURE

 1.ADJUST COMPRESSOR OIL
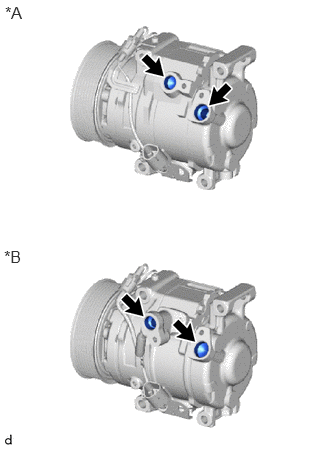
| *A | for Others |
| *B | for Middle East |
When replacing the compressor assembly with magnet clutch with a new one, gradually discharge the refrigerant gas from the service valve, and drain the following amount of oil from the new compressor assembly with magnet clutch before installation.
- Standard:
- w/o Rear Cooler:
(Oil capacity inside the new compressor assembly with magnet clutch: 120 to 135 cc (4.06 to 4.56 fl.oz)) - (Remaining oil amount in the removed compressor assembly with magnet clutch) = (Oil amount to be removed from the new compressor)
- Standard:
- w/ Rear Cooler:
(Oil capacity inside the new compressor assembly with magnet clutch: 140 to 155 cc (4.73 to 5.24 fl.oz)) - (Remaining oil amount in the removed compressor assembly with magnet clutch) = (Oil amount to be removed from the new compressor)
- NOTICE:
- ·
If a new compressor assembly with magnet clutch is installed without removing some oil, there will be too much oil in the system due to the oil remaining in the pipes of the vehicle. Excessive oil in the system prevents heat exchange in the refrigeration cycle and causes ineffective cooling.
·If the amount of oil remaining in the old compressor assembly with magnet clutch is too small, check the air conditioning system for oil leaks.
·Be sure to use ND-OIL 8 or equivalent compressor oil. If any compressor oil other than ND-OIL 8 is used, compressor assembly with magnet clutch insulation performance may decrease, resulting in a leak of electric power.
88320
2.INSTALL COMPRESSOR ASSEMBLY WITH MAGNET CLUTCH
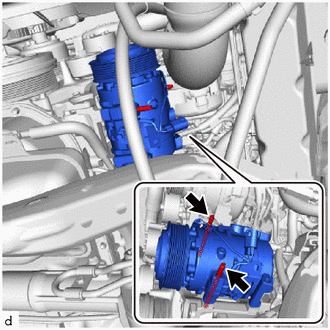
Using an E8 "TORX" socket wrench, temporarily install the compressor assembly with magnet clutch with the 2 stud bolts.
Tighten the stud bolt.
- Torque:
- 10 N*m (102 kgf*cm, 7 ft.*lbf)

|
Bolt |

|
Nut |
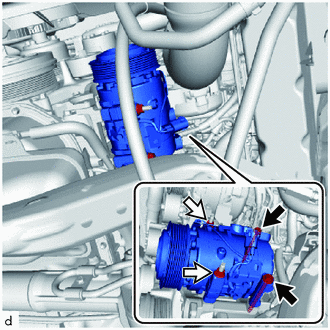
Tighten the 2 nuts and 2 bolts in the order shown in the illustration to install the compressor assembly with magnet clutch.
- Torque:
- Bolt, Nut : 24.5 N*m (250 kgf*cm, 18 ft.*lbf)
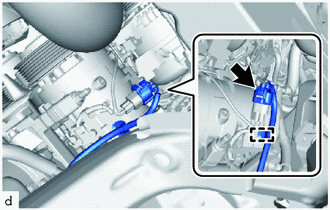
Connect the connector.
Attach the clamp.
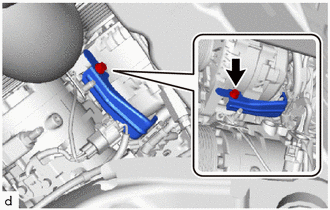
Install the wire harness bracket with the bolt.
88704
3.CONNECT SUCTION HOSE SUB-ASSEMBLY
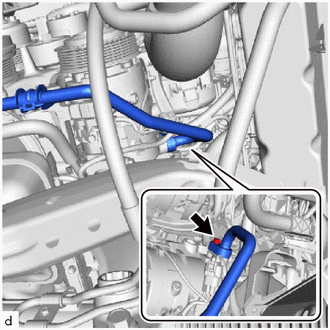
Remove the vinyl tape from the suction hose sub-assembly and compressor assembly with magnet clutch.
Sufficiently apply compressor oil to a new O-ring and the fitting surface of the compressor assembly with magnet clutch.
- Compressor Oil:
ND-OIL 8 or equivalent
Install a new O-ring to the suction hose sub-assembly.
- NOTICE:
-
Keep the O-ring and O-ring fitting surfaces free of foreign matter.
Connect the suction hose sub-assembly to the compressor assembly with magnet clutch with the bolt.
- Torque:
- 9.8 N*m (100 kgf*cm, 87 in.*lbf)
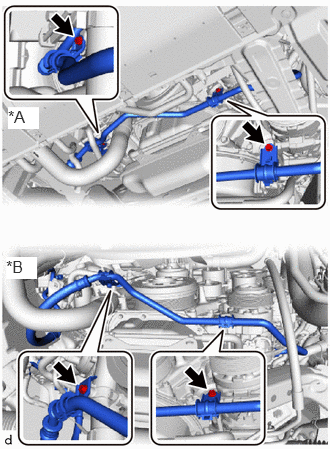
| *A | w/ Viscous Heater |
| *B | w/o Viscous Heater |
Install each suction hose bracket with the 2 bolts.
- Torque:
- 9.8 N*m (100 kgf*cm, 87 in.*lbf)
88703
4.CONNECT DISCHARGE HOSE SUB-ASSEMBLY
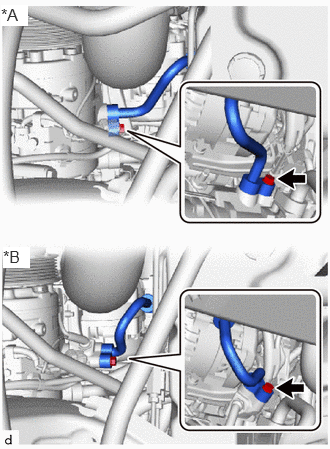
| *A | for Others |
| *B | for Middle East |
Remove the vinyl tape from the discharge hose sub-assembly and compressor assembly with magnet clutch.
Sufficiently apply compressor oil to a new O-ring and the fitting surface of the compressor assembly with magnet clutch.
- Compressor Oil:
ND-OIL 8 or equivalent
Install a new O-ring to the discharge hose sub-assembly.
- NOTICE:
-
Keep the O-ring and O-ring fitting surfaces free of foreign matter.
Connect the discharge hose sub-assembly to the compressor assembly with magnet clutch with the bolt.
- Torque:
- 9.8 N*m (100 kgf*cm, 87 in.*lbf)
51108C
5.INSTALL REAR SIDE RAIL REINFORCEMENT SUB-ASSEMBLY LH
16361A
6.INSTALL FAN AND GENERATOR V BELT
88359
7.INSTALL VISCOUS HEATER V BELT (w/ Viscous Heater)
51405A
8.INSTALL NO. 1 ENGINE UNDER COVER SUB-ASSEMBLY
52618
9.INSTALL LOWER FRONT BUMPER ABSORBER
51406A
10.INSTALL NO. 2 ENGINE UNDER COVER SUB-ASSEMBLY (w/ No. 2 Engine Under Cover Sub-assembly)
11. CHARGE AIR CONDITIONING SYSTEM WITH REFRIGERANT