PARK ASSIST / MONITORING TELEVISION CAMERA REMOVAL
CAUTION / NOTICE / HINT
The necessary procedures (adjustment, calibration, initialization, or registration) that must be performed after parts are removed, installed, or replaced during the television camera assembly removal/installation are shown below.
| Replacement part or procedure | Necessary procedures | Effect/Inoperative Function When Necessary Procedures are not Performed | Link |
|---|---|---|---|
| Television camera assembly | Parking assist monitor system initialization | Parking assist monitor system | ( ) |
| Television camera assembly (Only for removal and installation) | Television camera assembly optical axis (Back camera position setting) | Parking assist monitor system | ()
|
PROCEDURE

 76801
1.REMOVE BACK DOOR OUTSIDE GARNISH SUB-ASSEMBLY
86790
2.REMOVE TELEVISION CAMERA ASSEMBLY (w/ Digital Inner Mirror)
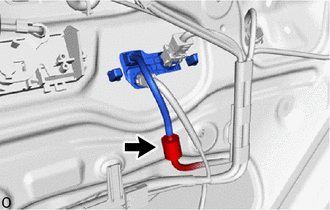
Disconnect the washer hose.
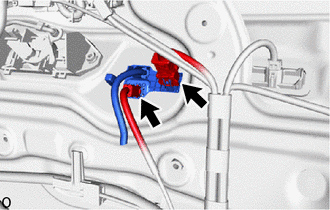
Disconnect the 2 connectors.
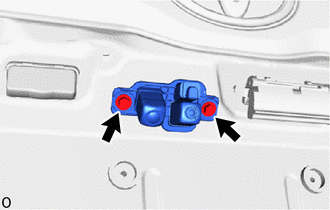
Remove the 2 screws.
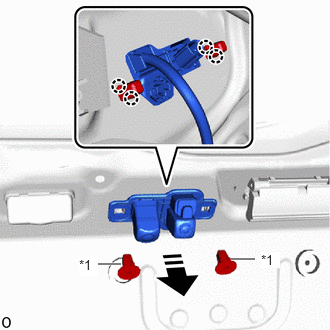
| *1 | Screw Grommet |

|
Remove in this Direction |
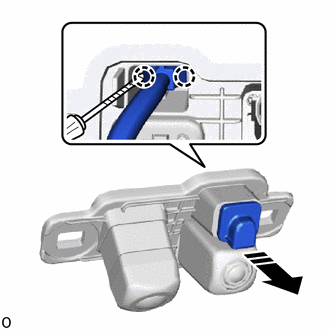
Using pliers, grip the claw of the 2 screw grommets and slide the 2 screw grommets to remove the television camera assembly and 2 screw grommets as shown in the illustration.

|
Protective Tape |
|
|
Remove in this Direction |
Using a thin-bladed screwdriver with its tip wrapped with protective tape, detach the claw and remove the camera cleaner nozzle assembly.
|
|
Remove in this Direction |
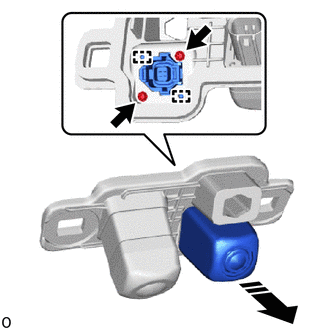
Remove the 2 screws.
Detach the guide and remove the inner mirror camera assembly as shown in the illustration.
86790
3.REMOVE TELEVISION CAMERA ASSEMBLY (w/o Digital Inner Mirror)
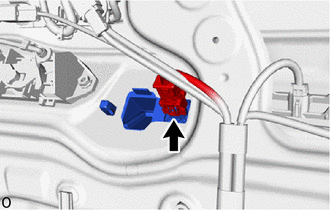
Disconnect the connector.
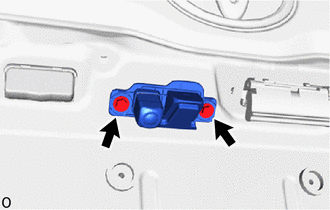
Remove the 2 screws.
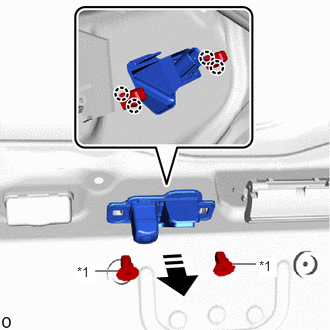
| *1 | Screw Grommet |
|
|
Remove in this Direction |
Using pliers, grip the claw of the 2 screw grommets and slide the 2 screw grommets to remove the television camera assembly and 2 screw grommets as shown in the illustration.