PARK ASSIST / MONITORING CLEARANCE WARNING BUZZER(for RHD) REMOVAL
CAUTION / NOTICE / HINT
The necessary procedures (adjustment, calibration, initialization, or registration) that must be performed after parts are removed, installed, or replaced during the clearance warning buzzer (for RHD) removal/installation are shown below.
| Replaced Part or Performed Procedure | Necessary Procedures | Effect/Inoperative Function When Necessary Procedures are not Performed | Link |
|---|---|---|---|
| Disconnect cable from negative (-) battery terminal | Memorize steering angle neutral point | Parking assist monitor system | ( ) |
| Panoramic view monitor system | ()
|
- HINT:
-
When the cable is disconnected/reconnected to the auxiliary battery terminal, systems temporarily stop operating. However, each system has a function that completes learning the first time the system is used.
- ·
Learning completes when vehicle is driven
Effect/Inoperative Function When Necessary Procedures are not Performed Necessary Procedures Link *: w/ Stop and start system
Stop and start system* Drive the vehicle until stop and start control is permitted (approximately 5 to 60 minutes). ( )
Lane control system Drive the vehicle straight ahead at 15 km/h (10 mph) or more for 1 second or more. ( )
Pre-collision system
·Learning completes when vehicle is operated normally
Effect/Inoperative Function When Necessary Procedures are not Performed Necessary Procedures Link Power slide door system Fully close the slide door by hand.
- HINT:
-
Initialization is not necessary if the above procedures are performed while the slide door is closed.
( )
Air conditioning system After the ignition switch is turned to ON, the servo motor standard position is recognized. -
PROCEDURE

 1. PRECAUTION
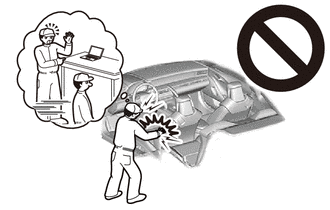
- CAUTION:
-
-
Be sure to read Precaution thoroughly before servicing.
- ·
for Airbag System Type A:
Click hereVehicle Interior>SUPPLEMENTAL RESTRAINT SYSTEMS>AIRBAG SYSTEM (for Type A)>PRECAUTION
·for Airbag System Type B:
Click hereVehicle Interior>SUPPLEMENTAL RESTRAINT SYSTEMS>AIRBAG SYSTEM (for Type B)>PRECAUTION
·for Airbag System Type C:
Click hereVehicle Interior>SUPPLEMENTAL RESTRAINT SYSTEMS>AIRBAG SYSTEM (for Type C)>PRECAUTION
- NOTICE:
-
After the ignition switch is turned off, there may be a waiting time before disconnecting the negative (-) battery terminal.
-
Click hereGeneral>SETUP>WHEN DISCONNECTING OR RECONNECTING BATTERY TERMINAL>BEFORE DISCONNECTING BATTERY
2.DISCONNECT CABLE FROM NEGATIVE BATTERY TERMINAL
for 7GR-FKS:
for 1GD-FTV:
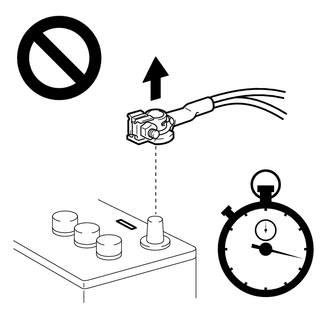
- CAUTION:
-
- ·
Wait at least 90 seconds after disconnecting the cable from the negative(-) battery terminal to disable the SRS system.
·If the airbag deploys for any reason, it may cause a serious accident.
67911B
3.REMOVE FRONT DOOR OUTSIDE SCUFF PLATE RH
- HINT:
-
Use the same procedure described for the LH side.
-
Click hereVehicle Interior>INTERIOR PANELS / TRIM>ROOF HEADLINING (for Full-trim)>REMOVAL
67913B
4.REMOVE FRONT DOOR SCUFF PLATE RH
- HINT:
-
Use the same procedure described for the LH side.
-
Click hereVehicle Interior>INTERIOR PANELS / TRIM>ROOF HEADLINING (for Full-trim)>REMOVAL
62111C
5.REMOVE COWL SIDE TRIM BOARD RH
- HINT:
-
Use the same procedure described for the LH side.
-
Click hereVehicle Interior>INTERIOR PANELS / TRIM>INSTRUMENT PANEL SAFETY PAD>REMOVAL
55631A
6.REMOVE NO. 1 INSTRUMENT PANEL UNDER TRAY STOPPER
55011A
7.REMOVE NO. 1 INSTRUMENT PANEL GARNISH SUB-ASSEMBLY
55641
8.REMOVE NO. 1 INSTRUMENT PANEL UNDER COVER
53601
9.REMOVE HOOD LOCK CONTROL LEVER SUB-ASSEMBLY
77306
10.REMOVE FUEL LID LOCK OPEN LEVER SUB-ASSEMBLY
55432D
11.REMOVE LOWER NO. 1 INSTRUMENT PANEL FINISH PANEL
55044C
12.REMOVE INSTRUMENT PANEL FINISH PANEL SUB-ASSEMBLY
55433B
13.REMOVE LOWER NO. 2 INSTRUMENT PANEL FINISH PANEL
73900
14.REMOVE LOWER NO. 1 INSTRUMENT PANEL AIRBAG ASSEMBLY (w/ Knee Airbag)
55445B
15.REMOVE INSTRUMENT PANEL FINISH PLATE (w/o Knee Airbag)
55313
16.REMOVE LOWER INSTRUMENT PANEL LH (w/o Knee Airbag)
89343C
17.REMOVE NO. 1 CLEARANCE WARNING BUZZER
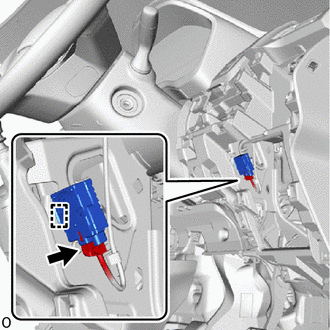
Detach the clamp and remove the No. 1 clearance warning buzzer.
Disconnect the connector.