Check that the battery negative (-) cable is disconnected.
CAUTION:
Wait for at least 90 seconds after disconnecting the cable to prevent airbag deployment.
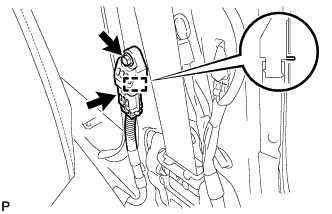
Install the side airbag sensor with the bolt and pin.
Torque:
9.0 N*m{
92 kgf*cm
, 80 in.*lbf
}
NOTICE:
If the side airbag sensor has been dropped, or there are any cracks, dents or other defects in the case, bracket or connector, replace it with a new one.
When installing the side airbag sensor, be careful that the SRS wiring does not interfere with other parts and that it is not pinched between other parts.
Make sure that the pin is securely inserted into the body hole.
Tighten the bolt while holding the side airbag sensor because the side airbag sensor pin (stopper) is easily damaged.
Check that there are no loose parts after installing the side airbag sensor.
Connect the connector to the side airbag sensor.
NOTICE:
When handling the airbag connector, take care not to damage the airbag wire harness.
2.
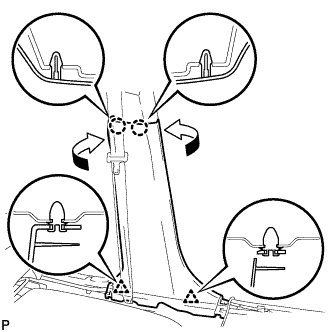
INSTALL LOWER CENTER PILLAR GARNISH
Engage the 2 claws and the 2 clips, and install the lower center pillar garnish LH.
3.
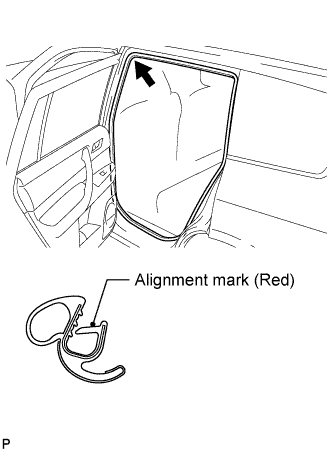
INSTALL REAR DOOR OPENING TRIM WEATHERSTRIP
Align the alignment mark (red) on the weatherstrip with the protruding portion on the body indicated by the arrow in the illustration, and install the rear door opening trim weatherstrip LH.
NOTICE:
After installation, check that the corners fit correctly.
4.
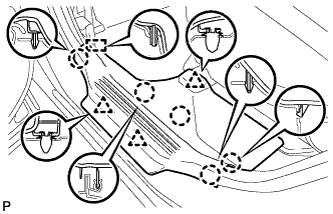
INSTALL REAR DOOR SCUFF PLATE
Engage the guide, 3 clips and 5 claws, and install the rear door scuff plate LH.
5.
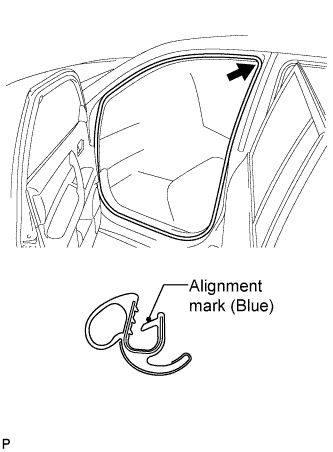
INSTALL FRONT DOOR OPENING TRIM WEATHERSTRIP
Align the alignment mark (blue) on the weatherstrip with the protruding portion on the body indicated by the arrow in the illustration, and install the front door opening trim weatherstrip LH.
NOTICE:
After installation, check that the corners fit correctly.
6.
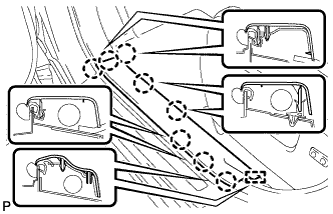
INSTALL FRONT DOOR SCUFF PLATE
Engage the guide and the 8 claws, and install the front door scuff plate LH.
7.
CONNECT CABLE TO NEGATIVE BATTERY TERMINAL
NOTICE:
When disconnecting the cable, some systems need to be initialized after the cable is reconnected (Click here).