2007-2013 Highlander Kluger · Service Manual RESTRAINTS

INSTALLATION

Removal / installation · Vehicles built from Jul 2010

Versions by build date: May 2007 – Jul 2008 Aug 2008 – Jun 2010 from Jul 2010


1. INSTALL REAR AIRBAG SENSOR
  1. Check that the ignition switch is off.

  1. Check that the battery negative (-) cable is disconnected.

    CAUTION:
    Wait for at least 90 seconds after disconnecting the cable to prevent airbag deployment.

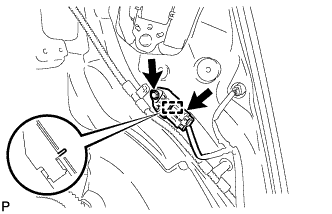
  1. C165114
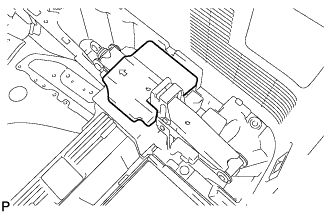
    Install the rear airbag sensor with the bolt and pin.

    Torque:
    9.0 N*m{ 92 kgf*cm , 80 in.*lbf }

    NOTICE:
    1. If the rear airbag sensor has been dropped, or there are any cracks, dents or other defects in the case, bracket or connector, replace it with a new one.
    2. When installing the rear airbag sensor, be careful that the SRS wiring does not interfere with other parts and that it is not pinched between other parts.
    3. Make sure that the pin is securely inserted into the body hole.
    4. Tighten the bolt while holding the rear airbag sensor because the rear airbag sensor pin (stopper) is easily damaged.

  1. Check that there are no loose parts after installing the rear airbag sensor.

  1. Connect the connector to the rear airbag sensor.

    NOTICE:
    When handling the airbag connector, take care not to damage the airbag wire harness.


2. INSTALL DECK TRIM SIDE PANEL ASSEMBLY LH
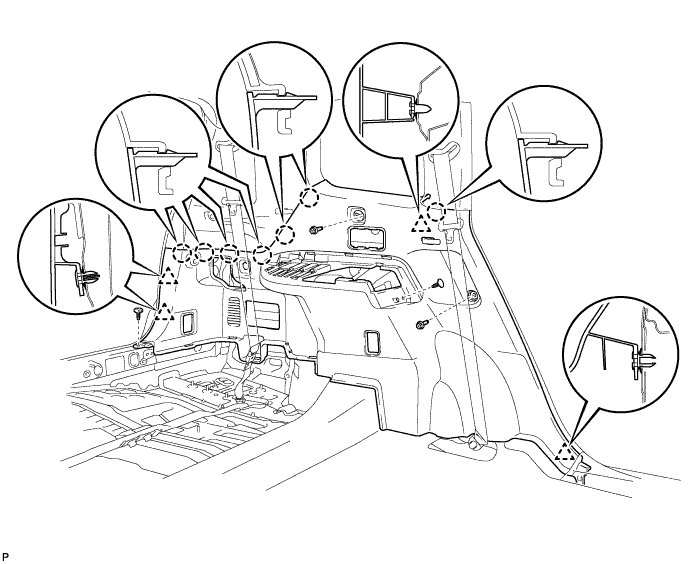
  1. Engage the 4 clips and 7 claws.

  1. Install the 2 clips.

  1. Install the deck trim side panel assembly LH with the 2 bolts.

    B173613


3. INSTALL REAR NO. 1 SEAT OUTER BELT ASSEMBLY

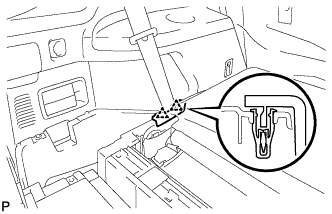
  1. B170934E01
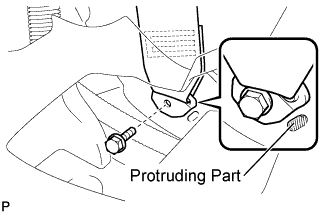
    Connect the floor anchor end of the rear No. 1 seat outer belt assembly and install the bolt.

    Torque:
    42 N*m{ 428 kgf*cm , 31 ft.*lbf }

    NOTICE:
    Do not allow the anchor part of the rear No. 1 seat outer belt assembly to overlap the protruding part of the floor panel.


4. INSTALL FRONT DECK SIDE TRIM COVER

  1. B175145
    Engage the 4 claws and install the 2 front deck side trim covers LH.


5. INSTALL NO. 2 DECK SIDE TRIM HOOK

  1. B173612
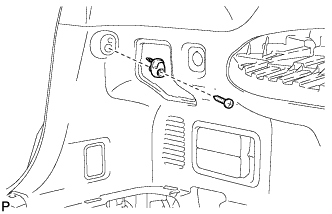
    Install the No. 2 deck side trim hook with the screw.


6. INSTALL ROPE HOOK ASSEMBLY

  1. B173599
    for Front Side:

    1. Install the rope hook assembly with the bolt.

      Torque:
      6.5 N*m{ 66 kgf*cm , 58 in.*lbf }

    2. Engage the 2 claws.

  1. B173601
    for Rear Side:

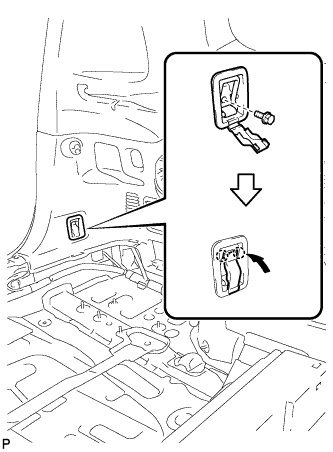
    1. Install the rope hook assembly with the bolt.

      Torque:
      6.5 N*m{ 66 kgf*cm , 58 in.*lbf }

    2. Engage the 2 claws.


7. INSTALL RECLINING REMOTE CONTROL LEVER BEZEL LH (w/ Remote Folding Function)

  1. B173603
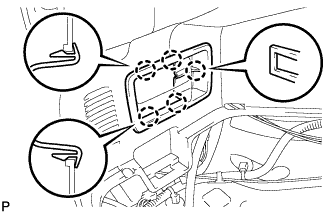
    Engage the 5 claws to install the reclining remote control lever bezel LH.


8. INSTALL REAR DECK TRIM COVER (w/o Remote Folding Function)

  1. B173602
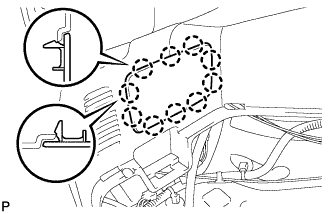
    Engage the 10 claws to install the rear deck trim cover.


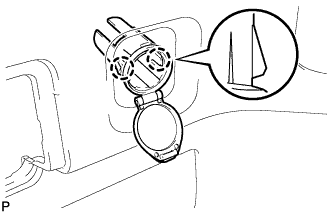
9. INSTALL REAR POWER OUTLET SOCKET COVER

  1. E151328
    Engage the 2 claws and install the rear power outlet socket cover.


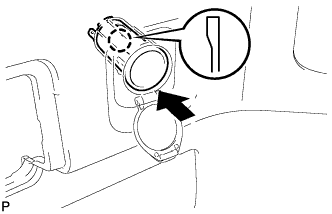
10. INSTALL REAR POWER POINT SOCKET ASSEMBLY

  1. E151490
    Engage the claw and install the rear power point socket assembly.

  1. Connect the connector.


11. INSTALL REAR COMBINATION LIGHT SERVICE COVER LH

  1. B175146
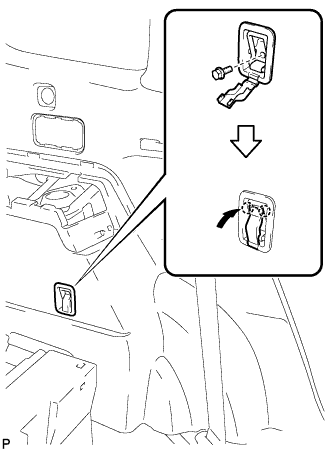
    Engage the 2 guides and 6 claws, and install the rear combination light service cover LH.


12. INSTALL SIDE TRIM COVER LH

  1. B173597
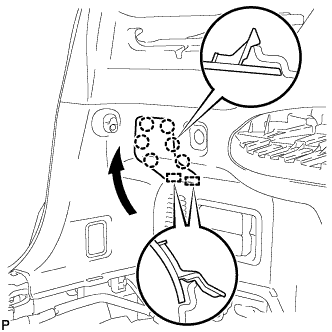
    Engage the 10 claws and install the side trim cover LH.


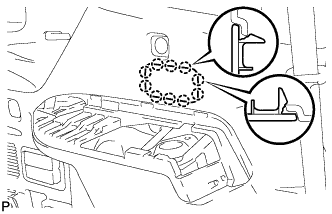
13. INSTALL DECK SIDE TRIM

  1. B173624
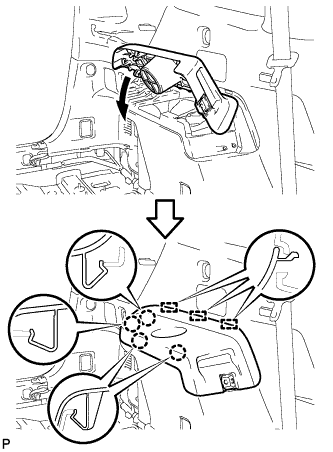
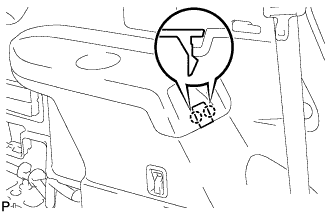
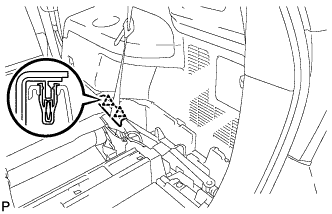
    Engage the 3 guides and 4 claws as shown in the illustration.

  1. B173596
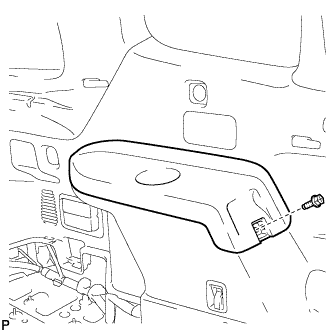
    Install the deck side trim LH with the bolt.


14. INSTALL DECK SIDE TRIM COVER

  1. B175144
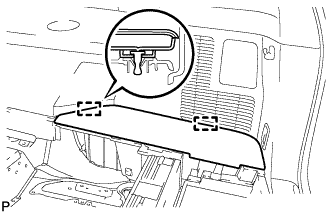
    Engage the 2 claws and install the deck side trim cover LH.


15. INSTALL REAR FLOOR FINISH PLATE

  1. B173609
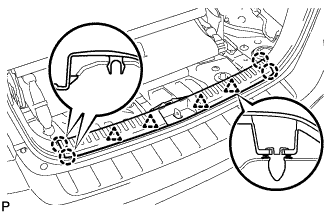
    Engage the 4 clips and 4 claws, and install the rear floor finish plate.


16. INSTALL REAR NO. 2 SEAT ASSEMBLY (w/ Rear No. 2 Seat)

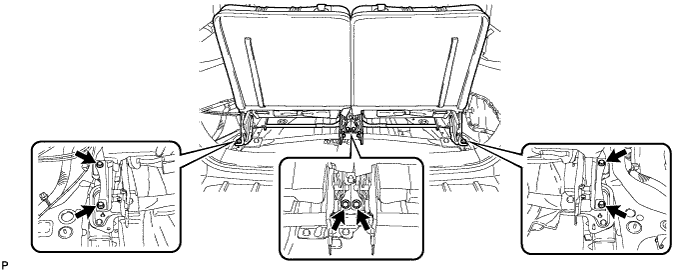
  1. Install the 6 bolts on the rear of the seat.

    B260174

    Torque:
    37 N*m{ 377 kgf*cm , 27 ft.*lbf }

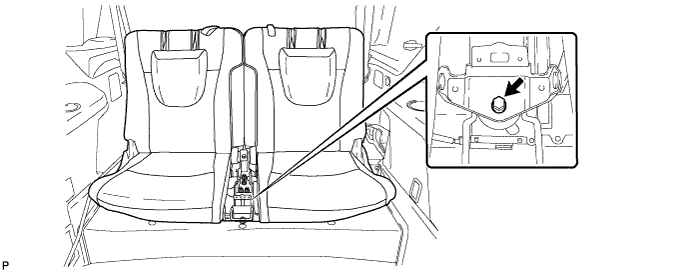
  1. Install the rear No. 2 seat assembly with the bolt.

    B260173

    Torque:
    37 N*m{ 377 kgf*cm , 27 ft.*lbf }


17. INSTALL CENTER SEAT CUSHION COVER SUB-ASSEMBLY (w/ Rear No. 2 Seat)

18. INSTALL REAR NO. 2 SEAT OUTER BELT ASSEMBLY LH (w/ Rear No. 2 Seat)

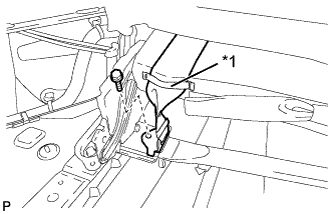
  1. B256544E01
    Route the rear No. 2 seat outer belt assembly LH through the rubber band as shown in the illustration.
    Text in Illustration 
    *1
    Rubber Band

  1. Install the rear No. 2 seat outer belt assembly LH with the bolt.

    Torque:
    42 N*m{ 428 kgf*cm , 31 ft.*lbf }

    NOTICE:
    After installing the belt, check that it is not twisted.


19. INSTALL REAR NO. 2 SEAT OUTER BELT ASSEMBLY RH (w/ Rear No. 2 Seat)

HINT:
Use the same procedure for the RH side and the LH side (Click here).


20. INSTALL REAR DECK FLOOR BOX (w/o Rear No. 2 Seat)

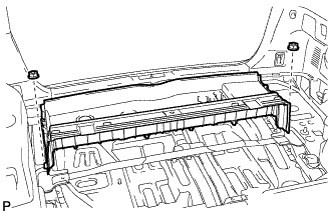
  1. B173679
    Install the rear deck floor box with the 2 nuts.


21. INSTALL DECK FLOOR BOARD ASSEMBLY (w/o Rear No. 2 Seat)

  1. B178560
    Install the 2 nuts and deck floor board assembly.

  1. Engage the 3 claws.


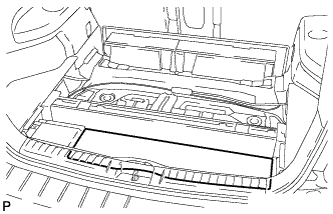
22. INSTALL REAR MAT

  1. B173249
    Install the rear mat.


23. INSTALL DECK FLOOR BOARD ASSEMBLY (w/ Rear No. 2 Seat)

  1. B260042
    Install the rear deck floor board assembly with the 4 nuts and 4 bolts.


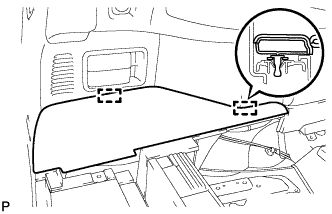
24. INSTALL DECK SIDE TRIM BOX LH

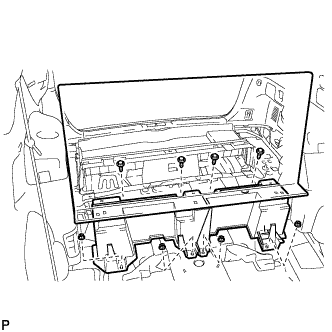
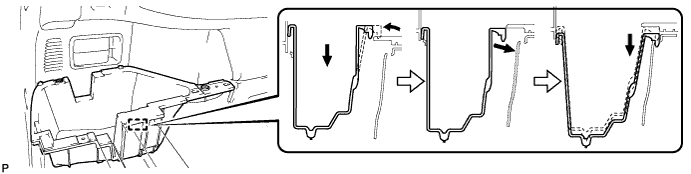
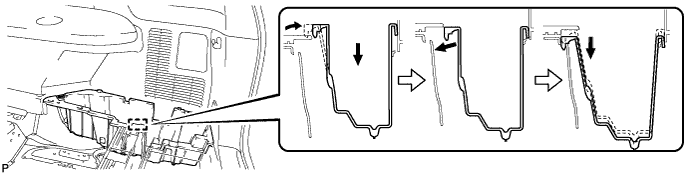
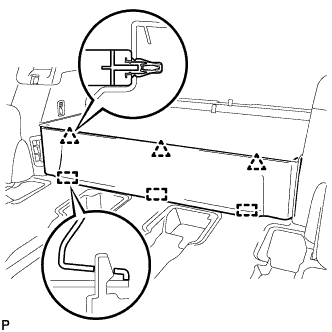
  1. Install the deck side trim box LH as shown in the illustration.

    B178555

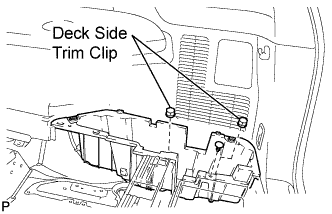
  1. B173243E01
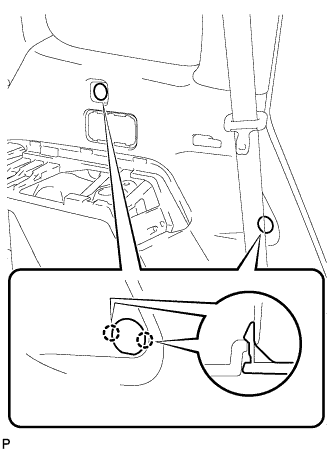
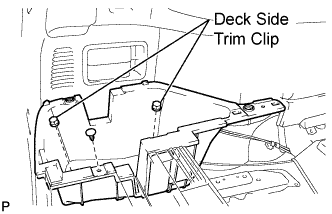
    Install the 2 deck side trim clips and clip.


25. INSTALL REAR SEAT SIDE COVER LH (w/ Rear No. 2 Seat)

  1. B173607
    Engage the 2 clips and install the rear seat side cover LH.


26. INSTALL DECK SIDE TRIM BOX RH

  1. Install the deck side trim box RH as shown in the illustration.

    B178553

  1. B173247E01
    Install the 2 deck side trim clips and clip.


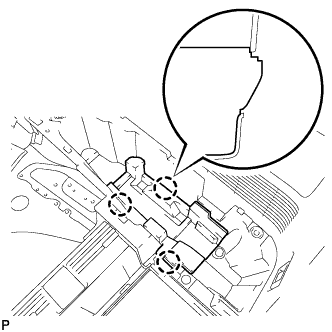
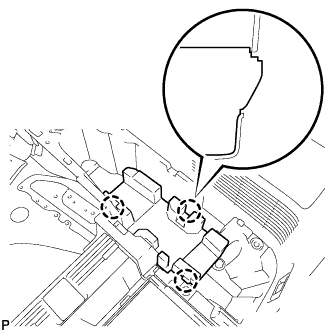
27. INSTALL JACK CARRIER ASSEMBLY (for LHD)

  1. B178549
    Engage the 3 claws, and install the jack carrier assembly.


28. INSTALL JACK CARRIER ASSEMBLY (for RHD)

  1. B179786
    Engage the 3 claws, and install the jack carrier assembly.


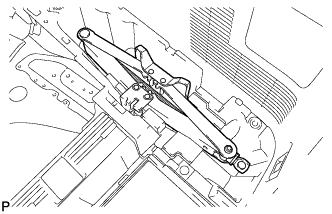
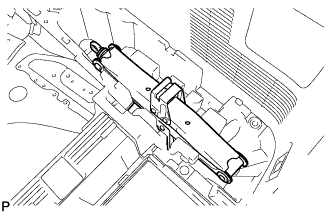
29. INSTALL JACK ASSEMBLY (for LHD)

  1. B173245
    Install the jack assembly.


30. INSTALL JACK ASSEMBLY (for RHD)

  1. B178566
    Install the jack assembly.


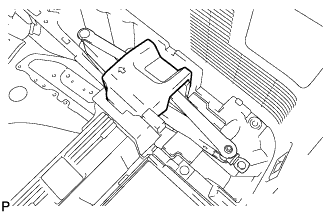
31. INSTALL JACK CARRIER CUSHION (for LHD)

  1. B178550
    Install the jack carrier cushion.


32. INSTALL JACK CARRIER CUSHION (for RHD)

  1. B178551
    Install the jack carrier cushion.


33. INSTALL JACK CARRIER SUPPORT

34. INSTALL REAR SEAT SIDE COVER RH (w/ Rear No. 2 Seat)

  1. B173608
    Engage the 2 clips and install the rear seat side cover RH.


35. INSTALL REAR NO. 1 FLOOR BOARD (w/o Rear No. 2 Seat)

  1. B175152
    Engage the 3 guides and 3 clips and install the rear No. 1 floor board.


36. INSTALL TONNEAU COVER ASSEMBLY (w/ Tonneau Cover)
  1. Install the tonneau cover assembly.


37. INSTALL NO. 2 DECK BOARD SUB-ASSEMBLY

  1. B173244
    Engage the 2 guides and install the No. 2 deck board sub-assembly.


38. INSTALL NO. 3 DECK BOARD SUB-ASSEMBLY

  1. B173242
    Engage the 2 guides and install the No. 3 deck board sub-assembly.


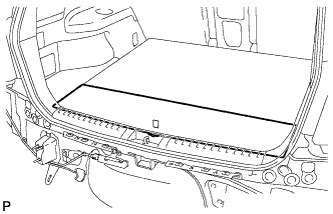
39. INSTALL DECK BOARD ASSEMBLY

  1. B173240
    Install the deck board assembly.


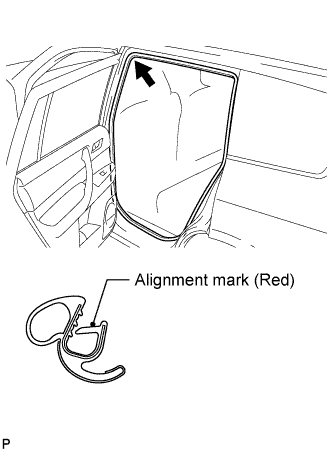
40. INSTALL REAR DOOR OPENING TRIM WEATHERSTRIP

  1. B173233E01
    Align the alignment mark (red) on the weatherstrip with the protruding portion on the body indicated by the arrow in the illustration, and install the rear door opening trim weatherstrip LH.

    NOTICE:
    After installation, check that the corners fit correctly.


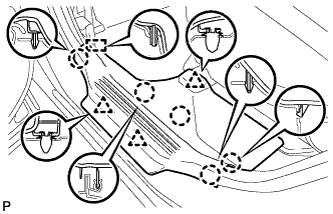
41. INSTALL REAR DOOR SCUFF PLATE

  1. B173228
    Engage the guide, 3 clips and 5 claws, and install the rear door scuff plate LH.


42. CONNECT CABLE TO NEGATIVE BATTERY TERMINAL

NOTICE:
When disconnecting the cable, some systems need to be initialized after the cable is reconnected (Click here).

43. INSPECT SRS WARNING LIGHT
  1. Inspect the SRS warning light (Click here).
← INSTALLATION (Aug 2008 – Jun 2010)COMPONENTS (from May 2007) →