Some of these service operations affect the SRS airbag system. Read the precautionary notices concerning the SRS airbag system before servicing the steering column (Click here).
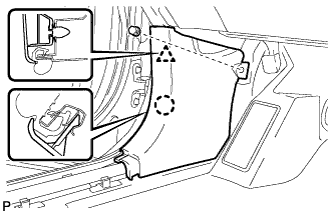
Disconnect the hood lock control cable assembly and remove the lower instrument panel finish panel sub-assembly.
13.
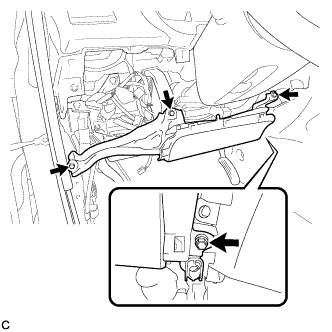
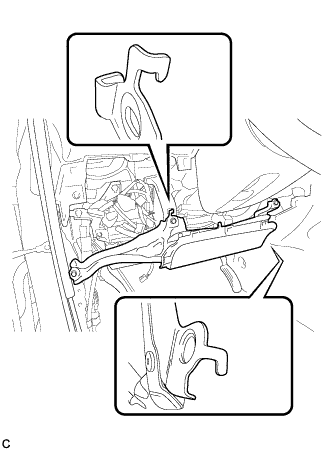
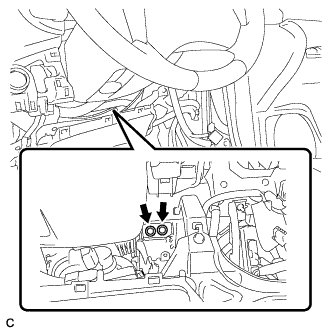
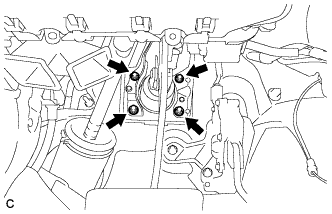
REMOVE DRIVER SIDE KNEE AIRBAG ASSEMBLY
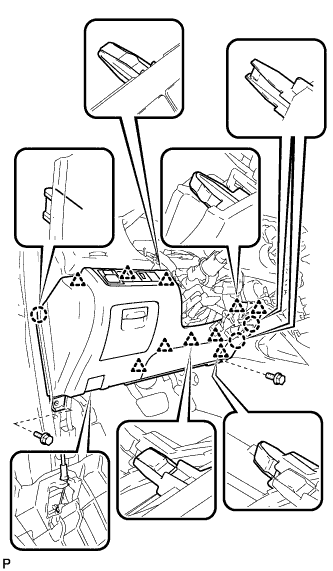
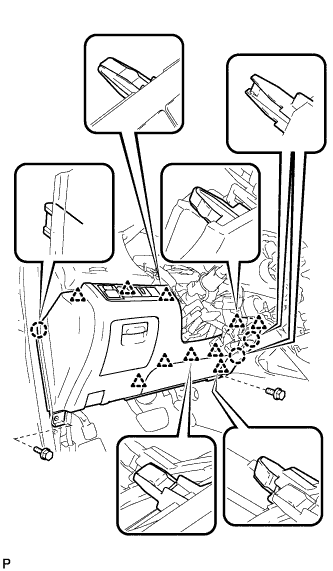
Remove the 4 bolts.
Disengage the 2 hooks.
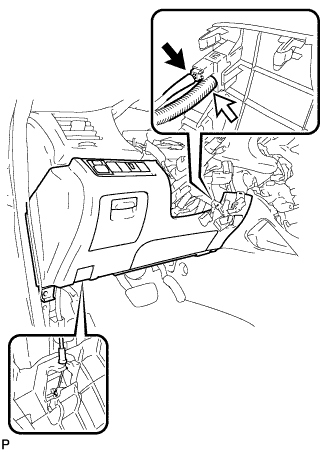
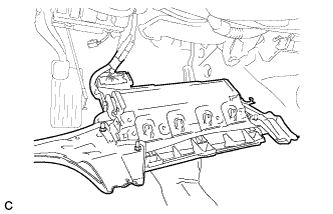
Pull out the driver side knee airbag assembly from the vehicle and support the driver side knee airbag assembly with one hand as shown in the illustration.
NOTICE:
When removing the driver side knee airbag assembly, do not pull the airbag wire harness.
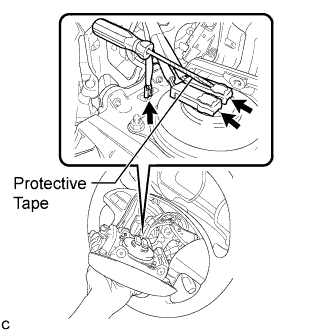
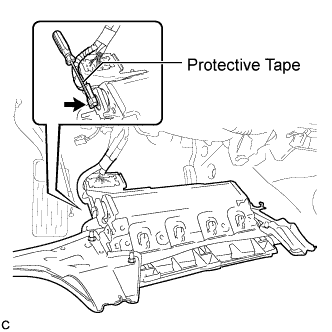
Using a screwdriver with the tip wrapped with protective tape, disconnect the driver side knee airbag connector.
NOTICE:
When handling the airbag connector, take care not to damage the airbag wire harness.
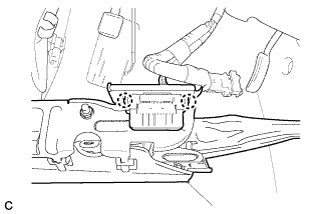
Disengage the 2 claws and separate the DLC3 from the driver side knee airbag assembly.
14.
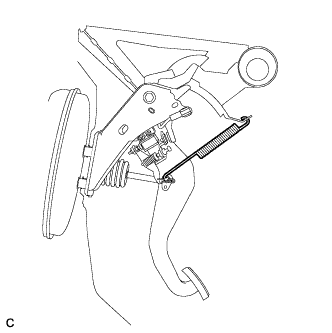
REMOVE BRAKE PEDAL RETURN SPRING
Remove the brake pedal return spring from the push rod pin and instrument panel reinforcement.
15.
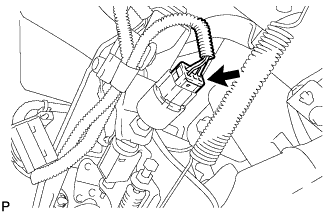
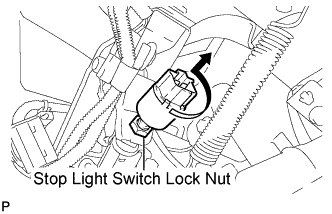
REMOVE STOP LIGHT SWITCH ASSEMBLY
Disconnect the connector.
Loosen the stop light switch lock nut.
Remove the stop light switch assembly as shown in the illustration.
16.
SEPARATE BRAKE MASTER CYLINDER PUSH ROD CLEVIS
Remove the clip and push rod pin, and separate the brake master cylinder push rod clevis from the brake pedal sub-assembly.
17.
REMOVE BRAKE PEDAL SUPPORT SUB-ASSEMBLY (for LHD)
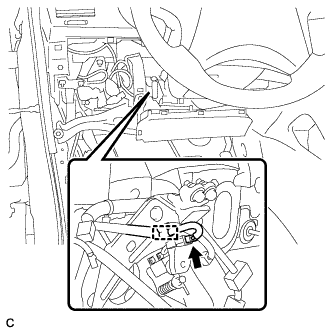
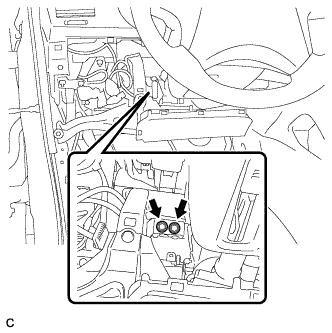
Disconnect the brake pedal load sensing switch connector and disengage the clamp.
Remove the 2 bolts and separate the brake pedal support sub-assembly from the instrument panel reinforcement.
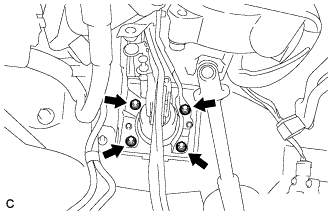
Remove the 4 nuts and brake pedal support sub-assembly from the body.
18.
REMOVE BRAKE PEDAL SUPPORT SUB-ASSEMBLY (for RHD)
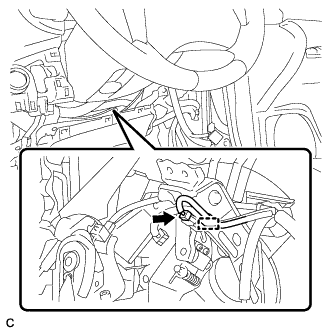
Disconnect the brake pedal load sensing switch connector and disengage the clamp.
Remove the 2 bolts and separate the brake pedal support sub-assembly from the instrument panel reinforcement.
Remove the 4 nuts and brake pedal support sub-assembly from the body.
19.
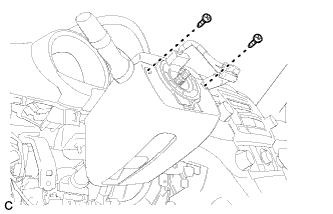
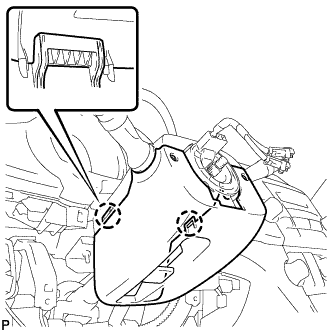
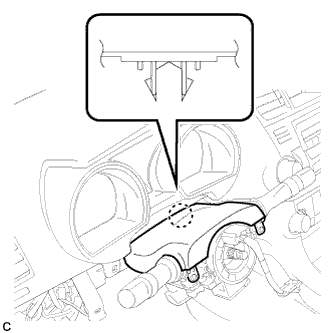
REMOVE STEERING COLUMN COVER
Remove the 2 screws.
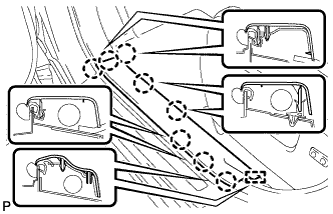
Disengage the 2 claws to remove the lower steering column cover.
Disengage the claw to remove the upper steering column cover.
20.
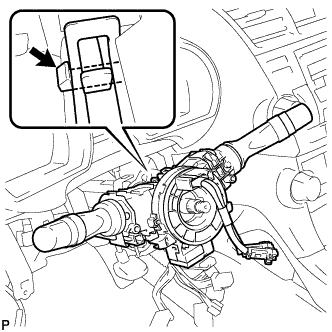
REMOVE TURN SIGNAL SWITCH ASSEMBLY WITH SPIRAL CABLE SUB-ASSEMBLY
Disconnect the connectors from the turn signal switch assembly with spiral cable sub-assembly.
Using pliers, grip the claws of the clip and remove the turn signal switch assembly with spiral cable sub-assembly.
21.
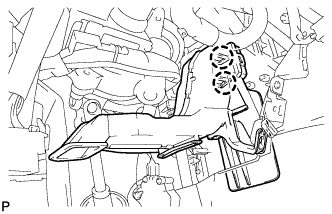
REMOVE NO. 1 AIR DUCT SUB-ASSEMBLY (for LHD)
Disengage the 2 claws and remove the No. 1 air duct sub-assembly.
22.
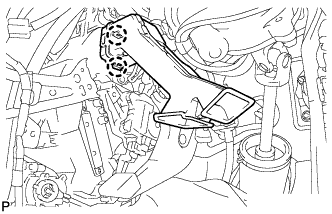
REMOVE NO. 1 AIR DUCT SUB-ASSEMBLY (for RHD)
Disengage the 2 claws and remove the No. 1 air duct sub-assembly.
23.
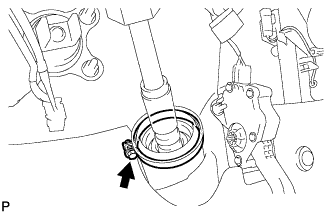
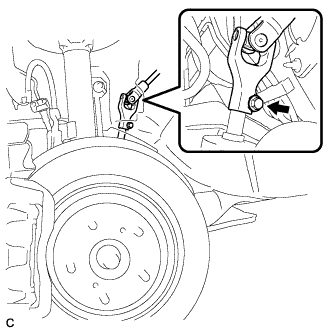
SEPARATE STEERING INTERMEDIATE SHAFT SUB-ASSEMBLY
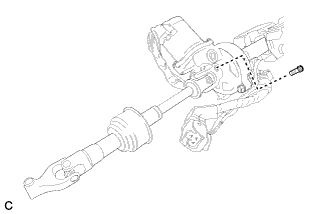
Loosen the bolt.
Remove the bolt and slide the steering intermediate shaft sub-assembly.
NOTICE:
Do not separate the steering intermediate shaft sub-assembly from the power steering link assembly.
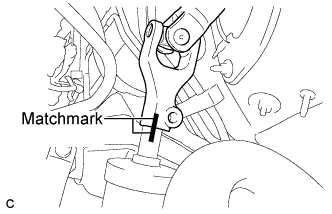
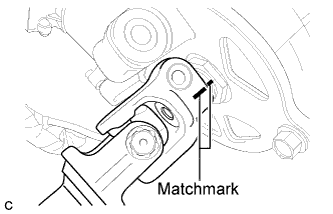
Put matchmarks on the steering intermediate shaft sub-assembly and the power steering link assembly.
Separate the steering intermediate shaft sub-assembly from the power steering link assembly.
24.
REMOVE STEERING COLUMN ASSEMBLY (for LHD)
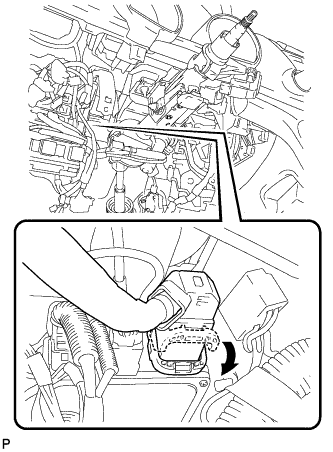
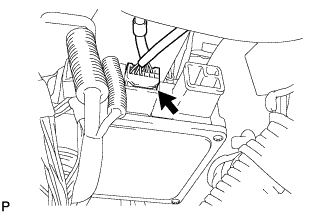
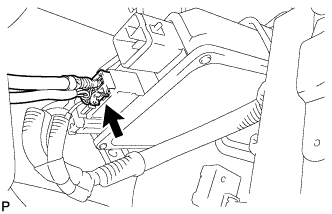
Disconnect the connector from the power steering ECU assembly.
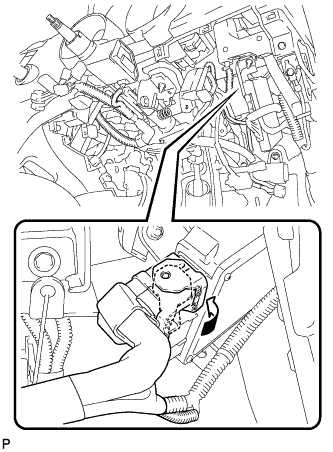
HINT:
As shown in the illustration, turn the lock lever to disconnect the connector.
Disconnect the connector from the power steering ECU assembly.
Disconnect the connectors and disengage the wire harness clamps from the steering column assembly.
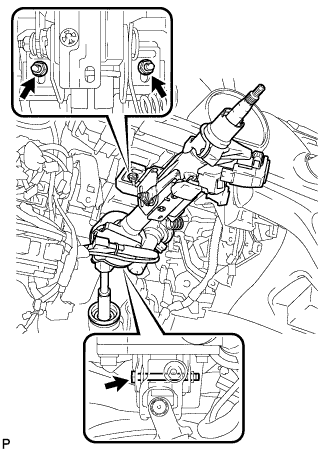
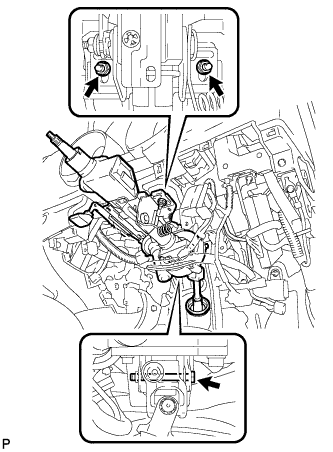
Remove the bolt, 2 nuts, and the steering column assembly.
25.
REMOVE STEERING COLUMN ASSEMBLY (for RHD)
Disconnect the connector from the power steering ECU assembly.
HINT:
As shown in the illustration, turn the lock lever to disconnect the connector.
Disconnect the connector from the power steering ECU assembly.
Disconnect the connectors and disengage the wire harness clamps from the steering column assembly.
Remove the bolt, 2 nuts, and the steering column assembly.