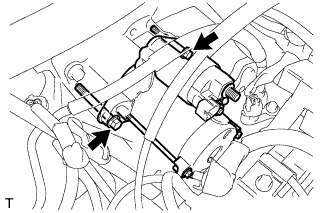
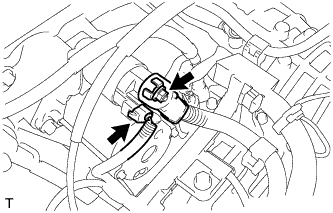
Connect the starter wire with the nut and cover the nut with the cap.
Torque:
9.8 N*m{
100 kgf*cm
, 87 in.*lbf
}
2.
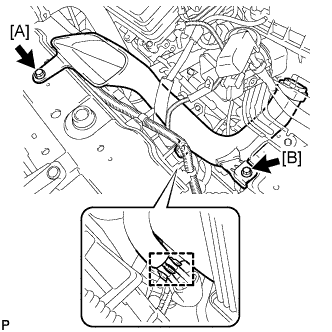
INSTALL AIR CLEANER BRACKET
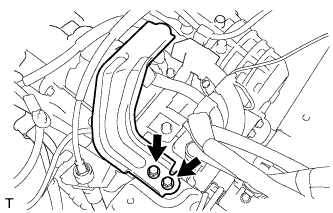
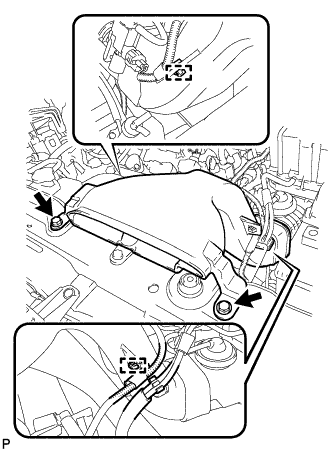
Install the bracket to the reinforcement with the 2 bolts.
Torque:
12 N*m{
120 kgf*cm
, 9 ft.*lbf
}
3.
INSTALL AIR CLEANER CASE SUB-ASSEMBLY
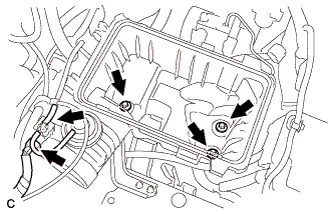
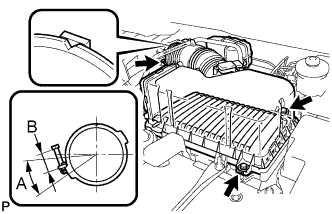
Install the air cleaner case with the 3 bolts.
Torque:
5.0 N*m{
51 kgf*cm
, 44 in.*lbf
}
Connect the hose and connector.
4.
INSTALL AIR CLEANER CAP SUB-ASSEMBLY
Install the air cleaner filter element, align the groove on the air cleaner hose with the throttle body alignment tab and tighten the clamp as shown in the illustration.
HINT:
A = 30°
B = 11 to 14 mm (0.433 in. to 0.551 in.)
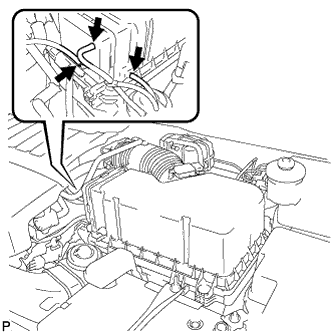
Install the air cleaner cap with the 2 bolts and clips.
Torque:
5.0 N*m{
51 kgf*cm
, 44 in.*lbf
}
Connect the 3 vacuum hoses.
Connect the mass air flow meter connector.
Connect the No. 2 ventilation hose and fuel vapor feed hose assembly.
5.
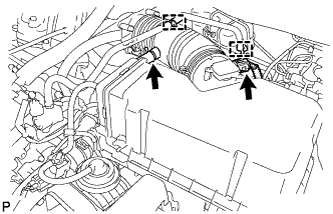
INSTALL NO. 1 AIR CLEANER INLET
Install the No. 1 air cleaner inlet with the 2 bolts.
Torque:
7.0 N*m{
71 kgf*cm
, 62 in.*lbf
}
[A]
Torque:
5.0 N*m{
51 kgf*cm
, 44 in.*lbf
}
[B]
Connect the 2 vacuum hoses.
6.
INSTALL NO. 2 AIR CLEANER INLET
Install the No. 2 air cleaner inlet with the 2 bolts.
Torque:
7.0 N*m{
71 kgf*cm
, 62 in.*lbf
}
Connect the 2 vacuum hoses and harness clamps.
7.
INSTALL BATTERY
NOTICE:
When reconnected the cable, some systems need to be initialized. (Click here).
Install the battery tray and battery.
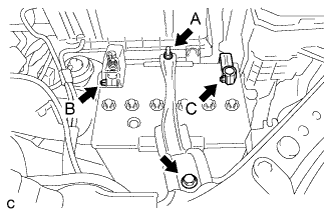
Install the battery clamp with the bolt and nut.
Torque:
Bolt:
5.4 N*m{
55 kgf*cm
, 47 in.*lbf
}
Nut A:
5.4 N*m{
55 kgf*cm
, 47 in.*lbf
}
Connect the positive battery terminal, and tighten the nut.
Torque:
Nut B:
6.4 N*m{
64 kgf*cm
, 57 in.*lbf
}
Connect the negative battery terminal, and tighten the nut.
Torque:
Nut C:
6.4 N*m{
64 kgf*cm
, 57 in.*lbf
}
8.
INSTALL COOL AIR INTAKE DUCT SEAL
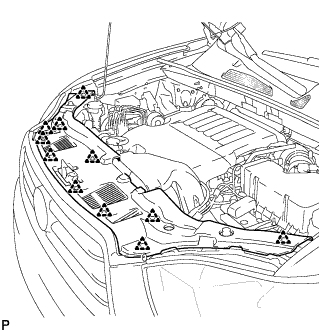
Install the cool air intake duct seal with the 11 clips.