INSTALLATION
Removal / installation · Vehicles built Aug 2008 – Jun 2010
Versions by build date: May 2007 – Jul 2008 Aug 2008 – Jun 2010 from Jul 2010
| 1.
INSTALL WATER PUMP ASSEMBLY |
 |
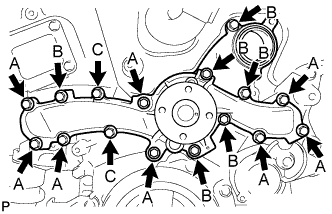
- Install a new water pump gasket and the water pump assembly with the 16 bolts.
-
Torque:
- Bolt A:
- 21 N*m{
214 kgf*cm
, 16 ft.*lbf
}
- Bolts B and C:
- 9.1 N*m{
93 kgf*cm
, 81 in.*lbf
}
- NOTICE:
- Make sure that there is no oil on the threads of bolts A.
- Be sure to replace 2 bolts C with new ones or reuse them after applying adhesive 1344.
- Adhesive:
- Toyota Genuine Adhesive 1344, Three Bond 1344 or equivalent
| 2.
INSTALL WATER INLET HOUSING |
|
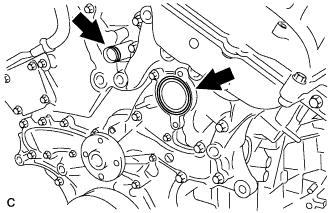
- Install a new water inlet housing gasket and water outlet pipe O-ring.
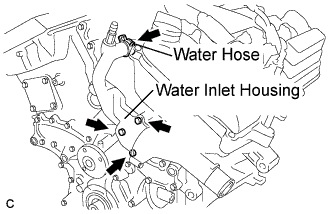
- Install the water inlet housing with the 2 bolts and nut.
-
Torque:
- 10 N*m{
102 kgf*cm
, 7 ft.*lbf
}
- NOTICE:
- Be careful not to allow the O-ring to get caught between the parts.
Connect the water hose.
| 3.
INSTALL WATER PUMP PULLEY |
|
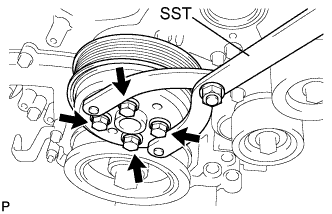
- Temporarily install the water pump pulley with the 4 bolts.
Using SST, hold the water pump pulley.
- SST
- 09960-10010
(09962-01000, 09963-00700)
Tighten the 4 bolts.
-
Torque:
- 21 N*m{
214 kgf*cm
, 16 ft.*lbf
}
| 4.
INSTALL V-RIBBED BELT TENSIONER ASSEMBLY |
|
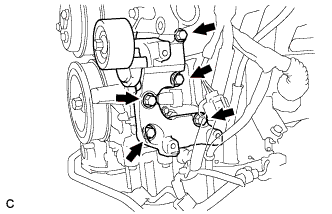
- Install the V-ribbed belt tensioner assembly with the 5 bolts.
-
Torque:
- 43 N*m{
438 kgf*cm
, 32 ft.*lbf
}
| 5.
INSTALL NO. 2 IDLER PULLEY SUB-ASSEMBLY |
|
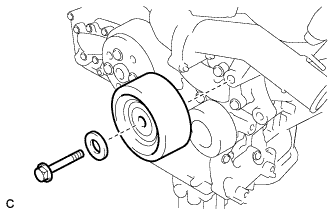
- Install the idler pulley cover plate and idler pulley sub-assembly with the bolt.
-
Torque:
- 43 N*m{
438 kgf*cm
, 32 ft.*lbf
}
| 6.
INSTALL GENERATOR ASSEMBLY
|
|
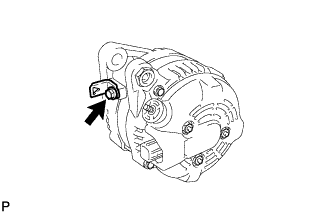
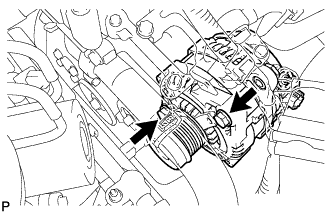
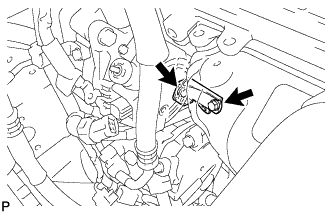
- Install the wire harness clamp bracket with the bolt.
-
Torque:
- 20 N*m{
204 kgf*cm
, 15 ft.*lbf
}
- Connect the generator bracket with the wire harness clamp.
- Install generator assembly with the 2 bolts.
-
Torque:
- 43 N*m{
438 kgf*cm
, 32 ft.*lbf
}
- Temporarily install the 2 bolts.
- Fully tighten the 2bolts.
-
Torque:
- 20 N*m{
204 kgf*cm
, 15 ft.*lbf
}
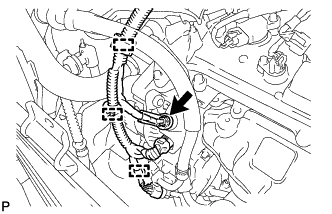
- Connect the generator connector to the generator assembly.
Install the generator wire with the nut.
-
Torque:
- 9.8 N*m{
100 kgf*cm
, 87 in.*lbf
}
Install the terminal cap.
Connect the 3 wire harness clamps.
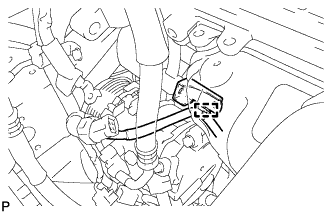
Connect the magnetic clutch connector to the compressor and magnetic clutch.
| 7.
INSTALL ENGINE HANGERS
|
|
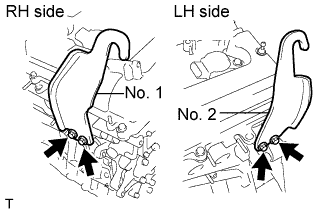
- Install the 2 engine hangers with the 4 bolts as shown in the illustration.
- Part No.:
- No. 1 Engine hanger 12281-31120
No. 2 Engine hanger 12282-31100
Bolts 91671-10825
-
Torque:
- 33 N*m{
337 kgf*cm
, 24 ft.*lbf
}
Attach the engine sling device and hang the engine with the chain block.
| 9.
INSTALL ENGINE ASSEMBLY WITH TRANSAXLE |
|
- HINT:
-
Click here.