DISASSEMBLY
Removal / installation · Vehicles built from May 2007
| 1.
REMOVE PROPELLER SHAFT ASSEMBLY |
 |
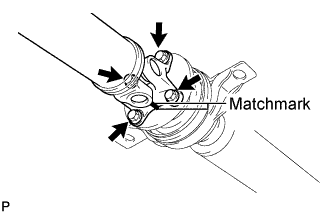
- Place matchmarks on both the flanges.
Remove the 4 nuts, 4 bolts and 4 washers.
| 2.
REMOVE INTERMEDIATE SHAFT |
|
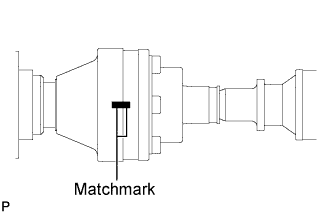
- Place matchmarks on the rear flange and rear propeller shaft.
- NOTICE:
- Do not make matchmarks with a punch.
Using a hexagon wrench (6 mm), remove the 6 bolts and 2 washers and remove the intermediate shaft from the rear propeller shaft.
| 3.
REMOVE NO. 2 CENTER SUPPORT BEARING ASSEMBLY |
|
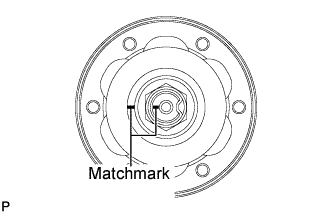
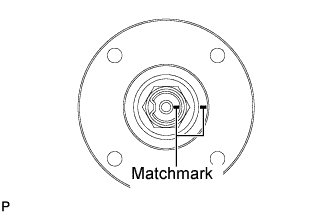
- Place matchmarks on the rear flange and intermediate shaft.
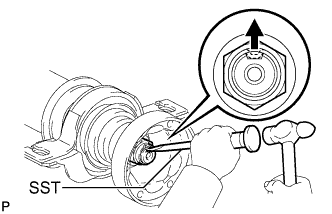
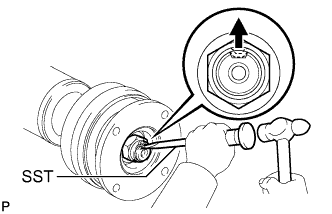
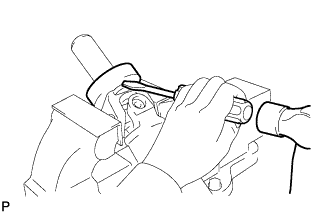
- Using SST and a hammer, unstake the staked part of the nut.
- SST
- 09930-00010
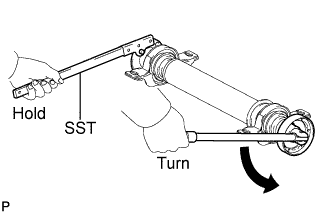
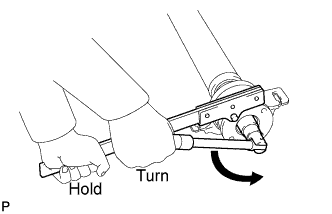
- Using SST to hold the front flange, remove the nut and plate washer.
- SST
- 09330-00021
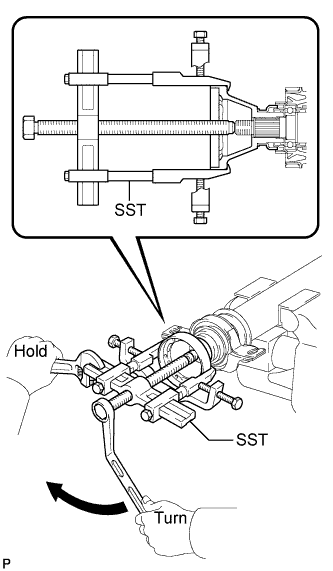
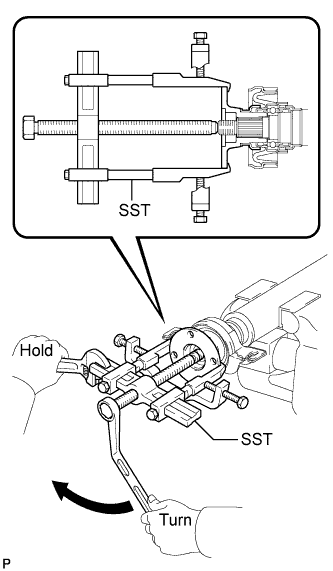
- Using SST, remove the rear flange.
- SST
- 09950-40011
(09951-04020, 09952-04010, 09953-04030, 09954-04010, 09955-04061, 09957-04010, 09957-04010)
Remove the No. 2 center support bearing assembly and washer.
| 4.
REMOVE NO. 1 CENTER SUPPORT BEARING ASSEMBLY |
|
- Place matchmarks on the front flange and intermediate shaft.
- Using SST and a hammer, unstake the staked part of the nut.
- SST
- 09930-00010
- Using SST to hold the front flange, remove the nut and plate washer.
- SST
- 09330-00021
- Using SST, remove the front flange.
- SST
- 09950-40011
(09951-04020, 09952-04010, 09953-04030, 09954-04010, 09955-04061, 09957-04010, 09958-04011)
Remove the No. 1 center support bearing assembly and plate washer.
| 5.
REMOVE SLIDING SHAFT DUST COVER |
|
- Hold the intermediate shaft assembly between aluminum plates in a vise.
Using a screwdriver and a hammer, remove the sliding shaft dust cover.