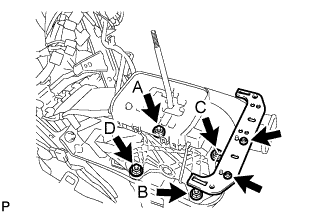
Be careful not to route the indicator light or shift lock system wiring between the shift lever assembly and the floor while installing the shift lever assembly.
Install the No. 2 console box mounting bracket with the 2 screws.
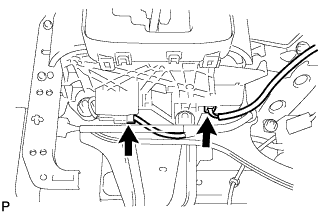
Connect the 2 connectors to the shift lever assembly.
2.
CONNECT TRANSMISSION CONTROL CABLE ASSEMBLY
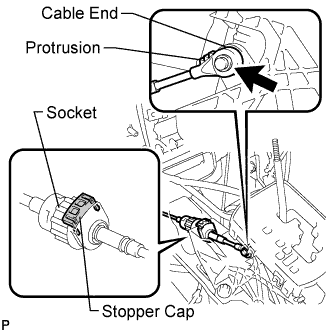
Connect the socket of the transmission control cable assembly to the shift lever assembly.
Connect the control cable end to the shift lever assembly.
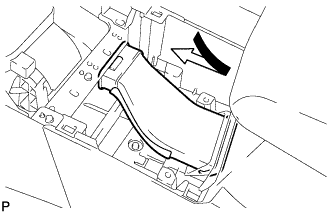
Push the stopper cap to the socket as shown in the illustration.
Turn the socket of the transmission control cable assembly clockwise and install the stopper cap.
NOTICE:
To prevent torsion of the inner cable, the end with protrusion should face up.
Confirm that the connection between the socket and the shift lock control unit is secure.
3.
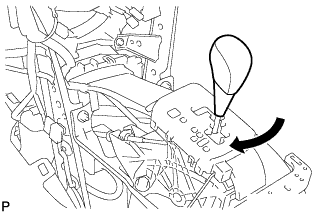
INSTALL SHIFT LEVER KNOB SUB-ASSEMBLY
Install the shift lever knob sub-assembly.
4.
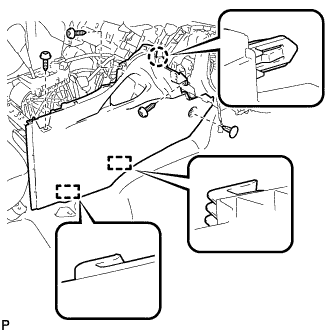
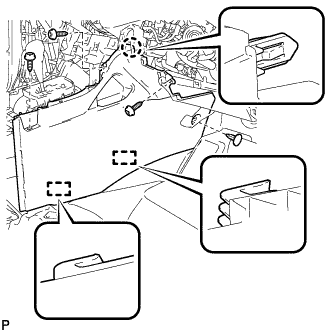
INSTALL FRONT NO. 2 CONSOLE BOX INSERT (for LHD)
Engage the claw and 2 guides.
Install the front No. 2 console box insert with the 3 screws <F> and clip.
5.
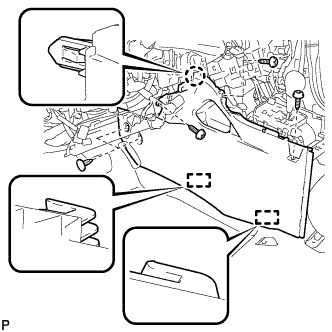
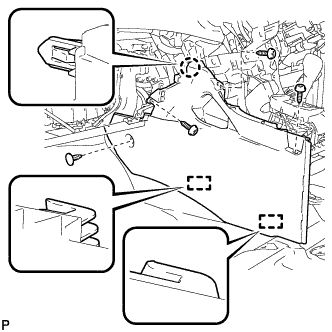
INSTALL FRONT NO. 2 CONSOLE BOX INSERT (for RHD)
Engage the claw and 2 guides.
Install the front No. 2 console box insert with the 3 screws <F> and clip.
6.
INSTALL FRONT NO. 1 CONSOLE BOX INSERT (for LHD)
Engage the claw and 2 guides.
Install the front No. 1 console box insert with the 3 screws <F> and 2 clips.
7.
INSTALL FRONT NO. 1 CONSOLE BOX INSERT (for RHD)
Engage the claw and 2 guides.
Install the front No. 1 console box insert with the 3 screws <F> and clip.
8.
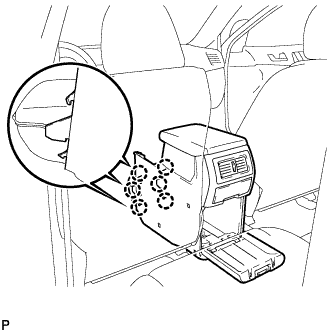
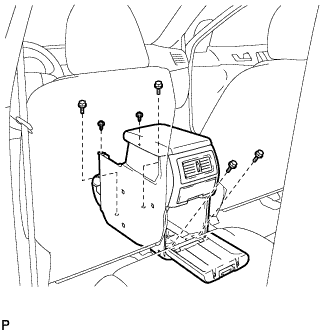
INSTALL CONSOLE BOX ASSEMBLY (w/o Rear Air Conditioning System)
Engage the 6 claws.
Install the console box assembly with the 4 bolts and 2 screws.
9.
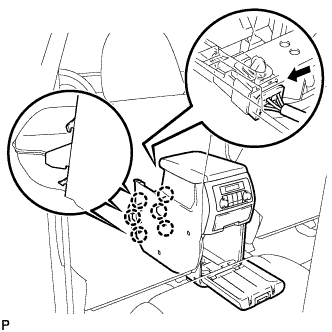
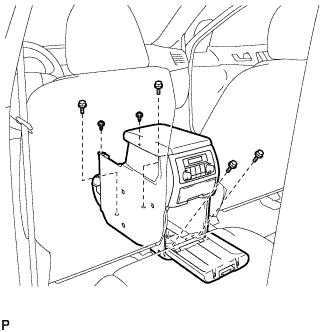
INSTALL CONSOLE BOX ASSEMBLY (w/ Rear Air Conditioning System)
Engage the 6 claws.
Connect the connector.
Install the console box assembly with the 4 bolts and 2 screws.
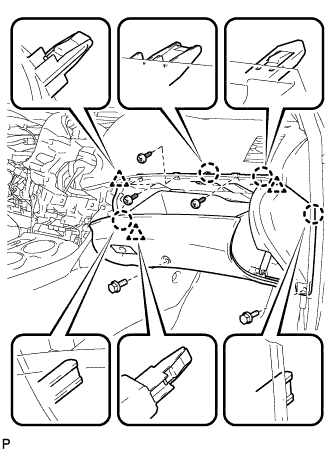
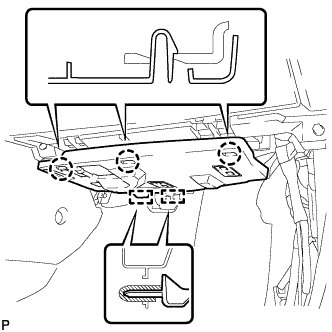
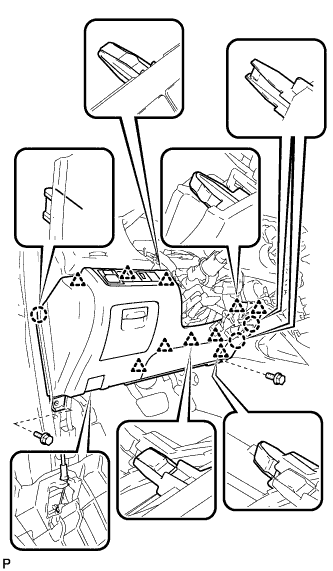
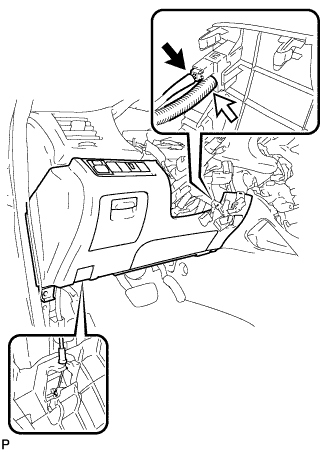
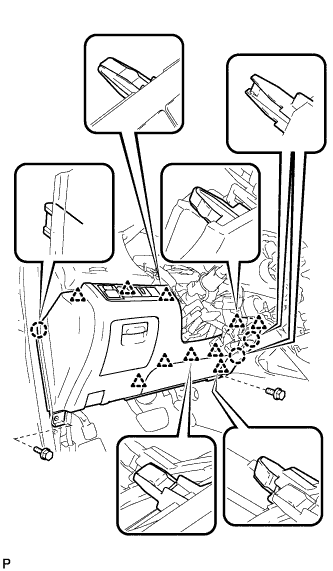
Install the lower instrument panel finish panel sub-assembly with the 2 bolts <B>.
19.
INSTALL COWL SIDE TRIM SUB-ASSEMBLY LH
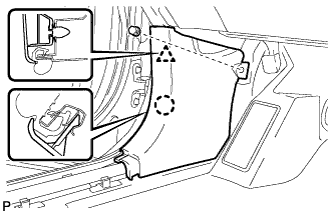
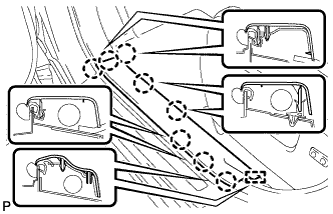
Engage the claw and clip, install the cowl side trim sub-assembly LH.
Install the clip.
20.
INSTALL FRONT DOOR SCUFF PLATE LH
Engage the guide and the 8 claws, and install the front door scuff plate LH.
21.
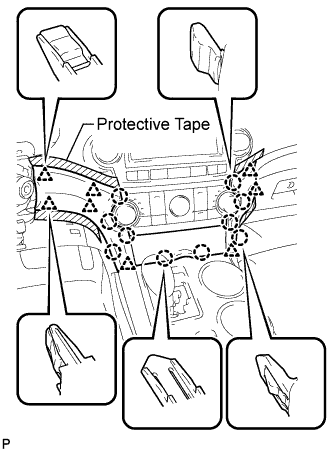
INSTALL CENTER INSTRUMENT CLUSTER FINISH PANEL ASSEMBLY (w/o Smart Entry and Start System)
Apply protective tape to the areas shown in the illustration.
Connect each connector.
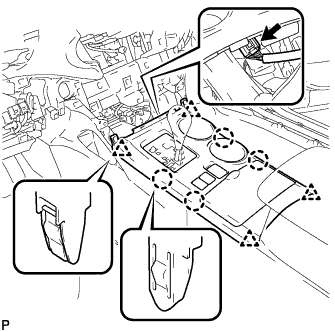
Engage the 10 claws and 8 clips, and install the center instrument cluster finish panel assembly.
NOTICE:
Do not the damage the instrument panel safety pad assembly and lower instrument panel finish panel sub-assembly.
22.
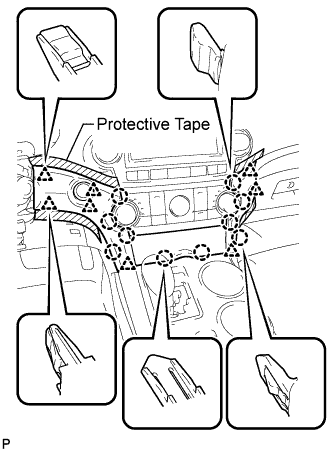
INSTALL CENTER INSTRUMENT CLUSTER FINISH PANEL ASSEMBLY (w/ Smart Entry and Start System)
Apply protective tape to the areas shown in the illustration.
Connect each connector.
Engage the 10 claws and 8 clips, and install the center instrument cluster finish panel assembly.
NOTICE:
Do not the damage the instrument panel safety pad assembly and lower instrument panel finish panel sub-assembly.
23.
CONNECT CABLE TO NEGATIVE BATTERY TERMINAL
NOTICE:
When disconnecting the cable, some systems need to be initialized after the cable is reconnected (Click here).
24.
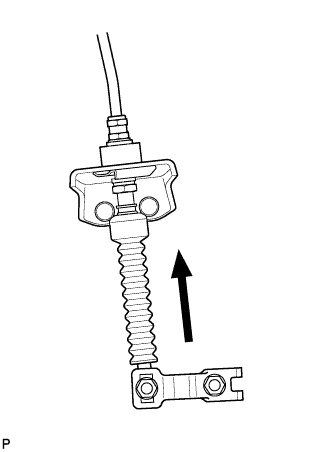
ADJUST SHIFT LEVER POSITION
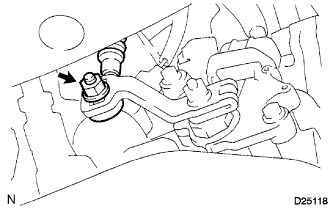
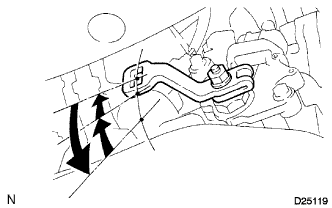
Loosen the nut on the control shaft lever.
Push the control shaft fully downward.
Return the control shaft lever 2 notches to the N position.
While pushing the control cable end up with the shift lever in the N position, install it to the control shaft lever with the nut.
Torque:
12 N*m{
122 kgf*cm
, 9 ft.*lbf
}
NOTICE:
If the control cable end is excessively pushed up, the shift lever cannot be adjusted.
When tightening the nut, confirm that the control cable is properly stretched.
Start the engine and make sure that the vehicle moves forward when shifting the lever from the N to the D position and moves rearward when shifting it to the R position.
25.
INSPECT SHIFT LEVER POSITION
When shifting from the P to the R position with the ignition switch on (IG) and the brake pedal depressed, make sure that the shift lever moves smoothly and moves correctly into the position.
Start the engine and make sure that the vehicle moves forward when shifting from the N to the D position and moves rearward when shifting to the R position. If operation cannot be done as specified, inspect the park/neutral position switch assembly and check the shift lever assembly installation condition.