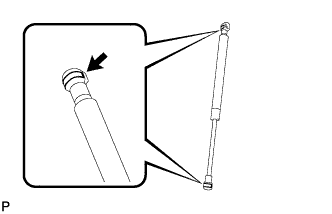
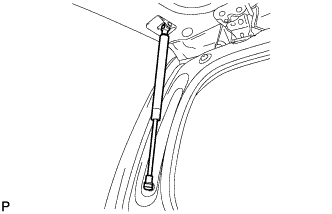
For the glass hatch type, if any of the following parts are removed and installed or adjusted, the location of the axis of the rear wiper motor assembly will change, causing the wiping angle to change. Be sure to remove and install the rear wiper motor assembly using the centering jig.
After installing the back door glass, do not open it before installing the rear wiper link pivot.
Back door glass
Rear wiper motor assembly
Back door hinge assembly
Rear wiper link pivot
Back window stay assembly
Rear spoiler sub-assembly
Back window lock assembly
-
2.
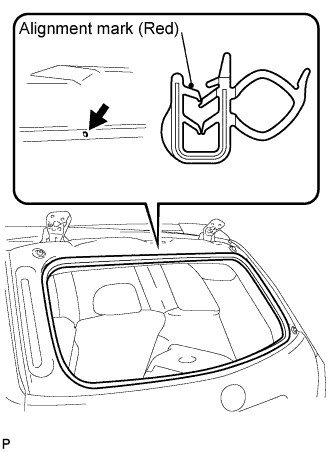
INSTALL NO. 2 BACK DOOR WEATHERSTRIP
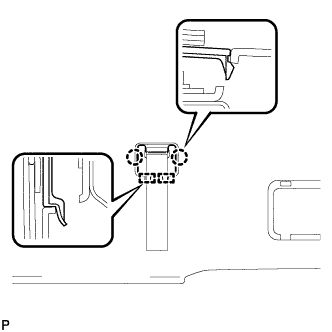
Align the alignment mark (red) on the weatherstrip with the protruding portion on the body indicated by the arrow in the illustration, and install the No. 2 back door weatherstrip.
NOTICE:
After installation, check that the corners fit correctly.
Use the same procedure for the RH side and the LH side.
6.
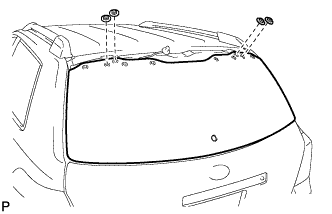
INSTALL REAR SPOILER SUB-ASSEMBLY
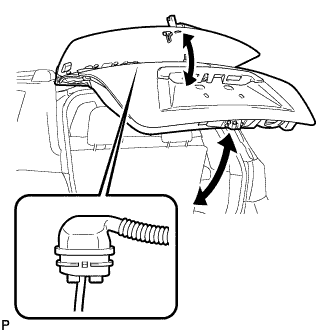
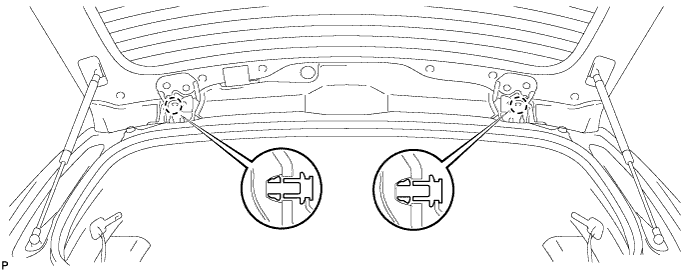
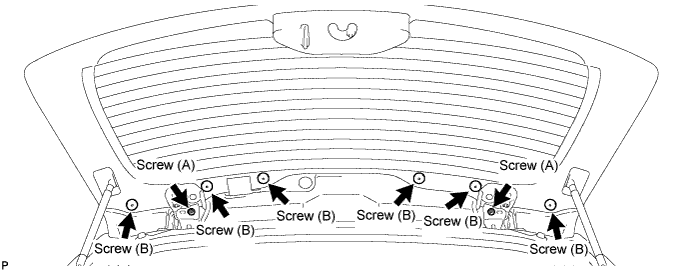
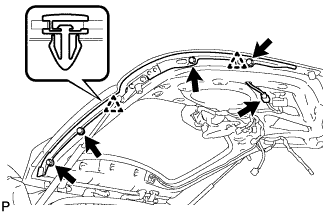
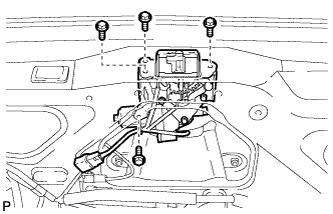
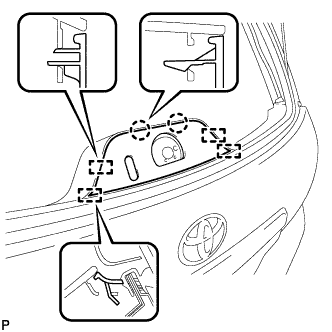
Raise and lower the glass hatch and the back door respectively. Pass the wire harness into the vehicle and temporarily install the rear spoiler sub-assembly.
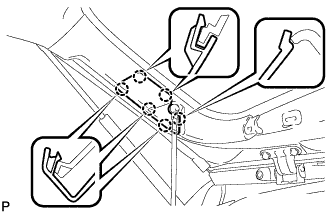
Engage the 2 claws.
Temporarily install the 8 screws.
Using a "TORX" socket wrench (T30), fully tighten the 6 screws (B).
Torque:
5.0 N*m{
51 kgf*cm
, 44 in.*lbf
}
Using a "TORX" socket wrench (T30), fully tighten the 2 screws (A).
Torque:
6.5 N*m{
66 kgf*cm
, 58 in.*lbf
}
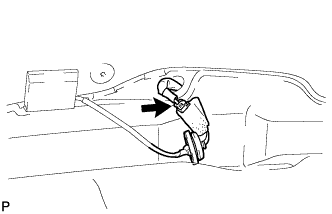
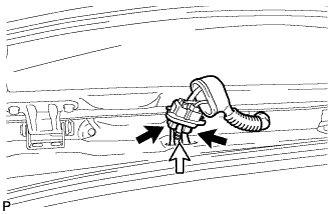
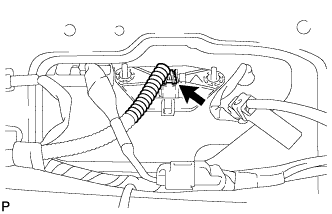
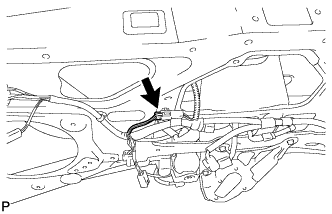
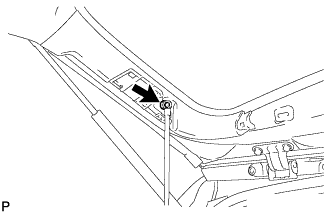
Connect the wire harness.
Connect the connector.
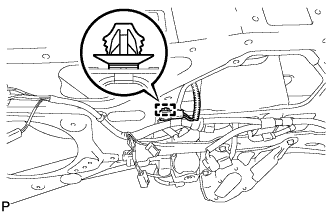
Engage the grommet.
Connect the rear washer hose.
Connect the 2 connectors.
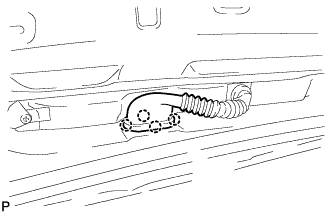
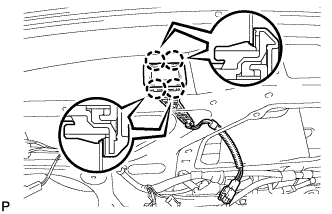
Install the wire harness grommet to the wire harness.
Engage the 4 claws and install the wire harness.
7.
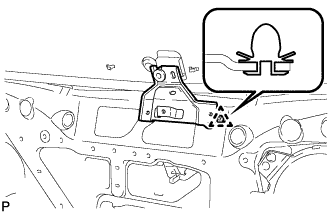
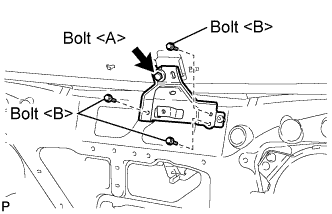
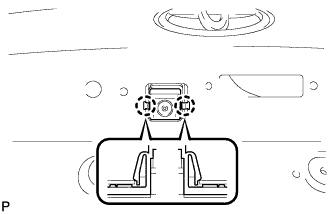
INSTALL BACK DOOR GLASS GUIDE BRACKET SUB-ASSEMBLY (for Fixed Glass Type)
Engage the clip and install the back door glass guide bracket sub-assembly.
Install the 3 bolts <B>.
Torque:
8.0 N*m{
82 kgf*cm
, 71 in.*lbf
}
Tighten the bolt <A>.
Torque:
5.5 N*m{
56 kgf*cm
, 49 in.*lbf
}
8.
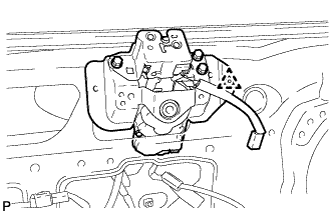
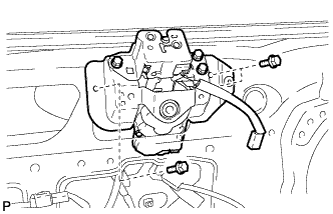
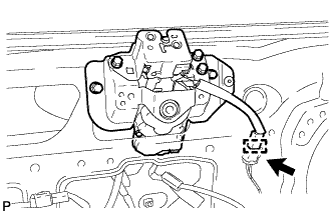
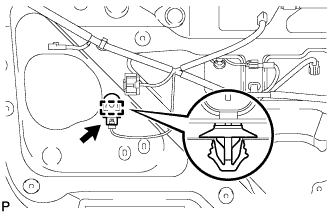
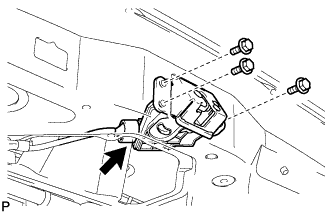
INSTALL BACK WINDOW LOCK ASSEMBLY (for Glass Hatch Type)
Engage the clip and install the back window lock assembly.
Install the 3 bolts.
Torque:
8.0 N*m{
82 kgf*cm
, 71 in.*lbf
}
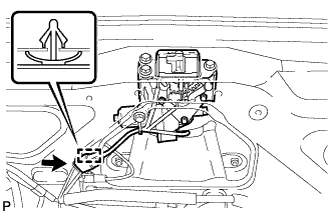
Engage the clamp.
Connect the connector.
9.
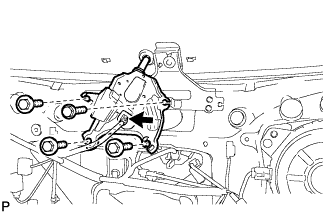
INSTALL REAR WIPER MOTOR ASSEMBLY (for Fixed Glass Type)
Install the rear wiper motor assembly with the 4 bolts.
Torque:
5.5 N*m{
56 kgf*cm
, 49 in.*lbf
}
NOTICE:
Be careful not to scratch the back door glass.
Connect the connector.
10.
INSTALL REAR WIPER MOTOR ASSEMBLY (for Glass Hatch Type)
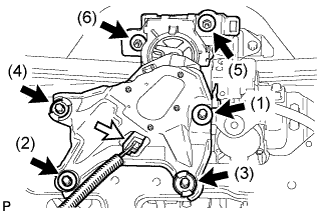
Temporarily install the rear wiper motor assembly with the 4 bolts and 2 nuts.
NOTICE:
Do not hold the rear wiper motor assembly by the rear wiper link pivot.
Be careful not to scratch the back door glass.
Do not remove the centering jig before installing the rear wiper link pivot.
Tighten the 4 bolts and 2 nuts in the order shown in the illustration to install the rear wiper motor assembly.
Torque:
Bolt:
5.5 N*m{
56 kgf*cm
, 49 in.*lbf
}
Nut:
8.0 N*m{
82 kgf*cm
, 71 in.*lbf
}
Connect the connector.
11.
INSTALL REAR WIPER MOTOR GROMMET (for Fixed Glass Type)
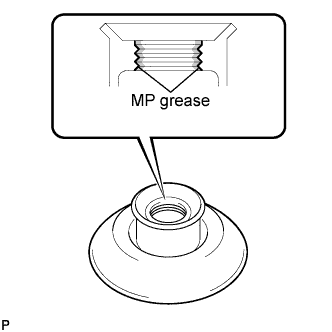
Apply MP grease to the entire surface of the wiper motor grommet lip.
HINT:
Make sure that the hole does not clog with grease and the grooves on the lip are filled with grease.
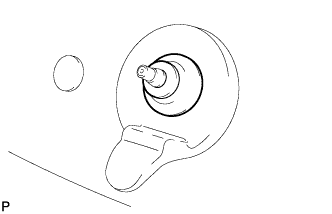
Install the rear wiper motor grommet.
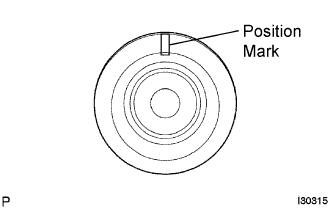
HINT:
As shown in the illustration, install the rear wiper motor grommet with its position mark at the top.
12.
INSTALL REAR WIPER LINK PIVOT (for Glass Hatch Type)
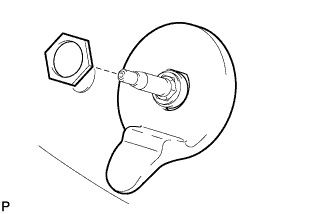
Install the rear wiper link pivot with the nut.
Torque:
7.0 N*m{
71 kgf*cm
, 62 in.*lbf
}
Open the glass hatch.
Disengage the 2 guides.
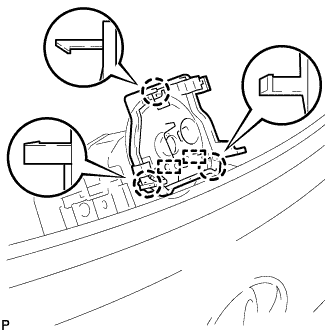
Disengage the 3 claws and remove the centering jig.
Close the glass hatch.
13.
INSTALL REAR WIPER LINK CAP (for Glass Hatch Type)
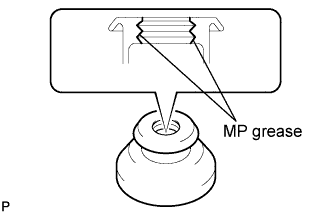
Apply MP grease to the entire surface of the rear wiper link cap.
HINT:
Make sure that the hole does not get clogged with grease and the grooves on the lip are filled with grease.
Install the rear wiper link cap.
14.
INSTALL REAR WIPER ARM AND BLADE ASSEMBLY (for Fixed Glass Type)
Stop the wiper motor at the automatic stop position.
When reinstalling:
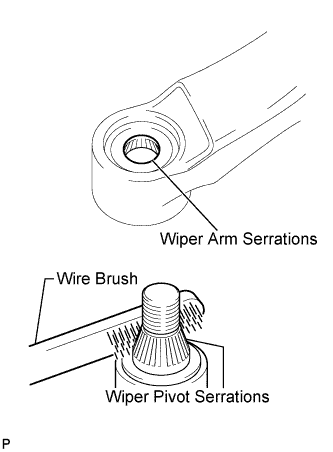
Clean the wiper arm serrations.
Clean the wiper pivot serrations with a wire brush.
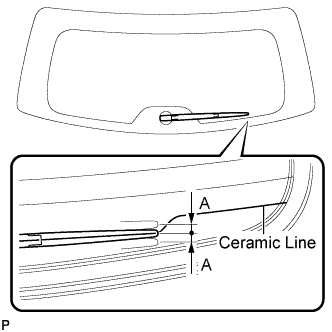
Place the rear wiper arm and blade assembly so that the rear wiper blade is aligned with the ceramic line.
Area
Dimension
A
10 mm (0.39 in.)
Install the rear wiper arm and blade assembly with the nut.
Torque:
5.5 N*m{
56 kgf*cm
, 49 in.*lbf
}
HINT:
Hold down the wiper arm by hand when tightening the nut.
15.
INSTALL REAR WIPER ARM AND BLADE ASSEMBLY (for Glass Hatch Type)
Stop the wiper motor at the automatic stop position.
When reinstalling:
Clean the wiper arm serrations.
Clean the wiper pivot serrations with a wire brush.
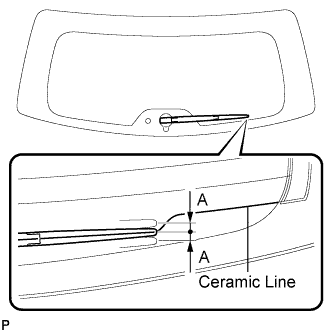
Place the rear wiper arm and blade assembly so that the rear wiper blade is aligned with the ceramic line.
Area
Dimension
A
10 mm (0.39 in.)
Install the rear wiper arm and blade assembly with the nut.
Torque:
5.5 N*m{
56 kgf*cm
, 49 in.*lbf
}
HINT:
Hold down the wiper arm by hand when tightening the nut.
16.
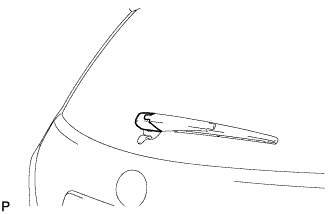
INSTALL REAR WIPER ARM HEAD CAP
Install the rear wiper arm head cap.
HINT:
Push down on the cap until a click sound can be heard.
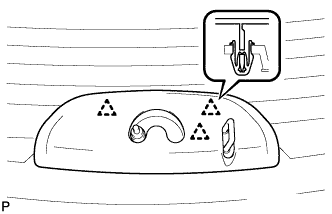
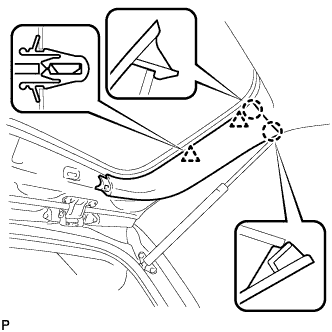
Engage the 3 clips and install the rear wiper shaft cover.
Operate the rear wiper while spraying washer fluid on the glass. Make sure that the rear wiper functions properly and there is no interference with the vehicle body.
18.
INSTALL TELEVISION CAMERA ASSEMBLY (w/ Rear View Monitor System)
Engage the 2 claws and install the television camera assembly.
Connect the television camera connector.
19.
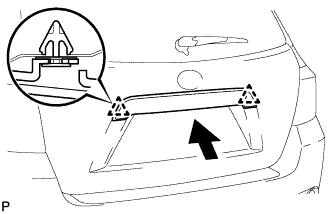
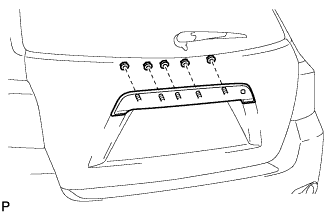
INSTALL BACK DOOR OUTSIDE GARNISH ASSEMBLY
Install 2 new clips and 5 new gaskets on the back door outside garnish assembly.
Engage the 2 clips and install the back door outside garnish assembly.
Install the 5 nuts.
Connect each connector.
20.
INSTALL POWER BACK DOOR SENSOR ASSEMBLY LH (w/ Power Back Door)
Install the power back door sensor assembly with the 4 bolts and engage the 2 clips.
Torque:
1.2 N*m{
12 kgf*cm
, 11 in.*lbf
}
Connect the connector.
21.
INSTALL POWER BACK DOOR SENSOR ASSEMBLY RH (w/ Power Back Door)
HINT:
Use the same procedure for the RH side and the LH side.
22.
INSTALL POWER BACK DOOR MAIN SWITCH (w/ Power Back Door)
Engage the 4 claws and install the back door control switch.
Engage the clamp.
Connect the connector.
23.
INSTALL POWER BACK DOOR WARNING BUZZER (w/ Power Back Door)
Engage the clamp and install the power back door warning buzzer.
Connect the connector.
24.
INSTALL BACK DOOR LOCK ASSEMBLY (w/o Power Back Door)
Connect the connector.
Install the back door lock assembly with the 3 bolts.
Torque:
13 N*m{
133 kgf*cm
, 10 ft.*lbf
}
25.
INSTALL BACK DOOR LOCK ASSEMBLY (w/ Power Back Door)
Install the back door lock assembly with the 4 bolts.
Torque:
13 N*m{
133 kgf*cm
, 10 ft.*lbf
}
Connect the connector.
Engage the clamp.
26.
INSTALL BACK PANEL TRIM BRACKET SUB-ASSEMBLY
Engage the 2 clips and install the back panel trim bracket sub-assembly.
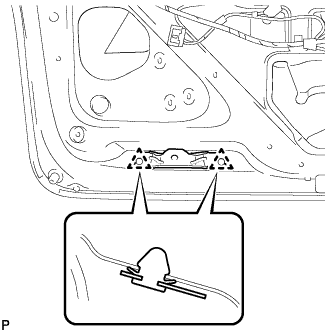
27.
INSTALL BACK DOOR LOCK COVER (for Fixed Glass Type)
Engage the 4 guides and 2 claws, and install the back door lock cover.
28.
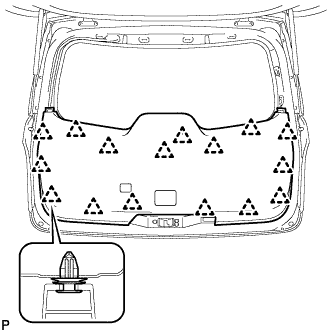
INSTALL BACK DOOR TRIM PANEL ASSEMBLY
Engage the 16 clips and install the back door trim panel assembly.
29.
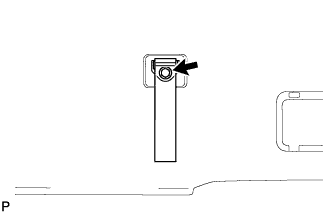
INSTALL ASSIST STRAP ASSEMBLY
Install the assist strap assembly with the bolt.
30.
INSTALL ASSIST STRAP HOLE COVER
Engage the 2 guides and 2 claws, and install the assist strap hole cover.
31.
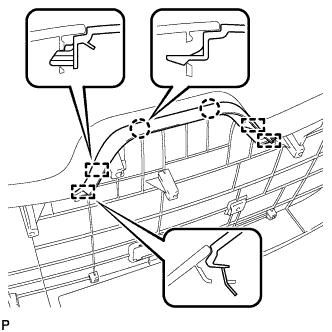
INSTALL BACK DOOR LOCK COVER (for Glass Hatch Type)
Engage the 4 guides and 2 claws, and install the back door lock cover.
32.
INSTALL BACK DOOR TRIM COVER LH (w/o Power Back Door)
Engage the 2 clips and 2 claws, and install the back door trim cover LH.
33.
INSTALL BACK DOOR TRIM COVER LH (w/ Power Back Door)
Engage the 2 clips and 2 claws, and install the back door trim cover LH.
34.
CONNECT POWER BACK DOOR ROD (w/ Power Back Door)
Install the back door stay plate and connect the power back door rod.
Torque:
18 N*m{
184 kgf*cm
, 13 ft.*lbf
}
35.
INSTALL BACK DOOR SERVICE HOLE COVER LH (w/ Power Back Door)
Engage the 6 claws and install the back door service hole cover LH.
36.
INSTALL BACK DOOR TRIM COVER RH
Engage the 2 clips and 2 claws, and install the back door trim cover RH.
37.
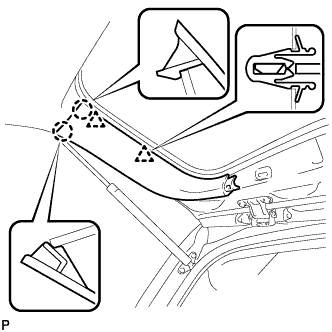
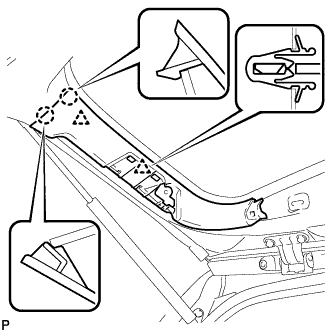
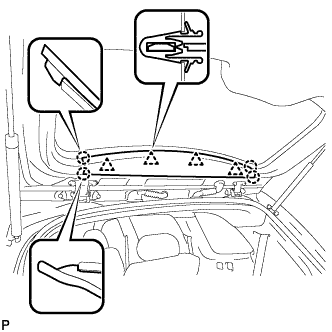
INSTALL BACK WINDOW UPPER TRIM PANEL ASSEMBLY
Engage the 4 clips and 4 claws, and install the back window upper trim panel assembly.