REASSEMBLY
Removal / installation · Vehicles built from May 2007
| 1. INSTALL REAR EVAPORATOR TEMPERATURE SENSOR |

Engage the claw and install the rear evaporator temperature sensor.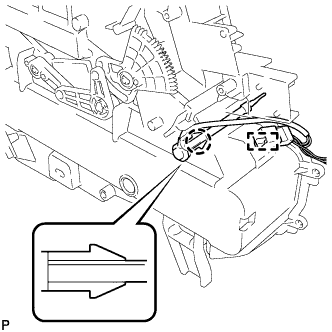

Engage the clamp to the rear cooling unit.
| 2. INSTALL REAR EVAPORATOR SUB-ASSEMBLY |
Sufficiently apply compressor oil to 2 new O-rings and the fitting surfaces. Install the 2 O-rings to the rear evaporator sub-assembly.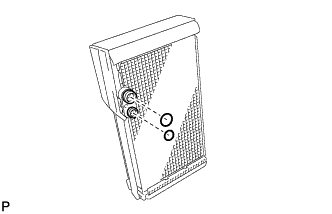
- Compressor oil:
- ND-OIL 8 or equivalent
- NOTICE:
- Keep the O-rings and O-ring fitting surfaces clean from dirt or any foreign objects.
Install the rear evaporator sub-assembly as shown in the illustration.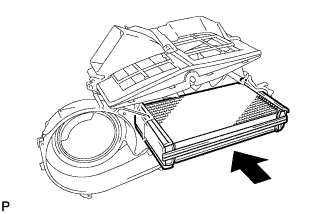
Install the 12 screws.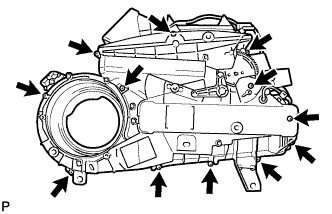
| 3. INSTALL REAR COOLING UNIT EXPANSION VALVE |
Using a 4 mm hexagon wrench, install the rear cooling unit expansion valve with the 2 hexagon bolts.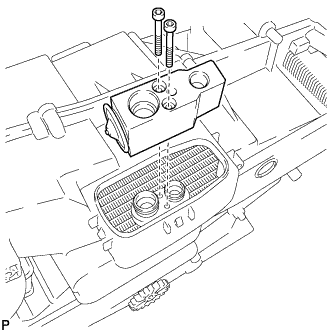
- Torque:
- 3.5 N*m{ 36 kgf*cm , 31 in.*lbf }
Install the grommet.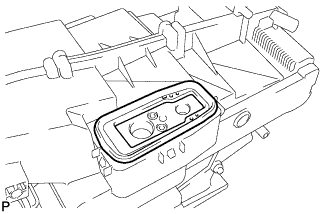
Engage the 3 claws and install the plate.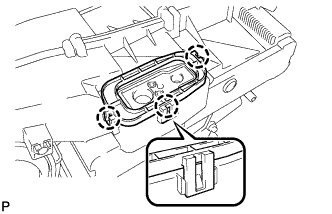
| 4. INSTALL BLOWER MOTOR CONTROLLER |
Install the blower motor controller with the 2 screws.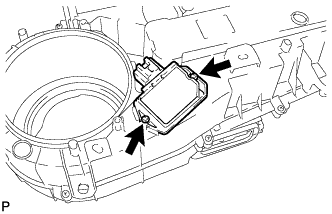
| 5. INSTALL REAR BLOWER MOTOR SUB-ASSEMBLY |
Install the rear blower motor sub-assembly with the 3 screws.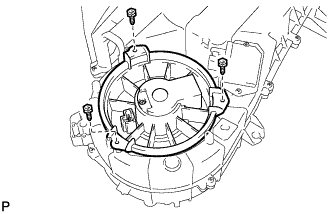
| 6. INSTALL HEATER RADIATOR UNIT SUB-ASSEMBLY |
Install the heater radiator unit sub-assembly as shown in the illustration.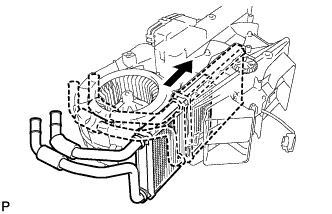
Install the clamp with the screw.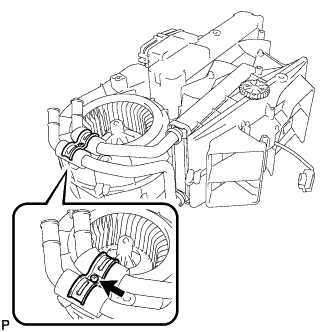
| 7. INSTALL HEATER WATER PIPE AND HOSE SUB-ASSEMBLY |
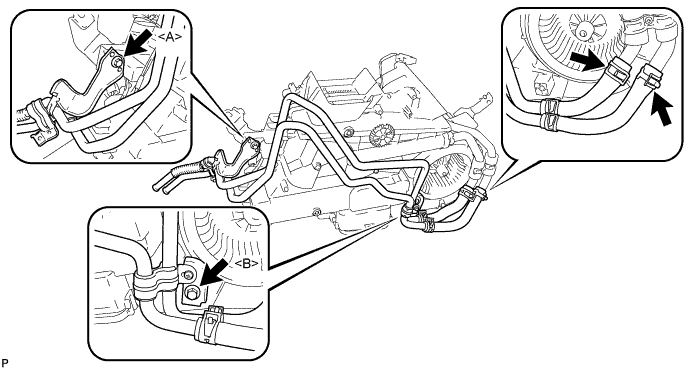
Install the screw <A>.
- Torque:
- 9.8 N*m{ 100 kgf*cm , 87 in.*lbf }
Install the heater water pipe and hose sub-assembly with the screw <B>.
- Torque:
- 9.8 N*m{ 100 kgf*cm , 87 in.*lbf }
Using pliers, grip the claws of the 2 clips and slide the clips to connect the heater water hose.
| 8. INSTALL REAR AIR CONDITIONING TUBE AND ACCESSORY ASSEMBLY |
Sufficiently apply compressor oil to 2 new O-rings and the fitting surfaces of the rear air conditioning tube and accessory assembly.
- Compressor oil:
- ND-OIL 8 or equivalent
Install the 2 new O-rings on the rear air conditioning tube and accessory assembly.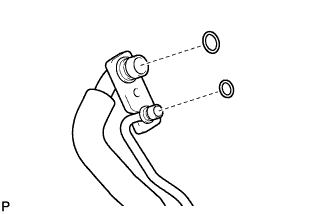
Move the hook connector in the direction indicated by the arrow in the illustration.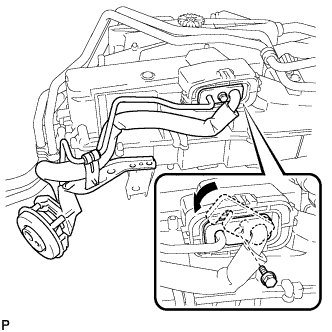
Insert the pipe joint into the fitting hole securely and tighten the bolt.
- Torque:
- 9.8 N*m{ 100 kgf*cm , 87 in.*lbf }
Install the bolt <A>.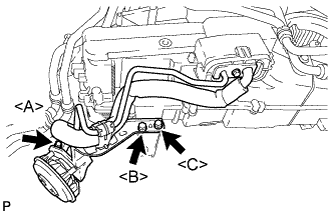
- Torque:
- 9.8 N*m{ 100 kgf*cm , 87 in.*lbf }
Install the screw <B>.
- Torque:
- 9.8 N*m{ 100 kgf*cm , 87 in.*lbf }
Install the rear air conditioning tube and accessory assembly with the screw <C>.
- Torque:
- 9.8 N*m{ 100 kgf*cm , 87 in.*lbf }
Install the packing.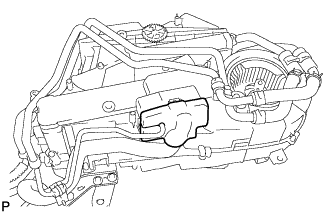
| 9. INSTALL REAR AIR OUTLET CONTROL SERVO MOTOR SUB-ASSEMBLY |
Using the reference point, install the rear air outlet control servo motor sub-assembly with the 2 screws.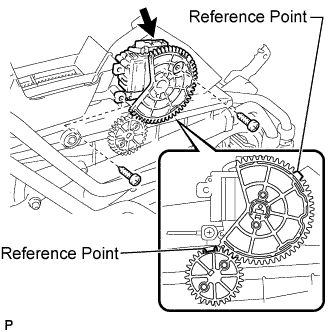
Connect the connector.
| 10. INSTALL REAR AIR MIX CONTROL SERVO MOTOR SUB-ASSEMBLY |
Using the reference point, install the rear air mix control servo motor sub-assembly with the 2 screws.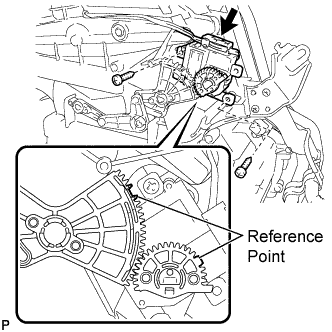
Connect the connector.
| 11. INSTALL DRAIN COOLER HOSE |
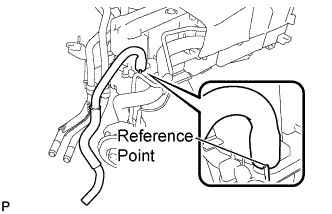
Using the reference point, install the drain cooler hose.