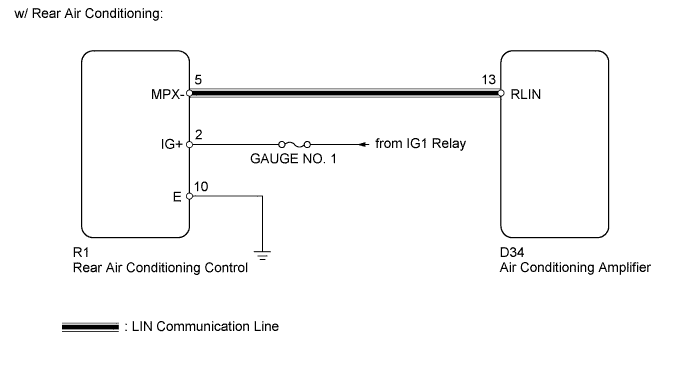
This circuit consists of the rear air conditioning control and the air conditioning amplifier. When the rear air conditioning control is operated, signals are transmitted to the air conditioning amplifier through the LIN communication system. If the LIN communication system malfunctions, the air conditioning amplifier does not operate even if the rear air conditioning control is operated.
WIRING DIAGRAM
INSPECTION PROCEDURE
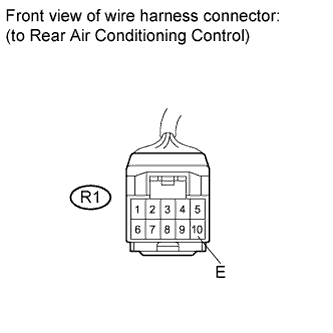
1. CHECK HARNESS AND CONNECTOR (REAR AIR CONDITIONING CONTROL - BODY GROUND)
Disconnect the R1 rear air conditioning control connector.
Measure the resistance according to the value(s) in the table below.
Standard resistance:
Tester Connection
Condition
Specified Condition
R1-10 (E) - Body ground
Always
Below 1 Ω
NG
REPAIR OR REPLACE HARNESS OR CONNECTOR
OK
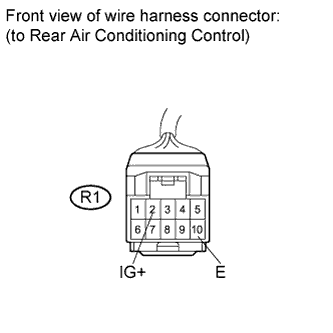
2. CHECK HARNESS AND CONNECTOR (REAR AIR CONDITIONING CONTROL - BATTERY)
Disconnect the R1 rear air conditioning control connector.
Measure the voltage according to the value(s) in the table below.
Standard voltage:
Tester Connection
Condition
Specified Condition
R1-10 (E) - R1-2 (IG+)
Ignition switch on (IG)
11 to 14 V
NG
REPAIR OR REPLACE HARNESS OR CONNECTOR
OK
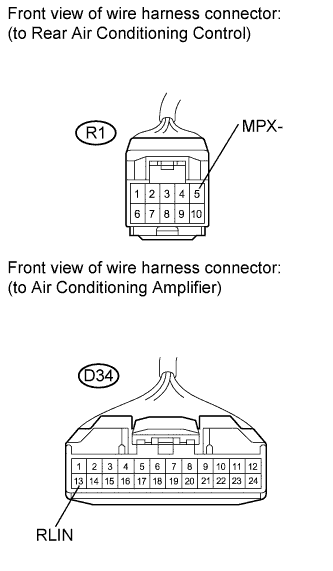
3. CHECK HARNESS AND CONNECTOR (AIR CONDITIONING AMPLIFIER - REAR AIR CONDITIONING CONTROL)
Disconnect the R1 control connector.
Disconnect the D34 amplifier connector.
Measure the resistance according to the value(s) in the table below.
Standard resistance:
Tester Connection
Condition
Specified Condition
D34-13 (RLIN) - R1-5 (MPX-)
Always
Below 1 Ω
D34-13 (RLIN) - Body ground
Always
10 kΩ or higher
NG
REPAIR OR REPLACE HARNESS OR CONNECTOR
OK
4. REPLACE REAR AIR CONDITIONING CONTROL
Replace the rear air conditioning control (Click here).
NEXT
5. CHECK REAR AIR CONDITIONING CONTROL (OPERATION)
Operate the rear air conditioning control to check that it functions properly.
OK:
Rear air conditioning control function operates normally.