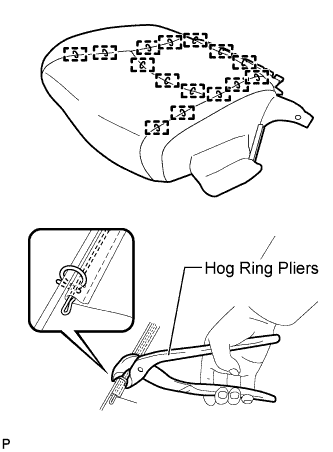
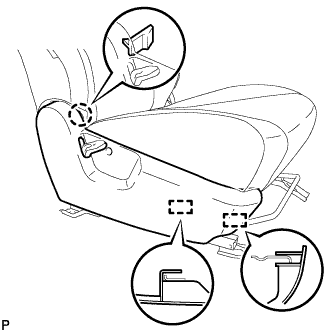
Using hog ring pliers, install the separate type front seat cushion cover to the separate type front seat cushion pad with 15 new hog rings.
NOTICE:
Be careful not to damage the cover.
When installing the hog rings, take care to minimize wrinkles as much as possible.
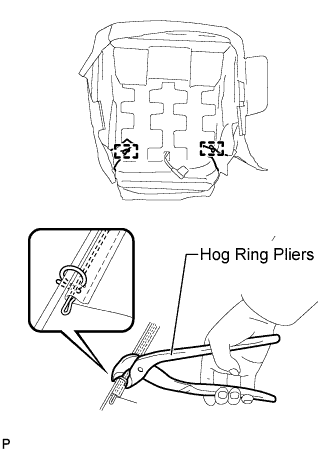
Using hog ring pliers, install the separate type front seat cushion cover to the separate type front seat cushion pad with 2 new hog rings.
NOTICE:
Be careful not to damage the cover.
When installing the hog rings, take care to minimize wrinkles as much as possible.
2.
INSTALL SEPARATE TYPE FRONT SEAT CUSHION COVER WITH PAD
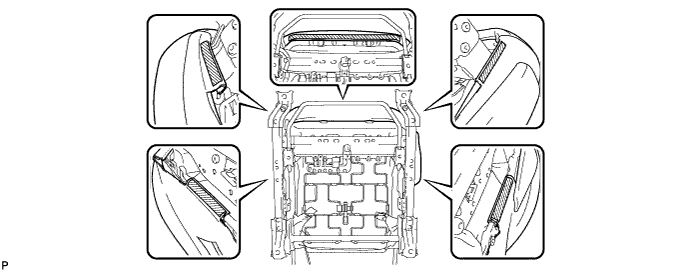
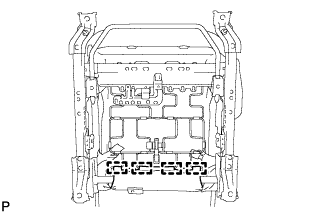
Engage each hook.
Engage the 2 clips and install the front seat cushion cover with pad.
Engage the 4 hooks.
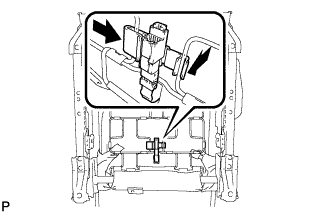
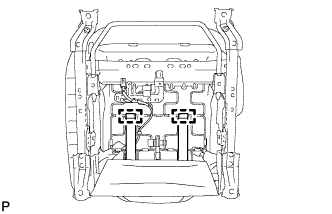
Connect the occupant detection sensor connector as shown in the illustration.
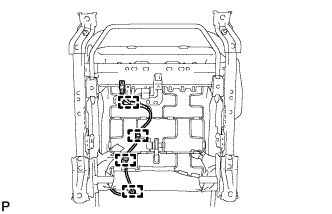
w/ Front Seat Side Airbag:
Engage the 4 clamps.
3.
INSTALL FRONT SEAT INNER BELT ASSEMBLY
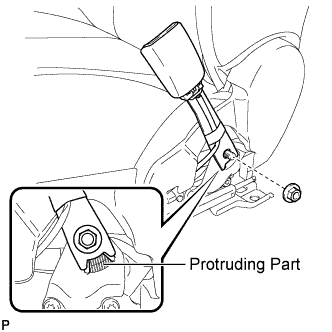
Install the front seat inner belt assembly with the nut.
Torque:
42 N*m{
428 kgf*cm
, 31 ft.*lbf
}
NOTICE:
Do not allow the anchor part of the front seat inner belt assembly to overlap the protruding part of the front seat adjuster.
Connect each connector and clamp.
4.
INSTALL FRONT SEAT CUSHION INNER SHIELD
HINT:
Use the same procedure for the RH side and the LH side (Click here).
5.
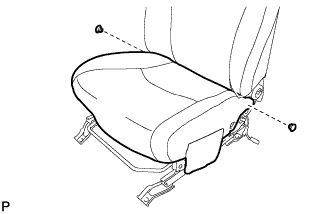
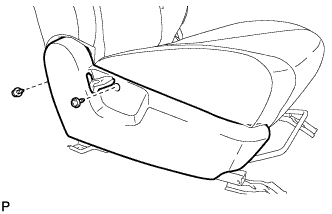
INSTALL FRONT SEAT CUSHION SHIELD
Engage the claw and 2 guides.
Install the front seat cushion shield with the 2 screws.
Install the 2 hooks on the backside of the front seatback board sub-assembly.
6.
INSTALL RECLINING ADJUSTER RELEASE HANDLE
HINT:
Use the same procedure for the RH side and the LH side (Click here).
7.
INSTALL FRONT SEAT ASSEMBLY
HINT:
Use the same procedure for the RH side and the LH side (Click here).
8.
INSPECT FRONT SEAT SLIDE ADJUSTER LOCK
During sliding operation of the front seat, check that the left and right adjusters move together smoothly and lock simultaneously. If the seat adjusters do not lock simultaneously, loosen the bolts securing the seat to adjust the adjuster position.
9.
INSTALL REAR INNER SEAT TRACK COVER
HINT:
Use the same procedure for the RH side and the LH side (Click here).
10.
INSTALL REAR OUTER SEAT TRACK COVER
HINT:
Use the same procedure for the RH side and the LH side (Click here).
11.
INSTALL FRONT INNER SEAT TRACK COVER
HINT:
Use the same procedure for the RH side and the LH side (Click here).
12.
INSTALL FRONT OUTER SEAT TRACK COVER
HINT:
Use the same procedure for the RH side and the LH side (Click here).
13.
INSTALL FRONT SEAT HEADREST ASSEMBLY
14.
CONNECT CABLE TO NEGATIVE BATTERY TERMINAL (w/ Front Seat Side Airbag)
NOTICE:
When disconnecting the cable, some systems need to be initialized after the cable is reconnected (Click here).
15.
INSPECT SRS WARNING LIGHT (w/ Front Seat Side Airbag)