INSTALLATION
Removal / installation · Vehicles built Aug 2008 – Jun 2010
Versions by build date: May 2007 – Jul 2008 Aug 2008 – Jun 2010 from Jul 2010
| 1. INSTALL WIRELESS DOOR LOCK BUZZER |

Connect the connector.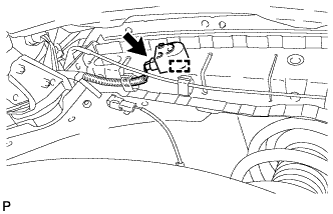

Install the wireless door lock buzzer with the clamp.
| 2. INSTALL FRONT FENDER LINER LH |
Install the front fender liner LH with the 5 clips and 8 screws.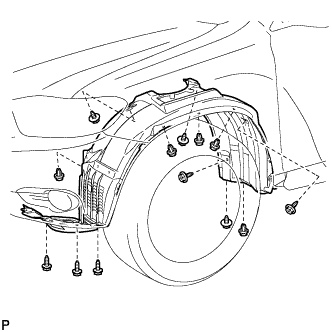
Install 2 new grommets.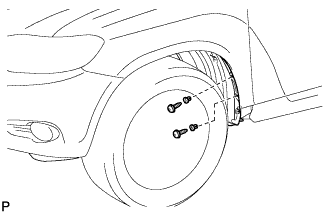
Using a 4 mm hexagon wrench, install the 2 screws.
Install the screw and pin hold clip.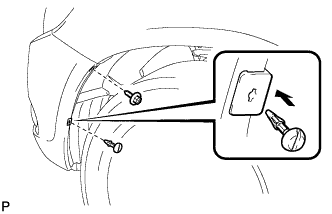
- Torque:
- 3.0 N*m{ 31 kgf*cm , 27 in.*lbf }
| 3. INSTALL FRONT FENDER MOULDING SUB-ASSEMBLY LH |
Clean the vehicle body surface.
Using a heat light, heat the vehicle body surface.
Remove the front fender side protector from the vehicle body.
Wipe off any tape adhesive residue with cleaner.
Clean the front fender moulding sub-assembly. (If reusing the front fender moulding sub-assembly)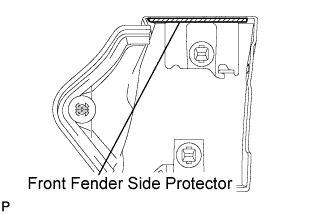
Using a heat light, heat the front fender moulding sub-assembly.
Remove the front fender side protector from the front fender moulding sub-assembly.
Wipe off any tape adhesive residue with cleaner.
Install a new front fender side protector to the the front fender moulding sub-assembly.
Install 2 new No. 4 clips on the front fender moulding sub-assembly.
Install a new pad on the front fender moulding sub-assembly.
Install the front fender moulding sub-assembly.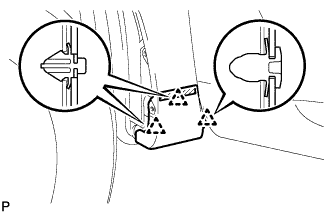
Using a heat light, heat the vehicle body and the front fender moulding sub-assembly.
Remove the release paper from the front fender moulding sub-assembly.
- HINT:
- After removing the release paper, keep the exposed adhesive free from foreign matter.
Engage the 3 clips and install the front fender moulding sub-assembly.
Using a 4 mm hexagon wrench, install the screw.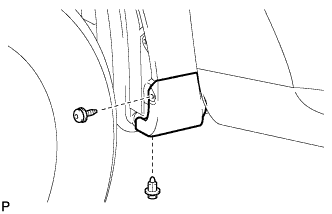
Install the clip.
| 4. INSTALL NO. 1 ENGINE UNDER COVER |
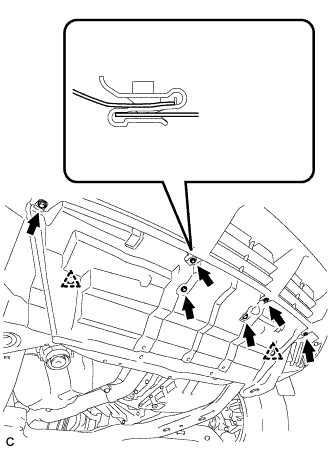
Install the No. 1 engine under cover with the 6 bolts and 2 clips.