REMOVAL
Removal / installation · Vehicles built from Jul 2010
Versions by build date: May 2007 – Jul 2008 Aug 2008 – Jun 2010 from Jul 2010
| 1.
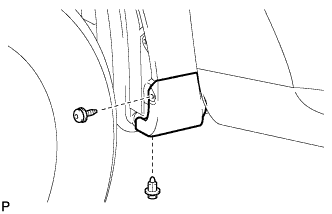
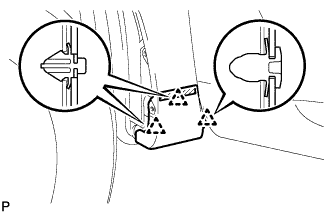
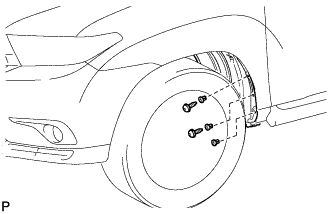
REMOVE FRONT FENDER MOULDING SUB-ASSEMBLY LH
|
 |
- Remove the clip.
Using a 4 mm hexagon wrench, remove the screw.
- Peel off the double-sided tape and disengage the 3 clips, and then remove the front fender moulding sub-assembly.
Remove the pad from the front fender moulding sub-assembly.
Remove the 2 No. 4 clips from the front fender moulding sub-assembly.
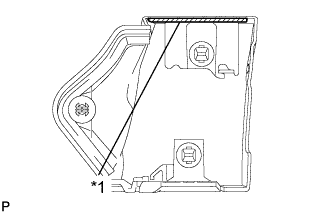
- Remove the double-sided tape from the front fender moulding sub-assembly.
Text in Illustration
*1
|
Double-sided Tape
|
| 2.
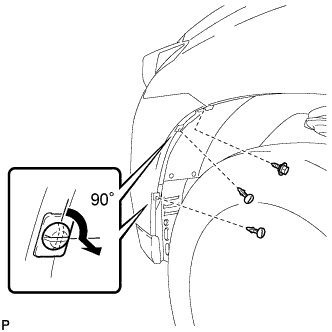
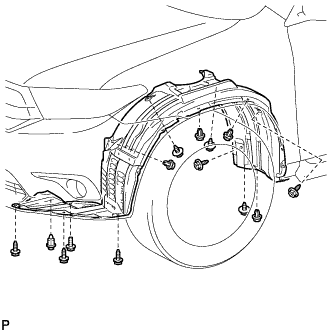
REMOVE FRONT FENDER LINER LH
|
|
- Remove the screw.
Using a screwdriver, turn the pin 90 degrees and remove the 2 pin hold clips.
- Using a 4 mm hexagon wrench, remove the 2 screws.
Remove the 3 grommets.
- HINT:
- The grommets need to be replaced with new ones because they will break when they are removed.
- Remove the 5 clips.
Remove the bolt, 8 screws and front fender liner LH.
| 3.
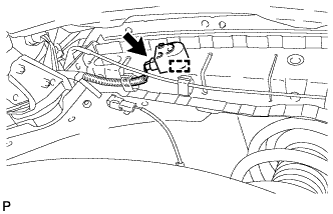
REMOVE WIRELESS DOOR LOCK BUZZER |
|
- Disconnect the connector.
Remove the clamp and the wireless door lock buzzer.