Home › HEATER & AIR CONDITIONING SYSTEM › AIR CONDITIONING › CONDENSERREMOVAL
Removal / installation · Vehicles built Aug 2008 – Jun 2010
Versions by build date: May 2007 – Jul 2008 Aug 2008 – Jun 2010 from Jul 2010
1.
RECOVER REFRIGERANT FROM REFRIGERATION SYSTEM
Start the engine.
Turn the A/C switch on.
Operate the cooler compressor at an engine speed of approximately 1000 rpm for 5 to 6 minutes to circulate the refrigerant. This causes most of the compressor oil from the various components of the A/C system to collect in the A/C compressor.
Stop the engine.
Recover the refrigerant from the A/C system using a refrigerant recovery unit.
2.
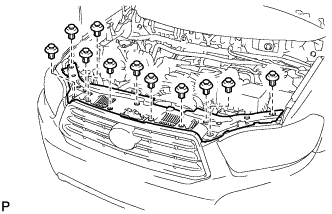
REMOVE COOL AIR INTAKE DUCT SEAL
Remove the 11 clips and cool air intake duct seal.
3.
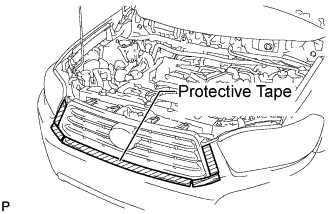
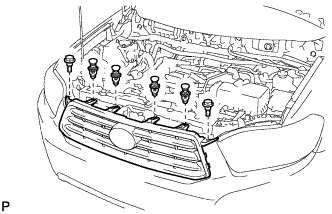
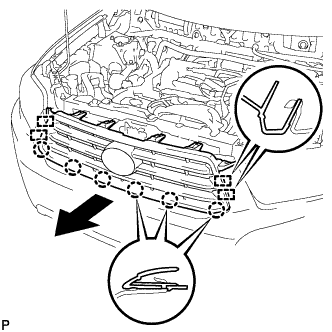
REMOVE RADIATOR GRILLE
Put protective tape around the radiator grille.
Remove the 2 bolts and 4 clips.
Disengage the 6 claws and 4 guides, and remove the radiator grille.
4.
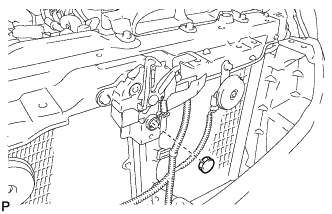
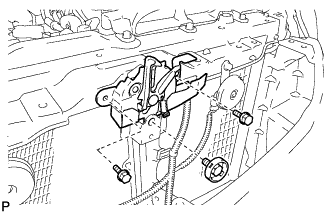
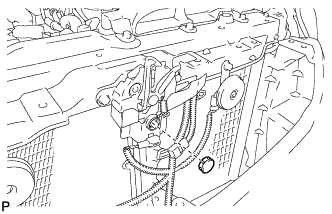
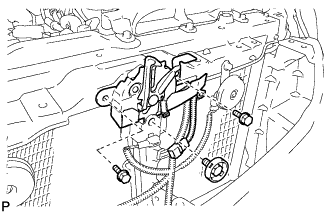
REMOVE HOOD LOCK ASSEMBLY (w/o Engine Hood Courtesy Switch)
Remove the hood lock nut cap.
Remove the 3 bolts.
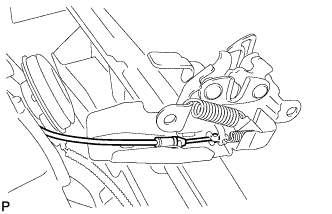
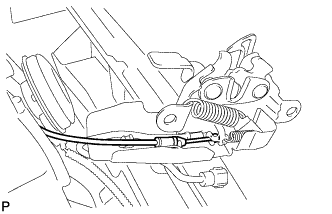
Disconnect the hood lock control cable and remove the hood lock assembly.
5.
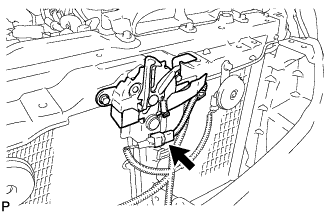
REMOVE HOOD LOCK ASSEMBLY (w/ Engine Hood Courtesy Switch)
Disconnect the connector.
Remove the hood lock nut cap.
Remove the 3 bolts.
Disconnect the hood lock control cable and remove the hood lock assembly.
6.
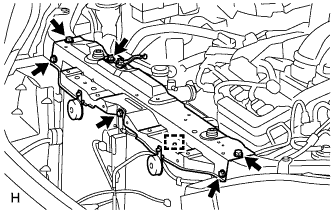
REMOVE UPPER RADIATOR SUPPORT SUB-ASSEMBLY (for LHD)
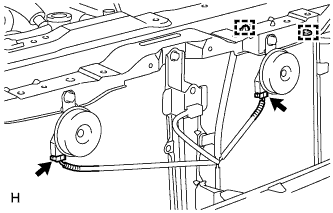
Disconnect the low pitched horn and high pitched horn connectors.
Detach the hood lock control cable clamp and remove the 6 bolts and upper radiator support sub-assembly.
7.
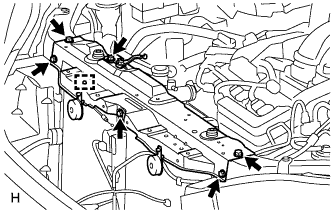
REMOVE UPPER RADIATOR SUPPORT SUB-ASSEMBLY (for RHD)
Disconnect the low pitched horn and high pitched horn connectors.
Detach the hood lock control cable clamp and remove the 6 bolts and upper radiator support sub-assembly.
8.
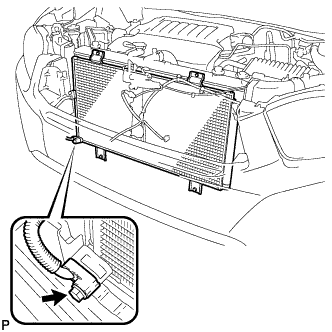
DISCONNECT DISCHARGE TUBE SUB-ASSEMBLY
Remove the bolt and disconnect the discharge tube sub-assembly from the condenser. Remove the O-ring from the discharge tube sub-assembly.
NOTICE:
Seal the openings of the disconnected parts using vinyl tape to prevent entry of moisture and foreign matter.
9.
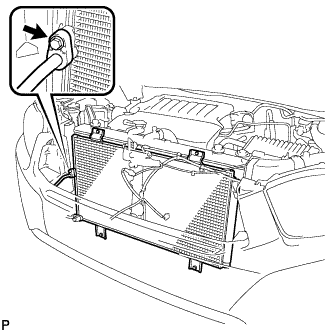
DISCONNECT COOLER REFRIGERANT LIQUID PIPE A
Remove the bolt and disconnect the cooler refrigerant liquid pipe A from the condenser. Remove the O-ring from the cooler refrigerant liquid pipe A.
NOTICE:
Seal the openings of the disconnected parts using vinyl tape to prevent entry of moisture and foreign matter.
10.
REMOVE COOLER CONDENSER ASSEMBLY
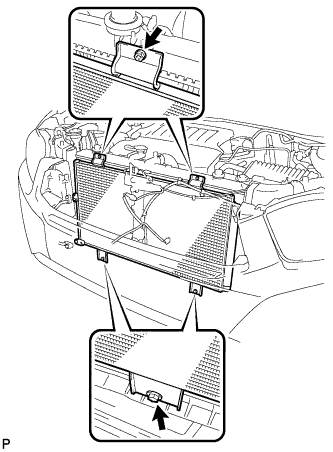
Remove the 4 bolts.
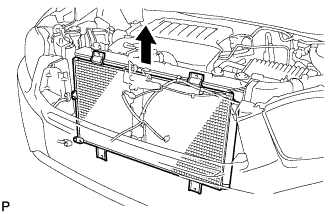
Remove the cooler condenser assembly as shown in the illustration.