2007-2013 Highlander Kluger · Service Manual HEATER & AIR CONDITIONING SYSTEM

REMOVAL

Removal / installation · Vehicles built from Jul 2010

Versions by build date: May 2007 – Jul 2008 Aug 2008 – Jun 2010 from Jul 2010


1. RECOVER REFRIGERANT FROM REFRIGERATION SYSTEM
  1. Start the engine.

  1. Turn the A/C switch on.

  1. Operate the cooler compressor at an engine speed of approximately 1000 rpm for 5 to 6 minutes to circulate the refrigerant. This causes most of the compressor oil from the various components of the A/C system to collect in the A/C compressor.

  1. Stop the engine.

  1. Recover the refrigerant from the A/C system using a refrigerant recovery unit.


2. REMOVE COOL AIR INTAKE DUCT SEAL

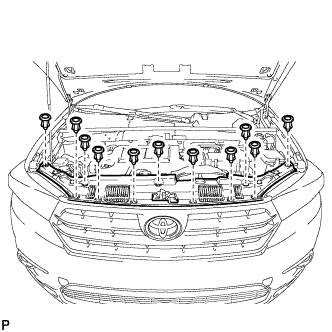
  1. B258270
    Remove the 11 clips and cool air intake duct seal.


3. REMOVE RADIATOR GRILLE SUB-ASSEMBLY

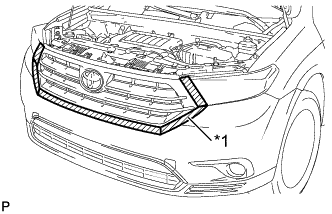
  1. B258273E01
    Put protective tape around the radiator grille sub-assembly.
    Text in Illustration 
    *1
    Protective Tape

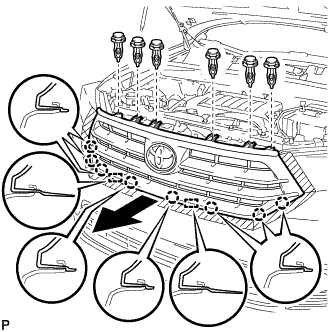
  1. B258271
    Remove the 6 clips.

  1. Disengage the 8 claws and 2 guides, and remove the radiator grille sub-assembly.


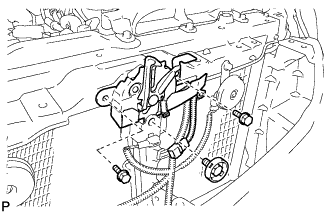
4. REMOVE HOOD LOCK ASSEMBLY (w/o Engine Hood Courtesy Switch)

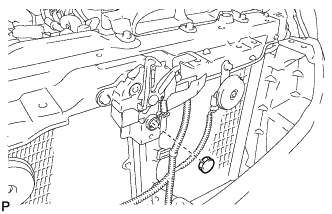
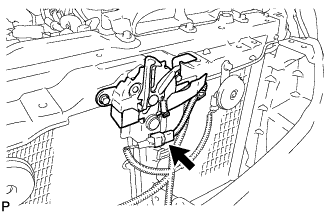
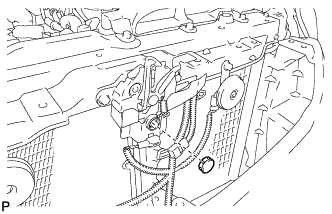
  1. B174188
    Remove the hood lock nut cap.

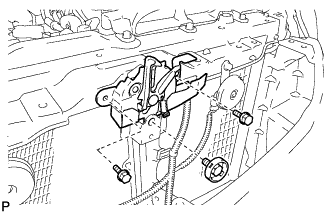
  1. B174189
    Remove the 3 bolts.

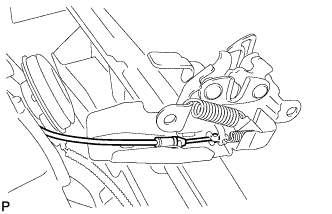
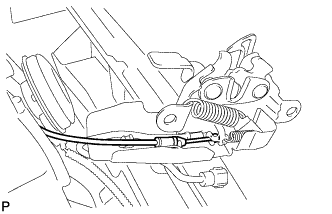
  1. B174190
    Disconnect the hood lock control cable and remove the hood lock assembly.


5. REMOVE HOOD LOCK ASSEMBLY (w/ Engine Hood Courtesy Switch)

  1. B174191
    Disconnect the connector.

  1. B174192
    Remove the hood lock nut cap.

  1. B174193
    Remove the 3 bolts.

  1. B174194
    Disconnect the hood lock control cable and remove the hood lock assembly.


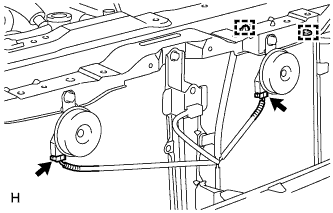
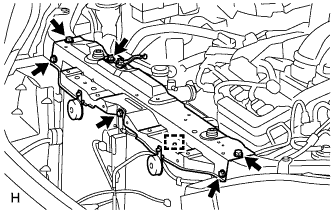
6. REMOVE UPPER RADIATOR SUPPORT SUB-ASSEMBLY (for LHD)

  1. A169432
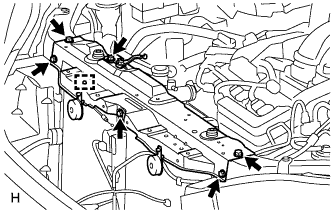
    Disconnect the low pitched horn and high pitched horn connectors.

  1. A169469
    Detach the hood lock control cable clamp and remove the 6 bolts and upper radiator support sub-assembly.


7. REMOVE UPPER RADIATOR SUPPORT SUB-ASSEMBLY (for RHD)

  1. A169432
    Disconnect the low pitched horn and high pitched horn connectors.

  1. A169470
    Detach the hood lock control cable clamp and remove the 6 bolts and upper radiator support sub-assembly.


8. DISCONNECT DISCHARGE TUBE SUB-ASSEMBLY

  1. E150338
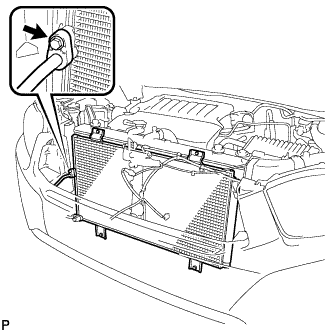
    Remove the bolt and disconnect the discharge tube sub-assembly from the condenser.

  1. Remove the O-ring from the discharge tube sub-assembly.

    NOTICE:
    Seal the openings of the disconnected parts using vinyl tape to prevent entry of moisture and foreign matter.


9. DISCONNECT COOLER REFRIGERANT LIQUID PIPE A

  1. E150339
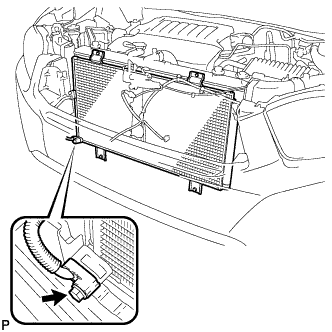
    Remove the bolt and disconnect the cooler refrigerant liquid pipe A from the condenser.

  1. Remove the O-ring from the cooler refrigerant liquid pipe A.

    NOTICE:
    Seal the openings of the disconnected parts using vinyl tape to prevent entry of moisture and foreign matter.


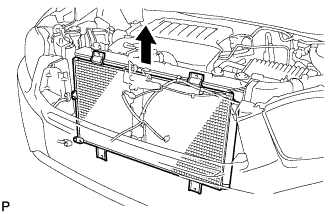
10. REMOVE COOLER CONDENSER ASSEMBLY

  1. E150340
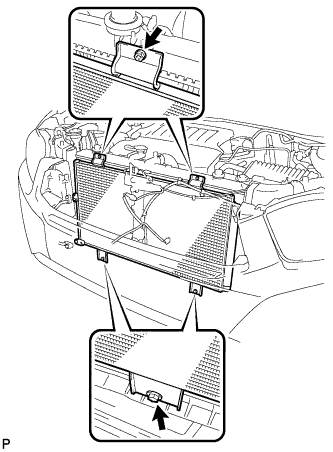
    Remove the 4 bolts.

  1. E150342
    Remove the cooler condenser assembly as shown in the illustration.

← REMOVAL (Aug 2008 – Jun 2010)DISASSEMBLY (from May 2007) →