INSTALLATION
Removal / installation · Vehicles built May 2007 – Jul 2008
Versions by build date: May 2007 – Jul 2008 Aug 2008 – Jun 2010 from Jul 2010
| 1.
INSTALL YAW RATE AND ACCELERATION SENSOR |
 |
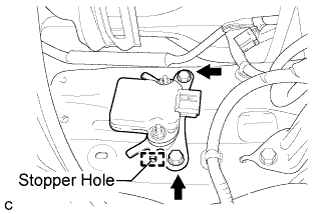
- Install the yaw rate and acceleration sensor with the 2 bolts.
-
Torque:
- 15 N*m{
153 kgf*cm
, 11 ft.*lbf
}
- NOTICE:
- Be sure to insert the yaw rate and acceleration sensor claw into the stopper hole while installing the yaw rate and acceleration sensor.
- Do not damage the yaw rate and acceleration sensor.
- Make sure that the yaw rate and acceleration sensor is installed securely.
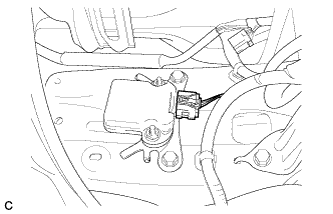
- Connect the connector to the yaw rate and acceleration sensor.
- NOTICE:
- Make sure that the yaw rate and acceleration sensor connector is connected securely.
| 2.
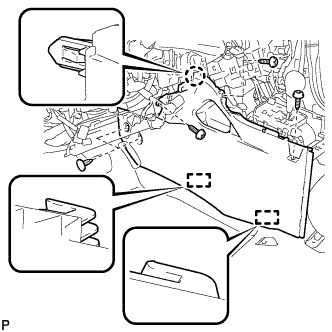
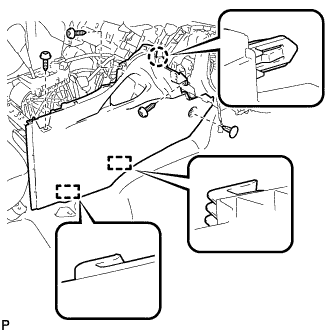
INSTALL FRONT NO. 1 CONSOLE BOX INSERT (for LHD)
|
|
- Engage the claw and 2 guides.
Install the front No. 1 console box insert with the 3 screws <F> and 2 clips.
| 3.
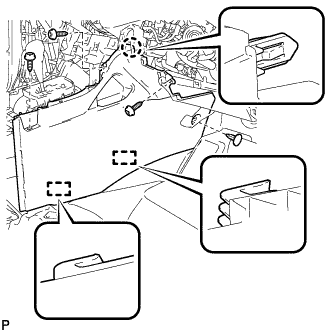
INSTALL FRONT NO. 1 CONSOLE BOX INSERT (for RHD)
|
|
- Engage the claw and 2 guides.
Install the front No. 1 console box insert with the 3 screws <F> and clip.
| 4.
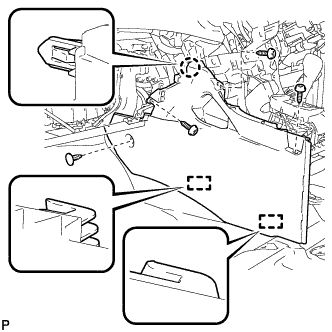
INSTALL FRONT NO. 2 CONSOLE BOX INSERT (for LHD)
|
|
- Engage the claw and 2 guides.
Install the front No. 2 console box insert with the 3 screws <F> and clip.
| 5.
INSTALL FRONT NO. 2 CONSOLE BOX INSERT (for RHD)
|
|
- Engage the claw and 2 guides.
Install the front No. 2 console box insert with the 3 screws <F> and clip.
| 6.
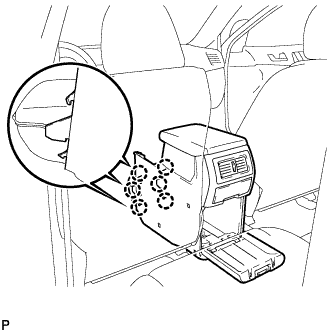
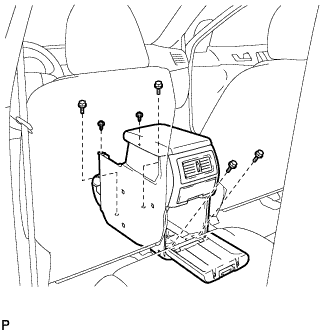
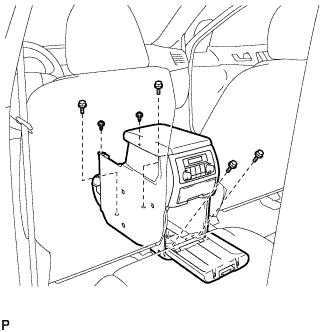
INSTALL CONSOLE BOX ASSEMBLY (w/o Rear Air Conditioning System)
|
|
- Engage the 6 claws.
- Install the console box assembly with the 4 bolts and 2 screws.
| 7.
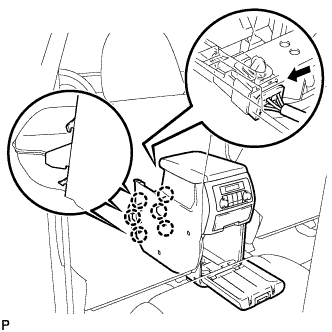
INSTALL CONSOLE BOX ASSEMBLY (w/ Rear Air Conditioning System)
|
|
- Engage the 6 claws.
Connect the connector.
- Install the console box assembly with the 4 bolts and 2 screws.
| 8.
INSTALL LOWER REAR CONSOLE BOX
|
|
Install the lower rear console box.
| 9.
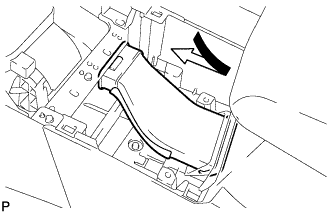
INSTALL NO. 2 CONSOLE BOX DUCT (w/o Rear Air Conditioning System)
|
|
- Install the No. 2 console box duct as shown in the illustration.
| 10.
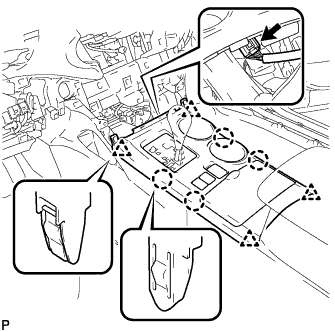
INSTALL UPPER CONSOLE PANEL SUB-ASSEMBLY
|
|
- Connect the connector.
Engage the 4 claws and 4 clips, and install the upper console panel sub-assembly.
| 11.
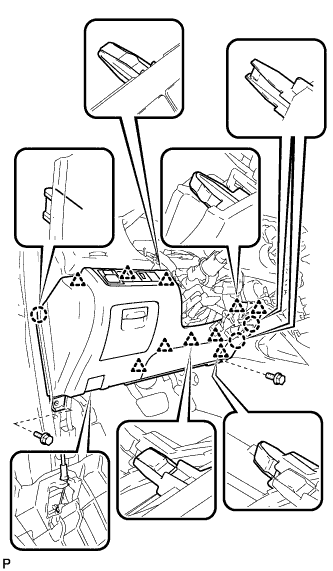
INSTALL LOWER INSTRUMENT PANEL SUB-ASSEMBLY
|
|
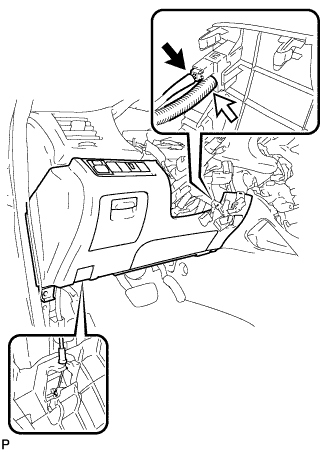
Connect each connector and clamp.
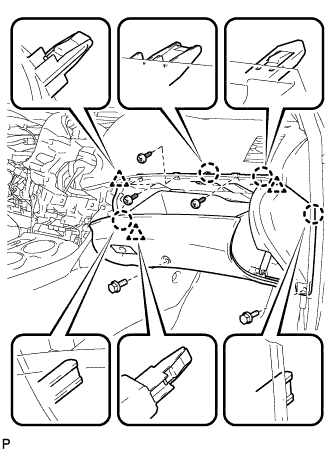
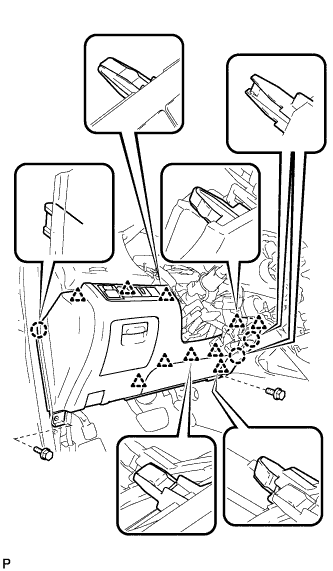
- Engage the 4 claws and 3 clips.
Install the lower instrument panel sub-assembly with the 2 bolts <B> and 3 screws <F>.
| 12.
INSTALL NO. 2 INSTRUMENT PANEL UNDER COVER SUB-ASSEMBLY
|
|
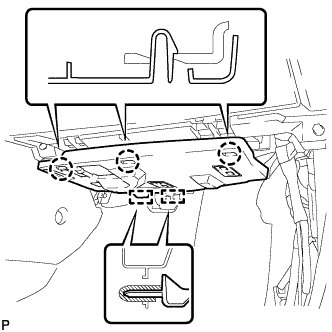
- Engage the 2 guides.
Engage the 3 claws and install the No. 2 instrument panel under cover sub-assembly.
| 13.
INSTALL COWL SIDE TRIM SUB-ASSEMBLY RH
|
|
- HINT:
- Use the same procedure for the RH side and the LH side.
| 14.
INSTALL FRONT DOOR SCUFF PLATE RH
|
|
- HINT:
- Use the same procedure for the RH side and the LH side.
| 15.
INSTALL LOWER INSTRUMENT PANEL FINISH PANEL SUB-ASSEMBLY (for Automatic Air Conditioning System)
|
|
- Connect the hood lock control cable assembly.
Connect each connector and the aspirator duct.
- Engage the 3 claws and 10 clips.
Install the lower instrument panel finish panel sub-assembly with the 2 bolts <B>.
| 16.
INSTALL LOWER INSTRUMENT PANEL FINISH PANEL SUB-ASSEMBLY (for Manual Air Conditioning System)
|
|
- Connect the hood lock control cable assembly.
Connect each connector.
Engage the 3 claws and 10 clips.
Install the lower instrument panel finish panel sub-assembly with the 2 bolts <B>.
| 17.
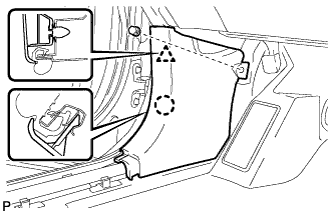
INSTALL COWL SIDE TRIM SUB-ASSEMBLY LH
|
|
- Engage the claw and clip, install the cowl side trim sub-assembly LH.
Install the clip.
| 18.
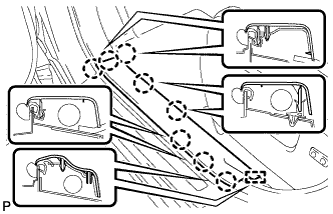
INSTALL FRONT DOOR SCUFF PLATE LH
|
|
- Engage the guide and the 8 claws, and install the front door scuff plate LH.
| 19.
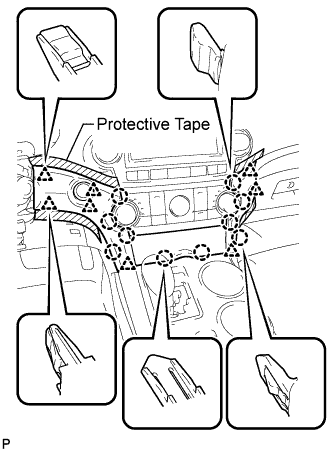
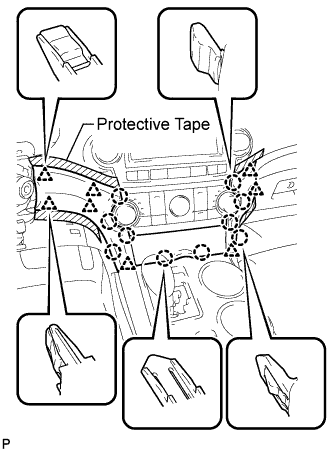
INSTALL CENTER INSTRUMENT CLUSTER FINISH PANEL ASSEMBLY (w/ Smart Entry and Start System)
|
|
- Apply protective tape to the areas shown in the illustration.
Connect each connector.
Engage the 10 claws and 8 clips, and install the center instrument cluster finish panel assembly.
- NOTICE:
- Do not the damage the instrument panel safety pad assembly and lower instrument panel finish panel sub-assembly.
| 20.
INSTALL CENTER INSTRUMENT CLUSTER FINISH PANEL ASSEMBLY (w/o Smart Entry and Start System)
|
|
- Apply protective tape to the areas shown in the illustration.
Connect each connector.
Engage the 10 claws and 8 clips, and install the center instrument cluster finish panel assembly.
- NOTICE:
- Do not the damage the instrument panel safety pad assembly and lower instrument panel finish panel sub-assembly.
| 21.
CONNECT CABLE TO NEGATIVE BATTERY TERMINAL |
|
- NOTICE:
- When disconnecting the cable, some systems need to be initialized after the cable is reconnected. (Click here)
| 22.
PERFORM YAW RATE AND ACCELERATION SENSOR ZERO POINT CALIBRATION |
|
(Click here)
| 23.
CHECK FOR YAW RATE SENSOR SIGNAL |
|
(Click here)