INSTALLATION
Removal / installation · Vehicles built from May 2007
| 1. INSTALL CENTER ROOF RACK BRACKET (w/o Roof Rack) |

Install a new center roof rack bracket with 2 new bolts as shown in the illustration.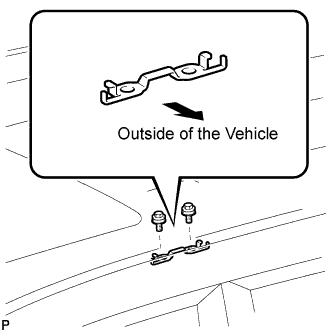

- Torque:
- 10 N*m{ 102 kgf*cm , 7.4 ft.*lbf }
- HINT:
- Use the same procedure for the rear side and front side.
| 2. INSTALL ROOF DRIP SIDE FINISH MOULDING (for Front Side) |
Engage the clip and install the roof drip side finish moulding as shown in the illustration.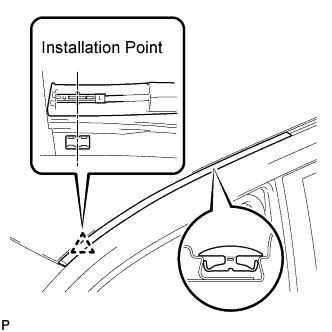
| 3. INSTALL ROOF DRIP SIDE FINISH MOULDING (for Rear Side) |
Engage the clip and install the roof drip side finish moulding as shown in the illustration.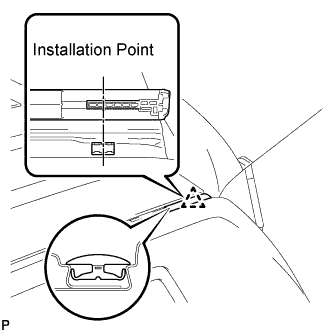
| 4. INSTALL CENTER ROOF DRIP SIDE FINISH MOULDING |
Position the center roof drip side finish moulding by aligning it with the matchmark on the vehicle body as shown in the illustration.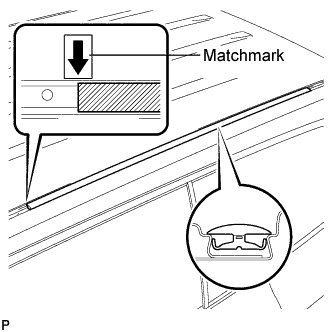
Install the center roof drip side finish moulding.
| 5. INSTALL ROOF DRIP SIDE FINISH MOULDING JOINT COVER (w/o Roof Rack) |
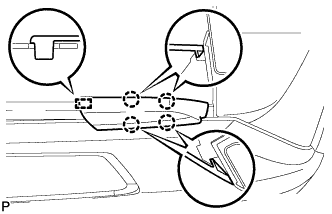
Engage the claw and clip, and install the roof drip side finish moulding joint cover as shown in the illustration.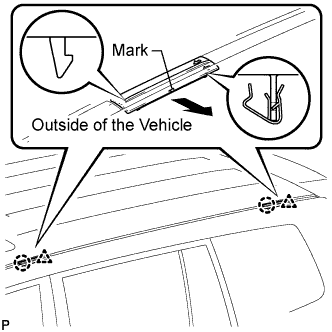
- HINT:
- Use the same procedure for the rear side and front side.
| 6. INSTALL ROOF RACK ASSEMBLY (w/ Roof Rack) |
Install 4 new gaskets.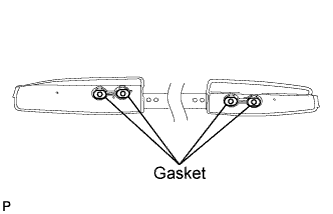
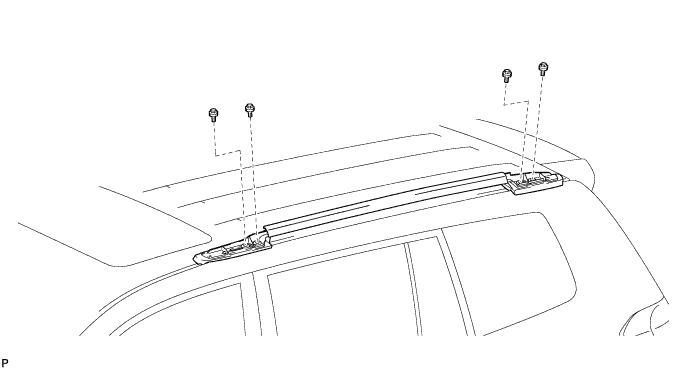
Install the roof rack assembly with 4 new bolts.
- Torque:
- 32 N*m{ 326 kgf*cm , 24 ft.*lbf }
| 7. INSTALL FRONT ROOF RACK LEG COVER (w/ Roof Rack) |
Engage the guide and 4 claws, and install the front roof rack leg cover.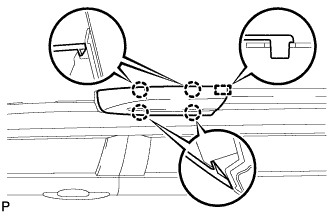
| 8. INSTALL REAR ROOF RACK LEG COVER (w/ Roof Rack) |
Engage the guide and 4 claws, and install the rear roof rack leg cover.