REMOVAL
Removal / installation · Vehicles built from Jul 2010
Versions by build date: May 2007 – Jul 2008 Aug 2008 – Jun 2010 from Jul 2010
| 1.
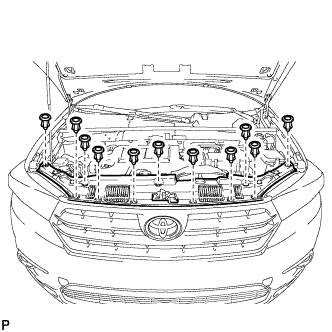
REMOVE COOL AIR INTAKE DUCT SEAL
|
 |
- Remove the 11 clips and cool air intake duct seal.
| 2.
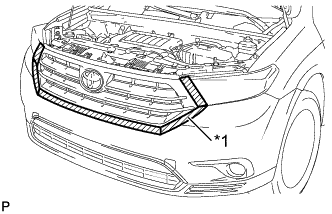
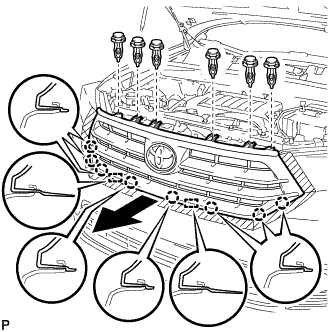
REMOVE RADIATOR GRILLE SUB-ASSEMBLY
|
|
- Put protective tape around the radiator grille sub-assembly.
Text in Illustration
*1
|
Protective Tape
|
- Remove the 6 clips.
Disengage the 8 claws and 2 guides, and remove the radiator grille sub-assembly.
| 3.
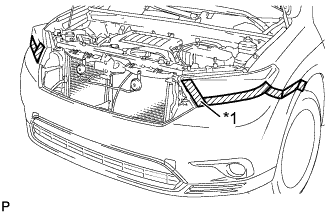
REMOVE FRONT BUMPER ASSEMBLY
|
|
- Put protective tape around the front bumper assembly.
Text in Illustration
*1
|
Protective Tape
|
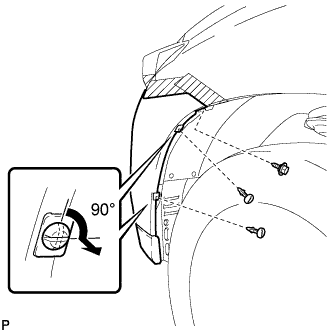
- Remove the screw.
- HINT:
- Use the same procedure for the RH side and LH side.
Using a screwdriver, turn the pin 90 degrees and remove the 2 pin hold clips.
- HINT:
- Use the same procedure for the RH side and LH side.
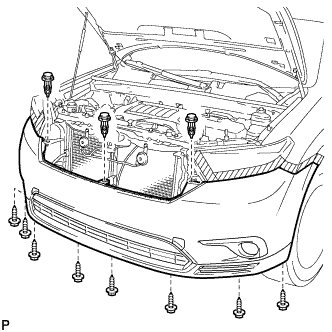
- Remove the 8 screws and 3 clips.
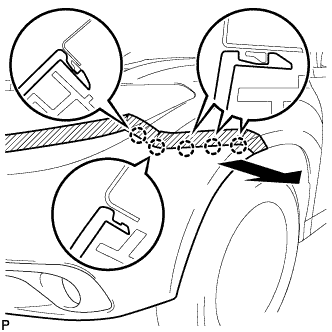
- Disengage the 5 claws and disconnect the front bumper assembly.
- HINT:
- Use the same procedure for the RH side and LH side.
Disconnect each fog light connector, and then remove the front bumper assembly.
| 4.
REMOVE FRONT FENDER MOULDING SUB-ASSEMBLY RH
|
|
- HINT:
- Use the same procedure as for the LH side.
| 5.
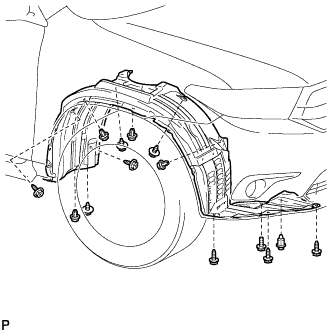
REMOVE FRONT FENDER LINER RH
|
|
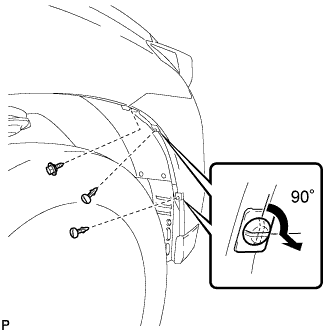
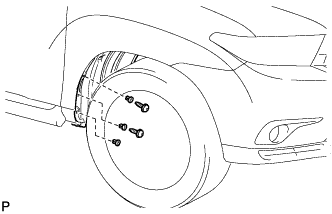
- Remove the screw.
Using a screwdriver, turn the pin 90 degrees and remove the 2 pin hold clips.
- Using a 4 mm hexagon wrench, remove the 2 screws.
Remove the 3 grommets.
- HINT:
- The grommets need to be replaced with new ones because they will break when they are removed.
- Remove the 5 clips
Remove the bolt, 8 screws and front fender liner RH.
| 6.
DRAIN WASHER FLUID |
|
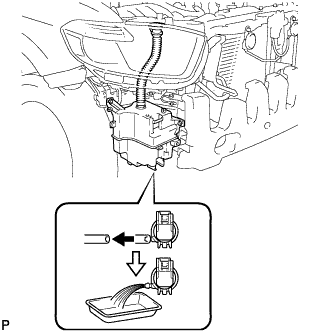
- Disconnect the washer hose from the front washer motor and pump assembly, and drain the washer fluid.
| 7.
REMOVE FRONT WASHER MOTOR AND PUMP ASSEMBLY |
|
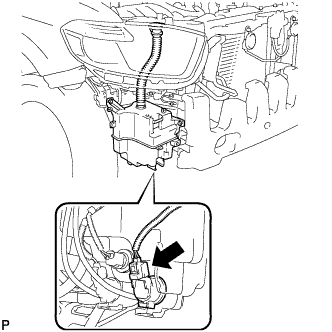
- Disconnect the connector.
Remove the front washer motor and pump assembly.