INSTALLATION
Removal / installation · Vehicles built from May 2007
| 1. INSTALL REAR NO. 1 SEAT INNER BELT ASSEMBLY |

Install the rear No. 1 seat inner belt assembly with the bolt.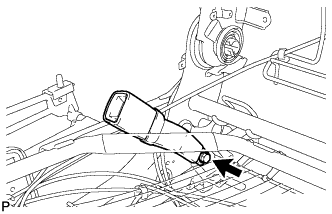

- Torque:
- 42 N*m{ 428 kgf*cm , 31 ft.*lbf }
| 2. INSTALL REAR SEAT RECLINING INNER COVER |
Engage the guide.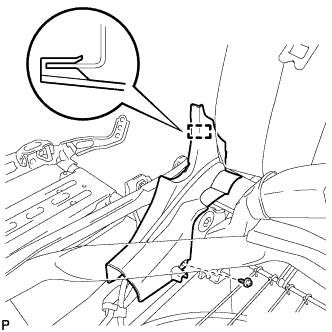
Install the rear seat reclining inner cover with the screw.
| 3. INSTALL SEAT TRACK UPPER RAIL COVER |
Engage the claw.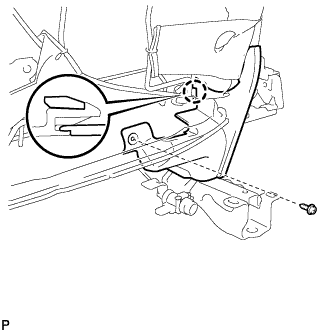
Install the seat track upper rail cover with the screw.
| 4. INSTALL REAR NO. 1 SEAT CUSHION COVER WITH PAD |
Using hog ring pliers, install 3 new hog rings.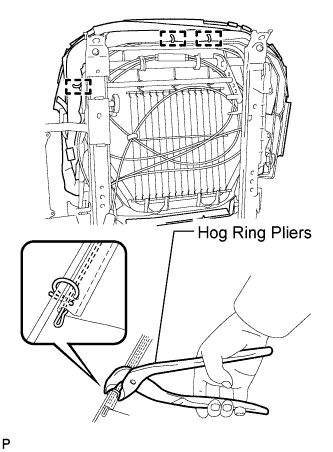
- NOTICE:
- Be careful not to damage the cover.
- When installing the hog rings, take care to minimize wrinkles as much as possible.
- Be careful not to damage the cover.
Engage the 12 hooks.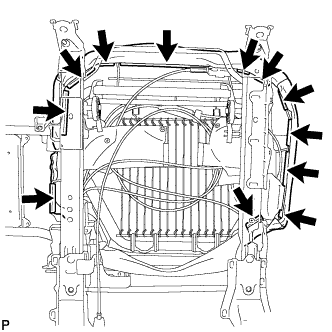
Engage the 3 buttons.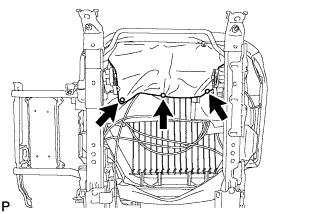
Using hog ring pliers, install 2 new hog rings.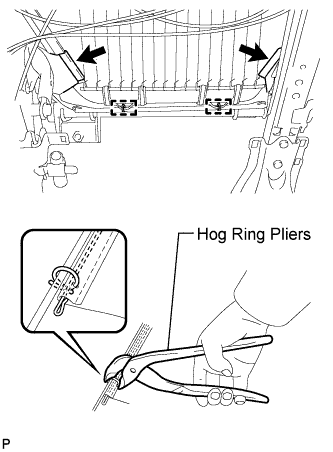
- NOTICE:
- Be careful not to damage the cover.
- When installing the hog rings, take care to minimize wrinkles as much as possible.
- Be careful not to damage the cover.
Install the 2 hooks.
Engage the 2 hooks to install the rear No. 1 seat cushion cover with pad.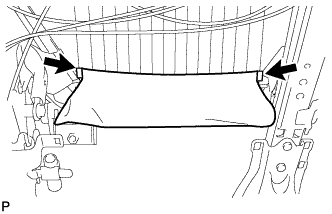
| 5. INSTALL REAR SEAT CUSHION MOULDING RH |
Engage the 6 claws.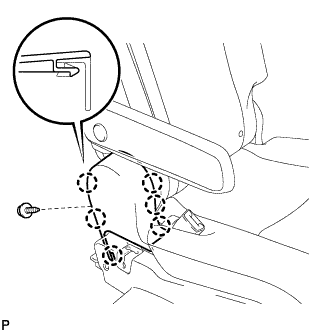
Install the rear seat cushion moulding RH with the screw.
| 6. INSTALL SEAT ADJUSTER COVER CAP |
Engage the 2 claws to install the seat adjuster cover cap.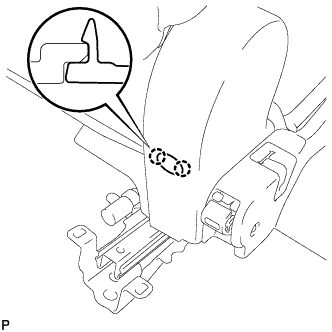
| 7. INSTALL REAR SEAT CUSHION MOULDING LH |
Engage the guide.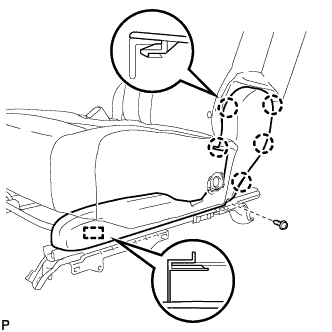
Engage the 5 claws.
Install the rear seat cushion moulding LH with the screw.
| 8. INSTALL NO. 1 RECLINING ADJUSTER RELEASE HANDLE |
Install the No. 1 reclining adjuster release handle with the 3 screws.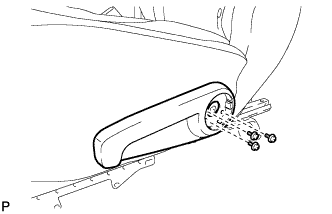
| 9. INSTALL REAR SEAT RECLINING UPPER COVER |
Engage the 3 claws to install the rear seat reclining upper cover.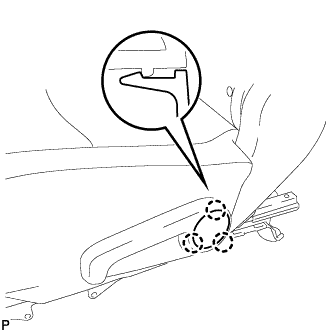
| 10. INSTALL REAR NO. 1 SEAT ASSEMBLY |
Temporarily install the 2 bolts on the front side of the seat.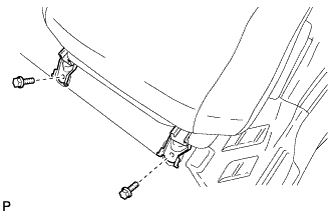
Temporarily install the 3 bolts on the rear side of the seat.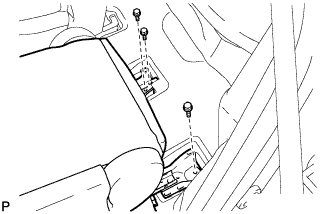
Install the rear No. 1 seat assembly with the 5 bolts.
- Torque:
- 37 N*m{ 377 kgf*cm , 27 ft.*lbf }
| 11. CONNECT REAR NO. 1 SEAT LOCK CABLE ASSEMBLY (w/ Remote Folding Function) |
Remove the rear seat reclining control cable from the carpet hole.
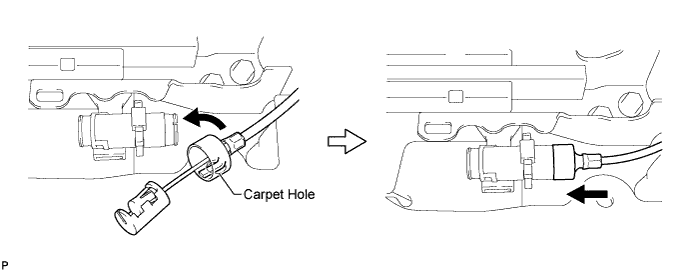
Connect the rear seat reclining control cable as shown in the illustration.
Connect the rear No. 1 seat lock cable assembly as shown in the illustration.
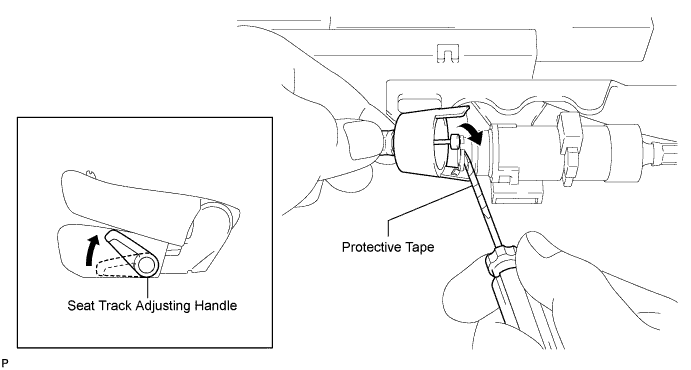
Engage the 2 claws and connect the rear No. 1 seat lock cable assembly as shown in the illustration.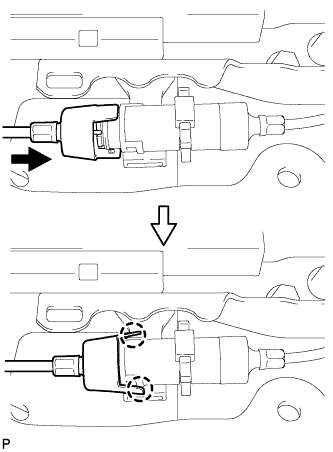
Return the seatback to the upright position.
Pull up the adjuster's lock piece to lock it as shown in the illustration.
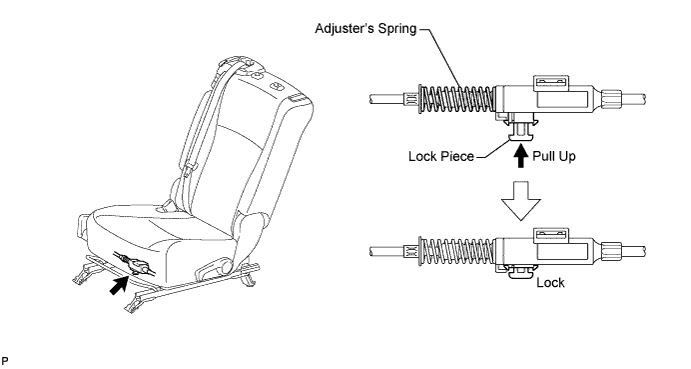
- NOTICE:
- When pressing the lock piece, make sure the adjuster's spring is not compress.
| 12. INSPECT REAR SEAT SLIDE ADJUSTER LOCK |
Check that the left and right adjusters lock simultaneously when sliding the seat.
If the left and right adjusters do not lock simultaneously, adjust by loosening the bolts securing the seat.
| 13. INSTALL REAR SEAT LEG SIDE COVER |
Engage the clip.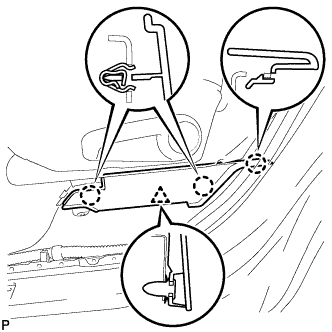
Engage the 3 claws and install the rear seat leg side cover.
| 14. INSTALL REAR INNER TRACK BRACKET COVER |
Engage the 4 claws and install the rear inner track bracket cover.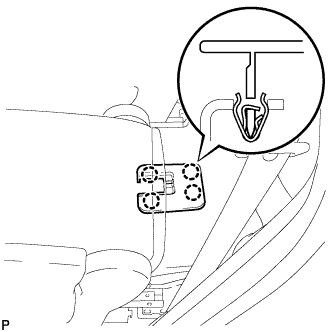
| 15. INSTALL REAR OUTER TRACK BRACKET COVER |
Engage the 4 claws and install the rear outer track bracket cover.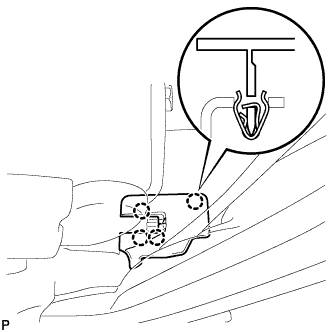
| 16. INSTALL REAR SEAT TRACK BRACKET COVER |
Engage the 8 claws and install the 2 rear seat track bracket covers.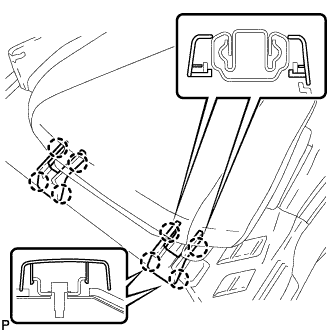
| 17. INSTALL REAR SEAT HEADREST ASSEMBLY |
| 18. INSTALL REAR CENTER SEAT ASSEMBLY |